Jump to content
SAU Community

Hr31 Coupe Rb26 (For Now)


DCIEVE

Recommended Posts

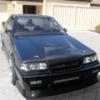
I picked this car up from fatz early in 06 while on a secondment to Sydney. In hindsight it was (very) rough but having grown bored of my previous 4door hr31 gts this felt like a big step up and it did have a lot of good gear, inc a fairly fresh rb26, 5stud, mechanical diff, coilovers and importantly was engineered. It was great fun on the old pacific hwy!

original_1.jpg

old.jpg

It went over the pits fairly easily once back in WA and after many hours work it eventually looked like this, changes included the rb25 gearbox, all new ps lines, new rotors, removed a few kg of redundant wiring and the wheels from my old hr31.

MV.jpg

In hindsight I should have left it there, it was good fun to drive (~400rwhp), relatively quiet and fully legal. But niggling problems were drivig me nuts, in particular nearly no control over boost with the xr6 turbo, and so it began.

The xr6 turbo was replaced by a regular .82 reared gt35, 6boob manifold and custom 3.5" stainless exhaust. I also made up new ally piping to suit the new 100mm cooler. Not to mention many hours cleaning and a lot of polishing...

comp1.jpg

exhcomplete.jpg

Also added a custom 4" ally intake pipe, winged rb26 sump made by a mate and some other bits and pieces before completely stripping the intake side down and re-cad plating everything (massive PITA!)

intakeweldedout.jpg

motorin3.jpg

motorin2.jpg

To be continued...

  • Like 1
Link to comment
Share on other sites

The alternator was rebuilt, a long process after a few parts went missing...

altcomplete.jpg

The existing fuel lines were replaced with speedflow teflon braid connected to the original hardlines flared to accept screw on fittings. An Aeromotive fuel reg & HKS rail were also added together with 750cc injectors.

fuelsys-1.jpg

fuelsys3.jpg

Around this time some new wheels showed up

ssrs3.jpg

The factory rb26 loom was in pretty bad shape so the powerfc was ditched for a wire in option. After dealing with endless headaches due to the ecu on my previous hr31 (Link plus) I went with the option I thought least likely to give me grief in the future (so far so good) - so an Autronic SM4, 500r cdi and Mercury coils were ordered.

The factory radiator was replaced with a koyo item with twin spal thermo's. A remote filter block was also added to the existing oil cooler and the lines re-run.

27122007083.jpg

27122007076.jpg

27122007082.jpg

Shortly after it went in for wire, turning over for the first time in 12 odd months on the 18th of January (2008) about 4 hours before a local car show (Motorvation).

Needless to say it copped a beating at Motorvation....

With the hicas/ps removed the rear subframe was moving around a lot on the factory subframe bushes, so solid items were sourced together with a nolathane diff mount.

diffmountfitted.jpg

Before going in for the final tune poncams, individual EGT's and wideband 02 were installed.

EGT's and modified manifold

egt.jpg

maniegtbungs.jpg

Poncams and camp cap studs

poncamstuds.jpg

Aaand EGT's installed

egts.jpg

The Mercury coils were finally installed (had been running the std coils with the cdi) and it was tuned to 530rwhp at 1.5/6'ish bar with afr's flat at ~11.0. The hr31 irs wasn't particularly suited to being strapped down on the dyno so wheelspin was a major problem. Managed to destroy two nearly new tyres on the dyno :(

dyno5.jpg

The following weekend I took it down to the hi-tech titles completing only one rolling start pass before breaking both stub axles attempting a launch on the second. The first pass returned an 11.8 at 128mph with a 2.2sec 60ft (rolled of the line) and the nearly new os giken twin plate slipping badly at the top end (the clutch was later sold and to my knowledge is still holding up in a 400+rwhp rb25).

I'd say it went bang a split second after this shot...

20080504_IMG_3138.jpg

DSC_0516.jpg

One of my favourite photo's of the car from the same day

lowsml.jpg

Given 5 stud stub axles are very rare for these things(coming from z31's) the car sat in the garage for the next 6 months while I waited for billet stub axles & companion flanges out of the US.

Ouch..

stubaxleout.jpg

Before the new axles arrived I was offered a position which involved moving to Noway to work in our Design office for 12 months - effectively putting the project on hold while I focused on work and did some travel.

Edited by DCIEVE
Link to comment
Share on other sites

Some time before heading to the drags it was reversed into by a careless council worker so I took the opportunity to fit a uras kit and a wingless boot. Std 4 stud rear axles were fitted so it could be driven to the paint shop and a few weeks later into storage.

It looked pretty odd with std 4 stud wheels!

11072008.jpg

Revised catch can (routing blowby to the back of the car)

catchcan.jpg

OS quad plate, pita to fit with the motor in - would have been a lot easier to remove the motor & box together and work on it that way!

osgikenquad.jpg

Just my luck, the day I flew out the bloody axles arrived....

pic5.jpg

pic6.jpg

Roughly 1 month after leaving we returned to Perth for a friends wedding... the plan was to fit the axles, shoot the car for HPI, check the tune and get to the drags again.

Sean at ASG ran it up on his hub dyno, without the slipping clutch and wheelspin the 6boob related boost control issues were even worse, with boost creeping to 1.7bar.

done18.jpg

Unfortunately bad weather saw the drags cancelled, but at least the axles were fitted.

Axles fitted

done14.jpg

And the rear wheels back on.

done2.jpg

done3.jpg

done5.jpg

DSC_0016.jpg

The weather meant we weren't able to get any good shots for the article besides a few in the garage..

HR26DET_mail2.jpg

It was then back into storage for the end of '08 and most of '09.

Link to comment
Share on other sites

The idea behind purchasing this thing in the beginning was to have something I could use in local club motorsport events, however somewhere along the line this was forgotten. Fortunately a drive at the Nurburgring while in Europe renewed my focus..

I picked up some weds tc 005's on yahoo, 17*9.5 +30 and only 7.7kg a corner! Massive brake clearance for a 17" wheel as well, this shot is trial fitting them over a mates f50 355mm brembo set-up (he liked them so much he went and bought a set).

PC311826.jpg

They're a bit of a squeeze up front, this is with 255 wide v70's. There will be another few deg of camber when it hits the track so clearance shouldn't be a problem.

255_02.jpg

Also found some alcons to go on the front, and r34 brembo's for the rear.

brakes_04.jpg

And while deciding what to do about the 6boob manifold a FullRace t4 twin scroll manifold popped up that I couldn't say no to...

fr_01.jpg

fr_03.jpg

Link to comment
Share on other sites

Cheers Snozzle.

The nice nolathane diff mount gave up the ghost and was replaced by piece of EA which makes for a noisy ride. But at least I don't have to worry about dragging the diff along the ground again!

z31parts_02.jpg

new_mount.jpg

Trial fitting the full race manifold with a gt35 t4 twin scroll 1.06 housing.

fullracerb26_gt35atp1p06_2.jpg

fullracerb26_gt35atp1p06_6.jpg

fullracerb26_gt35atp1p06_5.jpg

The t4 ts housing was a very tight fit, minimal access to oil & water lines and only a few mm between the comp cover and front wastegate. So the Garrett was sold with the intention of replacing it with an s300sx but then Jeff @ full race advised the efr range was coming soon...

I'm currently gathering the bits for a new engine using an rb30 short motor and the existing head as the 26 isn't in the best shape. After a lot of searching I finally have a clean rb30 crank with original/unmarked journals and a std size block.

Lewis engines are putting together an external oil pump kit, which together with the accusump should make the oiling system pretty reliable. The plan is to run e85 so the hks rail and injectors have been sold and replaced with bosch 1600's and a billet rail. Rounding up the bits collected so far is the ati balancer.

New pintle caps on the bosch injectors so they are direct fit

bosch1600cc_mod2.jpg

Block and crank ready for the machinist

rb30_2.jpg

OMP seats with Bride FX rails

seat_trialfit.jpg

So I just need to collect a few more parts for the motor before it's sent to the engine builder, and decide on a turbo...

Edited by DCIEVE
Link to comment
Share on other sites

Hey Nick its Matt Don (RB HQ)...

Best HR31 ever. Remember seeing it on cruise a few years back and fell in love, and still obsessed with it now!

Keen for drive!

Hey Matt, thanks mate. Hopefully once it's up and going you'll see it out and about a little more.

As for a drive, we'll see...!

I love Tc-005s I have a pair of 17x7s in Charcoal

Picked them up for 50 bucks from a tyre shop that didnt know what they were lol.

and the full race manifold is pure awesome

Yeh they don't seem to be all that well known so they go pretty cheap at auction (which is where these ones came from). 50 bucks is a bargain though!!

Yep the fullrace manifold is a nice piece of work, it's the 'power' version which has since been discontinued (larger runners than the 'response' manifold) - hopefully it works well on the rb30.

Link to comment
Share on other sites

  • 4 weeks later...

nice mate! you are a brave man to buy fatz's old 31... lol. :) full credit to keeping it going and tidying the old beast up. I've been in it years ago when fatz first put the XR6 tubz on it with fatz laughing like a giant school girl beside me as he drifted the thing. not the safest feeling in the world!!

it's always been a cool car though and with the new full race set-up and the weds it looks shit hot.

Link to comment
Share on other sites

Create an account or sign in to comment

You need to be a member in order to leave a comment

Create an account

Sign up for a new account in our community. It's easy!

Register a new account

Sign in

Already have an account? Sign in here.

Sign In Now


  • Similar Content

  • Latest Posts

    • Much less twat-tastic. CF wheels are too garish for civilised use.
    • From there, as the manual says....assembly is the reverse of disassembly, no tricks worth mentioning Much better (for me)
    • In my case, the standard wheel I had was in good condition but the buttons had more wear, so I swapped them across from the original wheel from the car. The plastic rear cover is held on by 4 tabs, and once the wiring is removed you can get access to 2 screws on each side the hold the buttons in From there I just swapped the wiring over. What was interesting is the standard style wheel is 2.0kg but the carbon fibre one is 50% heavier at 2.9kg. It even has a weight inside the wheel at the top to make up for some sort of imbalance in the design. weird
    • Once the airbag is off, to remove the steering wheel.... Undo the 2 plugs into the clock spring, and the horn connector from it's clip. Hit the 19mm nut with a rattle gun (preferably) or if you don't' have one, you probably want an assistant to hold the wheel in place while you use a breaker bar to undo the nut Then, screw the nut back on 3 turns, and pull the wheel sharply towards you. If that doesn't work hit it medium force with a rubber mallet on either side, or possible behind if you can get there. If that all fails (it shouldn't!) you might need a steering wheel puller
    • So, to next task....the carbon fibre steering wheel was either an expensive factory option or a chinesium special. Either way, I don't like either the flat bottom or thick ring style, so it had to go So...to remove the steering wheel.... First, disconnect battery negative and stomp on the brake pedal for a few seconds. Then, remove the small circular covers on each side of the wheel's rear surround to uncover the airbag clips. You need to push something like a flat bladed screw driver through, to push the steel clip inwards and pull the side of the airbag forward. Once you've done the easy side, same on the centre console side. You can see the tab you are shooting for circled in red Then, disconnect the horn spade connector and for the yellow airbag plug you need to get something small under the black locking tab to pop it out, then the connector releases......airbag is off  
×
×
  • Create New...