

Announcements
-
Similar Content
-
-
Latest Posts
-
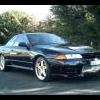
 @GTSBoy Yeah i know. The RB20 has 180Nm torque and the gearbox "should" take up to 400Nm if you are not doing stuff like drag/drift or dumping clutch and of course then it is pure "luck" on how will it last. My problem is (i think i said this in different post) that my car was very badly maintain so i would not be suprised if the oil in the gearbox was not changed until i bought it. Yeah the gearbox seem little bit sad. @Sxnjeet the +T seem very interesting but from where iam from it was nearly "impossible" to done right and not blow twice as money as just swap for the RB25.
 -
 Hi, I went to the MINES shop here and bought something.. Niikura-San just happened to be there so I managed to take some pics and got him to sign my dash surround thingy. Its still wrapped in plastic back home.. I was thinking how to preserve the signature??? Im sure someones thought of this and done this in the past.
 -

By mcfwordsworth · Posted
Perfect - thanks Joshuaho96! Will see what I can source. -
 If the plastic wore, the paint will wear quicker. Heck, most car manufacturers cant keep the coatings they put on their buttons/trims alive these days for more than 5 years... A cheap paint won't do it! However, you can get away with high quality vynil wrap, primarily in areas that won't cop much abuse. Skip colour matching, and just try and wrap a specific area with an edge in a new colour. PS vynil wrapping is a prick of a job, and I suck at it, even for a small dead flat surface...
 -
I think this is more a question you should ask the tuner. My assumption is you have nothing plugged into the original pin for ring gear crankshaft, which is where your map sensor should get wired to, but now you've asked the tuner to disable it. I'm assuming (because I haven't memorised your setup) you are using RB25 ECU on the RB20 loom, to plug into an RB25. You will want to check what else is connected potentially backwards between the engine, loom, and ECU. You might be all fine and safe. The best solution you could have done is wire in a map sensor, and leave the ECU able to read a map sensor.
-


Recommended Posts
Create an account or sign in to comment
You need to be a member in order to leave a comment
Create an account
Sign up for a new account in our community. It's easy!
Register a new accountSign in
Already have an account? Sign in here.
Sign In Now