Jump to content
SAU Community

Recommended Posts

So this is the build of my shit can 33, i know some people wont agree with my thought or taste or the way i like to do things so if you got nothing positive to say dont post your negative crap as i dont care what you have to think.

anything positive or any questions please feel free to post up and i will answer anything i can.

these are some of my other post's pulled from other sites as i cant be arsed retyping everything so please excuse any double take on some things..

so around the end of 2009 i decided to ditch the FWD Toyotas and move up into my first turbo RWD car.

i never really liked Nissans and i hated skylines as every man and his dog owns one and i still think the same today but i drove a mates R33 one day and i had a small soft spot for it that i never told any one about as i was such a avid skyline hater.

but as my search continued for a new project something made me remember how much i liked to drive his skyline, even though i thought it was a heavy, to common, and lazy i still though i would have a look.

any way after a few hours of looking around i found this one Skyline and in the description the owner had lost his licence for DUI and was looking for a Corolla SX which is what i had at the time, so after some negotiating and a swap with some cash i was the owner of a skyline that you could tell was bought from Liverpool.

i had it around a week and had been doing nothing but putting it back together as it was ratted and half arsed finished when i bought it, and it also had a set of these horrible white sunken crap wheels on it so i very quickly decided that they had to go.

so after a call to my friend Phillb i was the owner of a pair of Sparco meshies in 17 X 8.5 & 17 X 9.5 with the new HSD coil overs i ordered from otomoto it look something like this.

IMG_0064.jpg

IMG_0068.jpg

So after driving for a few day with it set at mega low i got over the novelty and though i would like to set it up properly and have some fun in it at the track.

As the car stands it has:

HSD Coilovers

Kakamoto Cat Back Exhaust

Sparco Rims

Mines ECU

after my first track day in the skyline at Oran Park it became very apparent that the HSD coilovers where a bad choice of suspension as they had next to no dampening adjustment and just felt rubbish to drive on over all.

IMG_0082.jpg

I even put new spring rates in to try and solve some of the issues but they where no help.

IMG_0081.jpg

after the track day i had a few things i wanted to get onto strait away, first was the Mines ECU was coming out as it was useless on our fuel.

3f84cf0d.jpg

So the Mines ECU is great in Japan or England but not here in Australia as our fuel is crap and they run allot of advance and they have a great tendency to ping there head off and can cause bad detonation in engines leading to a dead motor.

So that in mind a standard ECU went back in and all those rattling issues went away and my fuel economy went back up and the rpm limiter came back down to 7000 rpm.

i also decided that it was time to give it a bit more up and go so i started to do some research into boost controllers, was quite a learning curve because there was so many on the market and i picked the Greddy Profect II

79ebd941.jpg

Found some GTR seat for a good price so put them in to give me some more stability while driving.

IMG_0080.jpg

I did not like the feeling of the Hicas i found that you would start driving it to the limit and once you got the slightest bit of 4 wheel slide or the rear end would start to walk the hicas would kick in, it changed the feeling of the whole car and would make the inside wheel start to spin at higher rpm.

So to solve that i did some shopping and found a hicas lock out bar.

IMG_0113.jpg

I had no air box or heat shield by that point so i decided to make one to help the car breath some cold air, and move some of the heat the the under side of the car.

CopyofIMG_0098.jpg

The tabs on the back follow the dump pipe down to direct all the hot air from the turbo and manifold down to the underside of the car.

I went to my first motorkhana after that it was allot of fun had to borrow some old second hand tyres that had been lying around for a few years of my mate because i had no rear tyres so bald tyres where better then radials i guessed.

I had so much fun i placed 2nd in the pairs and 14th out of 43 over all which was super exciting, here are some pics from that day.

Skidpan100410-202.jpg

Skidpan100410-201.jpg

Skidpan100410-198.jpg

Skidpan100410-115.jpg

After that i thought it was time to sought the suspension out and i started with a new pair of coilovers so i bought BC ER Series coilovers.

BEST MONEY I HAVE SPENT WAS ON THESE!

ER_Series.jpg

And i bought some arms to try and fix the camber issues i had with the car.

frontcamber.jpg

reararms.jpg

Now i have heard so many people bag out ebay controll arms but after recieving these in the mail i was quite surprised to there build they are the same as the high end jap ones but are just made out of a thicker materiel ans run a different brand rose link in the end.

i have run them for close to 14 months and have never had a single issue with them so i dont care what any one says to me they are good value and i trust them on my car for track work.

so by that point the car had slowly started to transform into some thing more my taste and i did a few drives with it and even had a good friend MitchF1 do a photo shoot on it.

mitchf1.jpg

mitchf12.jpg

mitchf17.jpg

mitchf16.jpg

mitchf15.jpg

mitchf14.jpg

mitchf11.jpg

Link to comment
Share on other sites

======================================================================================================================================

so it's been quite a while since i have posted anything about my nugget and i have started to do some work to it so i though i would post up a bit about what i have been doing.

so over christmas i took it down to the bat cave and started the suspension meassure to see what is really going on down there.

few pics from the meassure.

IMG_0063-1.jpg

IMG_0055.jpg

IMG_0052.jpg

IMG_0056.jpg

IMG_0071-1.jpg

so it was very interesting looking at all the measurments and what was quite surprising was that there was pretty much no bump steer out the factory and they ran 10% anti dive and 10% anti squat as well, i did learn allot about the faults in controll arm design in the cars though but that is a easy fix with some new controll arms that i will make whn i get time, the other thing is the cast uprights are so damb heavy i have been contemplating making them out of 2mm sheet like the formula 5000 uprights or billet but i will do that when i get to it first is getting this nugget running.

i am over having to all ways go to a different work shop to do my wheel alignments so i decided to make some W/A bars so i can do one any where.

IMG_0096-1.jpg

started with the mounting bars

IMG_0104-1.jpg

then the upper mounting bars

IMG_0102-1.jpg

made the cuplings to hold the rod.

IMG_0108-1.jpg

finished product, pretty happy with them as they where made with scrap from the bin.

IMG_0110-1.jpg

shiney billet under drive pulley 15% under drive for the new motor. (for sale $100 never fitted)

and then it was about here i decided to just go a bit more serious with it so i have now de registered the car as it is just to hard other wise and i dont want the police hassals.

and this is 1 reason why,

garret 35/40 .63

c47422ff.jpg

2cf7e0f5.jpg

another little suprise, 60mm love, might go to a 38mm progate yet not sure see what happens.

ceb0ee1a.jpg

though i would practise my tig skills on my actual job and not a test plate smile.gif its been a few years since i have used the tig last but all in time.

8f55eee0.jpg

all new earl speed flow fitting for the turbo and silver soldered some fittings to the oil lines to make l;ife easy for me.

the rb series of engines are lazy nuggets of engines so i have been looking at ways to try and bring it to life under the 5000 rpm mark, so with some help from my dad i think this will be the new intake set up with some nice runners and plenum action going on, 8516f36c.jpg

i would love to do what the hks gtr did and just mill half the head off and make a strait port head but time and money is a small isue there as i have neither currently.

am about to order some CP pistons and Cirillo rods sm4 and cdi so i am hoping by next year it is running and finished, will post up some more pics as i do some more work to it.

oh and i have made a new 3" stainless dump as the old one looked like a 3year old on a sugar high weilding a stick welder had made it, pics soon. ,,

======================================================================================================================================

Edited by kungpow
Link to comment
Share on other sites

so a fair bit of work has happened since my last post my parts list has slowly grown and my progress list has even moved......my car has even moved for the first time in months.............thats just like ...magic.....that thing normally never moves.

any way to this is where i am at.

6ddcf6f4.jpg

128708234980095570.jpg

so me and my old man started working on the intake manifold as my choice of turbo ment that just about any thing stock was not going to work.

so we went through the rubbish bins to fiind what we had around to use and we found some billet at the bottom of the bin so we used that to make up the runner blocks.

77c808a8.jpg

this was the blank i had just fiinished milling all the holes now ready to do the port holes.

528b2d0c.jpg

milling the ports out praying i dont stuff it as there was no more billet left :S

then the injector bosses had to be done so after doing some more maths it was back to the mill!

98fb1355.jpg

gave them a bit of a clean up put the water cooling ports in the back of them and they turned out like this.

01fd8904.jpg

28cd3811.jpg

2c69947a.jpg

its around 4 and a bit hours of mill time per block to get them to this point, next was the runners so we had to neck down one end to get it onto the ports shape that we had.

a2b7fcd6.jpg

6750b771.jpg

then it was time to start on the plenum, normally we would of made the runners but we wanted them to be light and thin so they were spun up and at $18 a runner allot cheaper.

2126b4dd.jpg

look how dead flat those trumpets are tongue.gif

d595d306.jpg

and now fitted to the runners

7f81327b.jpg

446ffa6f.jpg

the brake booster and clutch master have been removed to fit in this manifold so i am going to a floor mounted pedal box now, there was one of these sitting on the shelf up stairs that dad had made a while ago so i thought i would relocate it to my car and hope he says nothing

5676a4a2.jpg

i will now be runnign twin tilton masters from inside that car which meens now i have to extend all the brake lines, but i am going to try and retain the abs unit as it is quite nice to drive with and will save tyres in a lock up.

starting to get the gauge mounts in now

cbfa3947.jpg

the seat will be going a fair way back my shoulder is around the b piller now so all new rails will have to be made to suit and the car will have to be built around my seating position now.

thats about where i am up to at the moments i have some new goodies on order just waiting for post to hurry up.

Link to comment
Share on other sites

got rid of the key and barrel today made a new push button set up and orderd a few more bits and pieces.

ae4b4090.jpg

waiting for:

greddy cam gear

16 lbs molly fly wheel

enkei wheels

clear cam cover

injectors

valves

springs

retainers

guides

got my hands on a autronic cdi today so now im just waiting till im ready to order ther autronic and it should start smile.gif

13 months of not running i am dieing to get it going now!!!!

Link to comment
Share on other sites

The intake and plenum looks unique,good job!

Sounds like your family is involved in a lot of metalwork, lucky. Must have a few goodies lying around too lol, 'Yeah found some billet in the bin, make something out of that n chuck her on' , 'Found this lying around,I'll put that to use" haha.

Link to comment
Share on other sites

yea cheers man, one of the main reasons the plenum was done in 2 stages is ease of use, if you need to work on it you can take it off and if you bend the car you can salvage more of it as all the runners and plennum are individual pieces.

dads a mechanic and does some fabricating for his own car and some stuff for others but after years and years you just start to accumulate material allot of it you dont even remember having.

the pedal box was made and never picked up so that was just luck, i think i am very lucky to have the mill lathe and welders and stuff there for me to use and allot of stuff you make it is just things you come up with and use whats around to keep costs down and for me most of the time that is scraps off other jobs or crap from the bin, the only real material i paid for was for the diffuser.

i have been looking at the diffusser and have been contemplating on extending all the mounting points and dropping it closer to the ground for more effect but im not sure weather it will be more hassel then use and i am a bit precerious about what affect it will have on my gear box temps, i have seen some raises of around 60deg in the gear box temp due to the diffusers.

Link to comment
Share on other sites

dang that's a fair temperature raise! Is there any noticeable performance gain in terms of handling with the diffuser? They look pretty sexy, and noticeable handling gains would be an added benefit lol.

What's the switch next to the killswitch for? Got a little exited, I've recently had a random obsession with missile switches haha.

Link to comment
Share on other sites

key is power switch is for the reds and then start button same 3 stages of your normal key barrel, yea i never got over switches my tow truck has about 10 of them and play with them all day never gets boring:)

i found the car ran cooler in the engine bay but i never did back to baqck when i did mine i will next time i down at the track mine goes from infront of my front to the back of my gear box but i have been worried to finnish it due to heat.

i will get some pics of it and the mounts up tomorrow bed now :P

Link to comment
Share on other sites

  • 2 months later...

So some bits and pieces have been happening since my last post.

9151b6e8.jpg

i lost a door while fishing.

f2a42427.jpg

with some floor work the in house made pedal box was fitted this was a prick of a job

had these turn up

e5afec32.jpg

43f7c1bd.jpg

39d2638e.jpg

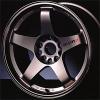
i have a feeling i will order a 2 more sets of these this year as they are not super expensive for a full forged race rim.

finally got the oil feel fitting that goes into the turbo been chasing this one fitting for like........... forever

a60effb6.jpg

its starting to look like some thing now which is kind of nice

3044ba02.jpg

injector rail made mounting brackets are made injectors in

10a44b5d.jpg

throttle body is on

5ef6735a.jpg

inspection window all done

7dfd628d.jpg

f39491e1.jpg

fuel pressure reg

6e2c161e.jpg

new coolant pipes are done

686c9a2a.jpg

new toys

990e2e72.jpg

new injectors

a09e62a2.jpg

still got so far to go but it is slowley getting there.

i have been looking at those water injection kits there not that steep either so i think that might be on the cards soon, my work is taking me out to Mackay in 3 weeks so progress will be slowing down on this thing unfortunatly but when i get back in a few months i should be able to do the sm4 cdi tune stock box over haul all in one hit.

then its running then i will focus on the suspension getting that all sorted then i will build the motor after i put it in superlap so still got a fair way to go yet but it is all slowly happening.

Edited by kungpow
Link to comment
Share on other sites

  • 1 month later...

Hey Mate,

Good to see you finally doing a write up on here :)

Can't wait to see this back on the road.

Cheers

Phillb

hahaha phillb the man on every forum :) yea mate just posting up whats being done bit broke atm afetr the last spending splurge should be good though get some cash and time after xmas and i think i will hit a few more days on it.

Wow, I was wondering where this beast dissapeared too!

Awesome work

yea it went MIA for a while after the turbo died, should of just high flowed it and i could be driving all ready :)

That looks insane mate awsome job :thumbsup:

Cheers:)

im liking the inspection window on the plenumthumbsup.gif

haha cheers mate think the same thing every time i look at the car which isnt very often atm :P

Link to comment
Share on other sites

  • 1 year later...

So i finally started to do a bit of work to it again after nearly 3 years of collecting dust, i am hoping to have it making noise in a few months as i only get one day a week to work on it which sucks but thats life.

So i finally got round to completely gutting it out now just to find that the stock looms are gay and really need to be completely removed, so now as much as i dont want to the car will get a complete re wire front to back just for ease of use.

Fair bit of fab work is now starting to happen as i have gotten to this point it is silly to start cutting corners, and i would really like to complete the car as much as i can now so i dint have to pull it apart again.

So this is where i am at:

621FD517-2A60-444C-87E6-7FFF68043E55-110

BA3A7515-E986-471B-AA62-CBC806A861C7-110

CF8483E9-AA93-4693-AB9E-85F70A412057-110

FEA0F8D7-7830-4185-9C8F-1A2A3F85FA86-110

2A121E86-DA88-4E8E-8945-B508737285EA-110

67C18EBB-F50A-4457-B565-522B3CA3D03D-110

D3384236-F449-4F8A-B33D-FCDC1536B993-110

380D7EB1-4E71-435E-B8D9-ADB0D6939A2D-110

337918F7-B8FF-44A1-8C48-08516CFA9EA2-110

1191C148-29DA-46A7-A7C3-AB8BE589B912-110

11D2B69B-4430-4FF7-B6AD-009FAB8F1DDA-110

03B0056F-4C05-4D85-A8DA-8B3B2E248BC9-110

More to come soon.

Link to comment
Share on other sites

Hey bud cheers, i have never heard of jenvey but from what i found on there site i cant see any simalarities?

All the r&d on this manofold was done in brookvale nothing was really copied from any where, the two piece is an old f1 thing for ease of service but thats about it, have you got any pics i would love to see what your talking about?

Link to comment
Share on other sites

Create an account or sign in to comment

You need to be a member in order to leave a comment

Create an account

Sign up for a new account in our community. It's easy!

Register a new account

Sign in

Already have an account? Sign in here.

Sign In Now
 Share


×
×
  • Create New...