Jump to content
SAU Community

Recommended Posts

Hi, history of the car first.

Car was imported here in 2006 by a guy around the corner from me, he got it registered (has engineers certs for most mods) drove it around for a little bit then had it taken off the road where it sat until i bought it 1.5 - 2yrs ago. car was equipped with a tdo6ls2 and a proposed (never been able to confirm as engine has never been opened and it has been great to drive) rb22 stroked engine. it got dynoed with a around the 220rwk mark with a hks fcon pro computer.

The computer was changed to a power FC because most people over here don't have alot of experience tuning them and it came out with a very healthy petrol economic (450-500km a tank) 270rwk tune. it was believed that this car was either a part of or the owner was a big fan of skidline underground drift group from japan. with all the stickers it had on it and the quality suspension and handling mods it came with.

The Car got a full respray in a custom orange (bright in the day) and mandarin kind of colour at night. wheels got re painted silver also. The Inside was pretty much stripped and didnt have many panels or interior trim, so i set about hunting down the stuff and was lucky enough to find most of it from members of sau. It also had no sound system, i managed to buy a pop out dvd player of a forum member for 300 bucks and bought some speakers and some amps and a sub all to go with it to have some very nice sound.

The only thing mechanically wrong with the car when i bought it was it had a clunking sound coming from the diff, so seeing as i had half cut from a ex hks gtr demo car with front and rear cradles lying around the side of the house i decided to put the gtr rear diff in, and what a beauty it was all custom and built to handle a good 800hp engine combo the car had. it has been in the car ever since and it has been so nice to drive, when it breaks traction it is very stable and much more enjoyable to drive then my locked diff in my sigma lol

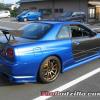
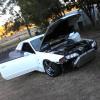
pics of the car when i got it.

IMG00004-20100124-1706.jpg

when i first got it without the front bar.

P1010632.jpg

front corner lights were faded, so later i changed them over to smoked ones i bought of ebay and have been great ever since

P1010629-1.jpg

P1010628-1.jpg

P1010670.jpg

practically brand new r33 series 2 seats, when i pulled them out and upgrade to r33 gtr seats.

skylineunderside.jpg

IMG00018-20100206-1409.jpg

IMG00024-20100206-1708.jpg

IMG00021-20100206-1708.jpg

IMG00020-20100206-1707.jpg

shots of all the interior trim peices i was missing

P1010507.jpg

the front and rear diffs from the half cut.

P1010660.jpg

2ndcamera054.jpg

2ndcamera055.jpg

the engine bay as it used to be before all the parts got taken off. crack in the front bumper is a result of lending your brother the car :domokun:

IMG00003-20100531-0822.jpg

getting some new tyres

IMG00002-20101031-1926.jpg

eneki circular rims before they got powdercoated

IMG00005-20100613-1646.jpg

IMG00006-20100613-1646_2.jpg

IMG00008-20100613-1650.jpg

IMG00019-20101114-1703.jpg

a few pictures from mates cars, had a gtr boot and wing in black that i had lying around from a previous skyline so i thought i would put it on for a bit of fun, didn't look half bad but i didnt realize that i didn't connect the wires back up and it stayed on for a while until i had time to call a locksmith who didnt end up getting it off. i crawled in through the back and did it.. yes you can get in to the boot lol

IMG00016-20101110-1838.jpg

R33 gtr seats in the car, made the car look alot better, very snug and hold well through corners and much better for taller people as the rails sit lower and my head doesn't skim the sunroof anymore.

fast forward a year or 2 and you have present day.

about 6 months ago i noticed a slight leak in the manifold gasket, i let it go for a while becasue the car was being used as a daily and it wasn't that bad (or so i thought). I was going to get my brother to fix it but he was busy with work and his job was uncertain as his boss and my mechanic had decided to shut up shop unfortunately. fast forward a few months and coming home one afternoon from shellharbour i lost all power and the car wouldnt spool the turbo or hold boost at all. i dropped it off to get it looked at to find that the exhaust manifold had split in half lol. apparently the manifold rusted over and became weak and allowed it to split in half. i expect the fact that it sat around for 3-5 years doing nothing may have had something to do with it also.

So i did a quick ring around to find out who can build or source another one. i decided to go against getting another greddy manifold as i didnt want it to split again as i read up that stainless steel was prone to do this.

Thus 2 options came up. 6boost or quickspool. I rang both and at the time i believe it was just before powercruise in queensland so 6boost was understandably busy. Will Tobin on the other hand from Quickspool answered my call the next day and i discussed what i wanted. the next day i shipped my turbo, wastegate and broken manifold off to Will and the process had begun. The reason i sent the stuff up was because i was trying to minimize any custom work and get Will to fabricate one to be as close to the other as possible so it could just be bolted back in.

A phone call from will a few days later suggested that the merge collector wasn't going to be able to sit in the same place and some customization of bringing the turbo a little forward had to be done. at this point i figured that now a little bit of extra work is going to be done and i just got bit by the modifying bug i knew i was going to have to wait a bit for parts so i decided to do a few other things as well. I also decided to ceramic coat the exhaust manifold for extra protection.

There has been so much talk about the plazmaman plenum not giving any benefits and loosing torque that i was very hesitant about going towards one of those. i did some research and got in touch with a guy named ariel from custom plenum creations. i spoke to him about what was already on my car and really what i wanted. i wanted to do away with the cross over pipes and just have a nice clean looking engine bay but not loose any power or torque on the car currently, nothing to over the top but subtle to the performance enthusiast. we had a chat and it was decided that he would build me custom runners and a custom plenum chamber. i also opted for an aftermarket fuel rail and set of 750cc injectors to help with the flow. currently i have 550cc so i thought they were close to the maximum and if i decided to try and push out more power better flow would be needed. so ariel set to work

My brothers friend has just started up doing some powder coating wheels as a hobby, and i was looking at getting chris from craved coatings to do it but he offered to do it for half the cost as he wanted some wheels to practice on, i had planned on getting other wheels to go with the carbon fibre exterior parts down the track so i though what the hell, they will be used as track rims so if it isn't perfect it doesn't really matter. as most of you that own cars i like everything to be perfect. it was funny to find out the wheels had been either sprayed or painted 5 different colours before the now black.

I then went and spoke to chris from Craved Coatings, about getting my valley and rocker covers powdercoated. i have seen his work first hand and i don't think there is anyone out there better. i decided on a specked marble kind of look so not to be to over the top but to be to my liking. this will go nicely with the stealth but subtle look i was going for.

last week a few parts came back my manifold arrived and the wheels were finished.

IMG-20110919-00009.jpg

IMG-20110919-00010.jpg

new manifold next to old manifold

IMG-20110902-00007.jpg

IMG-20110902-00008.jpg

the wheels came up great

and some pictures of the engine bay as it sits in pieces

IMG-20110920-00013.jpg

IMG-20110920-00012.jpg

IMG-20110920-00011.jpg

so now just waiting for chris to finish of the engine covers, and ariel to finish of the plenum and fuel rail, then the car can start to be put back together

Link to comment
https://www.sau.com.au/forums/topic/379098-yts-flame-orange-r32/
Share on other sites

Looks good mate, Keen to see what power figures it will make,Glad to see its a 20 and not a 25 :P ill be watching this thread. :D

i am also keen, still have to figure out who i am going to take it to for the tune. i wouldnt go an rb25 if someone paid me :nyaanyaa: , if the car becomes a track dedicated car later on maybe a 26 until then the 20 all the way.

  • 2 weeks later...

got engine covers back from craved, top bloke great job done very happy with the finish

got them done in a silver vein

before

IMG-20110920-00014.jpg

after

IMG-20111019-00019.jpg

should have plenum, custom fuel rail and injectors back next week

  • 3 weeks later...

Update:

bought an oil cooler kit of another member on here for a bargin price, only trial fitted and never used which was a bonus. although installation became a little bit of a problem when the adjuster bolt that goes into the engine block for the oil cooler only goes in 2mm of the thread to the adaptor, so ended up getting it welded on to the attachment so its all good now and just has to be mounted up. left or right side?

IMG-20111109-00040.jpg

also went to the fenix factory in sefton and picked up a full aluminium race radiator, spoke to a guy named Rob very helpful and great price knocked some $$ of cause i paid cash which is always good, if anyone one wants contact details for rob just pm me. but you can check out there radiators online. installation of this was pretty straight forward although the clutch fan rubbed a tad so just had to adjust that a little.

IMG-20111109-00038.jpg

made a thicker bracket for the new front mount so it would be nice and sturdy. and it sits nice just behind the front reo. the battery i am going to move to the back of the boot to allow for the front piping of the plenum and have to cut a hole under the radiator for the pipe.

IMG-20111109-00037.jpg

still waiting on the plenums final finishing touches, long story short guy building it broke his welder and parts that were meant to be shipped to him got sent elsewhere and re routed. pain in the arse but anyone who tells you building a car and parts goes to a certain time budget there are always little things that delay so got to be prepared for that.

bought a full gasket set for the rocker covers to go back on.

the battery is being mounted in the boot to allow a bit more space for the intercooler piping to come and placement of the oil filter.

the manifold is all bolted up with the new positioning of everything, i didn't realise that the wastgate would be so close to the turbo now practically staring you right in the face so i will have to get a heat shield made up to keep things looking legal, the screamer pipe has been moved now also so not sitting as low and kind of finished at the gearbox bell housing. i am assuming this will be ok as those things can withstand a fair bit of heat and the odd flame or too. if not let me know as i will get the guys who are putting the dump pipe and front pipe on to make a bit more pipe and angle it away.

IMG-20111109-00035.jpg

IMG-20111109-00036.jpg

IMG-20111109-00039.jpg

  • 2 weeks later...

ok so a few things have happened in the last few weeks,

finished mounting the oil cooler kit, mounted it a little higher and behind the front reo, gets plenty of air and wont have any stones or chips hitting the fins when driving.

IMG-20111111-00044.jpg

oil filter relocation kit will be fitted close to here.

IMG-20111111-00045.jpg

engine covers were put on with the new gaskets, very happy with the look.

IMG-20111111-00046.jpg

then i drove down to wollongong and picked up the plenum,

here is a pic..

IMG-20111118-00057.jpg

pulled off the old plenum, ordered new gaskets for the plenum from motorsport madness, they sent me out the wrong gasket set a rb25, got them to re send them and the 2nd time they sent out the rb20 ones they didnt fit either rang them up and apprently there are 4 different types of gaskets for the rb20det, weird? anyway lined up the ones that fit and that will be here monday.

now along with the plenum i was assuming it would be bolt off bolt on without too much dramas, well that was wrong. have to buy a whole heap of fittings so bought them from speedflow.

had to buy a new fuel pressure reg so i picked one up from turbo smart and a fuel pressure gauge.

IMG-20111118-00054.jpg

and and oil catch can...

IMG-20111118-00056.jpg

that is going to be mounted next to the fuel pressure reg and with the oil filter relocation kit.

made up some new coolant lines, and had to modify a few other things to make it fit without rubbing

here is a pic of the engine without the old plenum

IMG-20111118-00055.jpg

and so we dummy fitted the plenum to see how much room and how it will end up looking, really happy with how clean it looks in the engine bay now, here are some pics

IMG-20111119-00058.jpg

IMG-20111119-00059.jpg

IMG-20111119-00060.jpg

Create an account or sign in to comment

You need to be a member in order to leave a comment

Create an account

Sign up for a new account in our community. It's easy!

Register a new account

Sign in

Already have an account? Sign in here.

Sign In Now


  • Similar Content

  • Latest Posts

    • Lucky man, who owns it in the family? Any pics? 
    • The engine stuff is Greg Autism to the Max. I contacted Tony Mamo previously from AFR who went off to make his own company to further refine AFR heads. He is a wizard in US LS world. Pretty much the best person on earth who will sell you things he's done weird wizard magic to. The cam spec is not too different. I have a 232/234 .600/603 lift, 114LSA cam currently. The new one is 227/233 .638 .634. The 1.8 ratio roller rockers will effectively push this cam into the ~.670 range. These also get Mamo'ified to be drilled out and tapped to use a 10mm bolt over an 8mm for better stability. This is what lead to the cam being specced. The plan is to run it to 6800. (6600 currently). The Johnson lifters are to maintain proper lift at heavy use which is something the LS7's supposedly fail at and lose a bit of pressure, robbing you of lift at higher RPM. Hollow stem valves for better, well everything, Valve train control. I dunno. Hollow is better. The valves are also not on a standard valve angle. Compression ratio is going from 10.6 to 11.3. The cam is smaller, but also not really... The cam was specced when I generated a chart where I counted the frames of a lap video I had and noted how much of the time in % I spent at what RPM while on track at Sandown. The current cam/heads are a bit mismatched, the standard LS1 heads are the restriction to power, which is why everyone CNC's them to get a pretty solid improvement. Most of the difference between LS1->LS2->LS3 is really just better stock heads. The current cam is falling over about 600rpm earlier than it 'should' given the rest of my current setup. CNC'ing heads closes the gap with regards to heads. Aftermarket heads eliminate the gap and go further. The MMS heads go even further than that, and the heads I have in the box could quite easily be bolted to a 7.0 427ci or 454 and not be any restriction at all. Tony Mamo previously worked with AFR, designed new heads from scratch then eventually founded his own business. There he takes the AFR items and performs further wizardry, CNC'ing them and then manually porting the result. He also ports the FAST102 composite manifold: Before and after There's also an improved racing crank scraper and windage tray. Helps to keep oil in the pan. Supposedly gains 2% power. Tony also ports Melling oil pumps, so you get more oil pressure down low at idle, and the same as what you want up top thanks to a suitable relief spring. There's also the timing chain kit with a Torrington bearing to make sure the cam doesn't have any thrust. Yes I'll post a before and after when it all eventually goes together. It'll probably make 2kw more than a setup that would be $15,000 cheaper :p
    • Because the cars wheels are on blocks, you slide under the car.   Pretty much all the bolts you touched should have been put in, but not fully torque up.   Back them off a turn or two, and then tighten them up from under the car with the wheels sitting on the blocks holding car up in the air.
    • Yes. Imagine you have the car on the ground, and you mine away all the ground under and around it, except for the area directly under each individual wheel. That's exactly how it'd look, except the ground will be what ever you make the bit under each wheel from
    • Yes, if you set the "height" right so that it's basically where it would be when sitting on the wheel. It's actually exactly how I tighten bolts that need to be done that way. However....urethane bushes do NOT need to be done that way. The bush slides on both the inner and outer. It's only rubber bushes that are bonded to the outer that need to be clamped to the crush tube in the "home" position. And my car is so full of sphericals now that I have very few that I need to do properly and I sometimes forget and have to go back and fix it afterwards!
×
×
  • Create New...