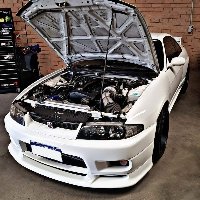
Painting My Brake Callipers Red
Announcements
-
Similar Content
-
Latest Posts
-
By Dose Pipe Sutututu · Posted
this thread delivers, once again Skyline owners, our cars spend more time off the road than on the road -
Some of the stuff the PDR guys in the states pull is amazing too. Instead of drilling a hole. They crank some insane tension into it. I actually DIY built a pulling bar myself that I used to pull the Subarus front end out with. About an hour's work, a bit of 30mm *3mm shs, and a piece of 5mm thick plate. Worked great! But I vote replace it with a GTR rad support. And not going to lie, I'll laugh if a GTR rad support doesn't fit a GTt...
-
Sorry, that was with regards to the rather pretzeled corner of the reo bar. It's in such a state over the years that drilling a hole is probably preferable to bothering to unbolt the thing
-
No need to drill any holes. There's plenty of access to reach through and behind all of that steel to "push" from behind with a pulling action on the slide hammer. There's all sorts of attachments you can screw on the end of them.
-
Yea the photos aren't the best. When I was pulling the bumper and headlights out there was a bodyshop guy looking on for it, there is a slight bend behind where the passenger headlight is, but we're talking a few MM and there is a little bit of a bend for the reo. That said it's supposedly well within the "Drill a hole in it and pull it out with a slide hammer to be close enough" and be on our way. The other option is to buy a GTR reo for the GTR bumper bits but this is a $2000+ fix for something Mr Hammer can probably do 99% of the job for and everything will/can line up pretty closely-to-good-enough.
-


Recommended Posts
Create an account or sign in to comment
You need to be a member in order to leave a comment
Create an account
Sign up for a new account in our community. It's easy!
Register a new accountSign in
Already have an account? Sign in here.
Sign In Now