Jump to content
SAU Community

Recommended Posts

More updates! banana.gif

Engine is in, Nearly finished hooking up the loom (I hope!!)

DSCF2454.JPG

This month is rather busy, so the car may not get as much love. We will the thread whenever we can though thumbsup.gif

  • Replies 43
  • Created
  • Last Reply

Top Posters In This Topic

I'd say it will happen eventually, but it's all time and $$$. We only have ever had issues once with heat on the RB20, and we think it may have been the detonation it was destroyed with. We'll just have to see how we go thumbsup.gif

looking good guys.

you may need ant man to borrow my brackets off my kit so you can make your self some.

They dont get made much better then the little jap men did on my b-eer 34 kit.

:D

kinda hard when im in Europe dude lol.. looking forward to coming home we will all be very busy with cars. As for the thermo fan and viscous fan option, id rather have a 400hp engine powering my cooling fan.

Turns out i was wrong and we have both teehee.gif Only update, we got some Gaskets from 999 Automotive, for the Dump pipe and the power steering pump doesnt line up with the harmonic balancer. Should get a little bit of work done this weekend, and we go on holidays the weekend after. After that, full steam ahead yes.gif

  • 5 weeks later...

Updates!! laugh.gif

Engine 98% ready (Trying a neater format here)

Engine is nearly ready to fire, Intercooler piping is all done, 2.5inch on the turbo side, using pipe from the RB20, Wheel is very close to the downward elbow on fulll lock. 3 inch on the Drivers side, to match the intake and because we needed all new pipe for this side anyway. Bought clamps and more silicon hose to suit. Also Fitted Y-pipe, for the air flow meters, looks a bit ugly but it'll do the job... All that is left to fire the engine is the resistor pack for the injectors, pulled apart the whole wiring loom trying to figure out where the feed for them is, to find an extra plug down where the power steering resovoir is, with 3 other wires, 1 of which is from the throttle position sensor not sure why? Currently figuring out what we are missing and what requires to be done.

DSCF2522.JPG

(90% of where we are at the moment, haven't got a pic yet, but you get the idea, intercooler piping is done ofcourse.)

DSCF2528.JPG

(Very close!!!)

DSCF2523.JPG

(Ugly, but it works, Filter fitmentt is a little better after shortening, Also need a 4 inch AFM adapter...)

Also hooked up all vacuum lines, Oil pressure gauge with hardline and a few other bits and pieces. Widebody updates in the next post...

Edited by SlidingAlex

Ass-end

Apologies, for the double post trying to seperate different updates and not losing work (I lost my whole post last time). I guess ill just throw some pics in, the whole kit will be complete before tune, just so the car is complete and ready to go after tuning (Paint pending. nyaanyaa.gif)

DSCF2530.JPG

(Wider wheels will come later, Size will also be dependant on what tyre we decide to use, high likely they will be slicks.)

DSCF2537.JPG

DSCF2532.JPG

DSCF2533.JPG

DSCF2535.JPG

More work to come this week!

Edit; Sorry guys, just thought i'd mention the guards are only held on using tek-screws for the moment, the guards will come off once the whole body is lined up, to cut out some of the inner guards and a few bits and pieces, then attach with rivets.

Edited by SlidingAlex

Rivets because race car! Help will be good, hopefully the car will be ready for tuning rather soon. Curious to know how your car is going aswel?

EDIT: Oh btw, i hope you didnt mean it was dean in that photo! that's dad laughing-smiley-014.gif

Edited by SlidingAlex

Finally looking like a car again

Starting to look like a car again, we began assembling the front end. Only did half an hour's worth of work which got the front guards and bonnet on.

DSCF2545.JPG

(Bonnet hinges have also been modified, can't get the bonnet all the way back on the windscreen as hoped, but you can still get a broom in there so we dont hit our heads? You can also see the wiring mess up the back there, still haven't sorted out the resistor pack pinch.gif)

DSCF2538.JPG

(So far, bonnet fits without touching anything, with the exception of air filters, gotta sort this out... )

DSCF2543.JPG

(One guard sits way to close to the bonnet)

DSCF2540.JPG

(One guard sits too far out, hopefully we'll align the bonnet properly tommorow, and this issue will be sorted.)

DSCF2539.JPG

(Wheel sits well inside the guard, even with a spacer and still have camber to come.)

More updates to come! thumbsup.gif

Easter weekend update - Finishing off, nearly there!!

Got more updates, have a few more to come but the camera went flat pinch.gif plus whatever gets done tommorow.

DSCF2549.JPG

(The widebody guards needed flares on the inside otherwise they would be completely pointless, so got cracking on those)

DSCF2552.JPG

(Painted them up to look nice, only to lay fiberglass over the top straight after, don't look pretty but you can't see them anyway)

DSCF2553.JPG

(Added 20mm+5mm spacers, fitment looks better now but the front still needs work.)

As of now, the widebody is finished as far as guards go, bonnet, sideskirts and rear undertray are left (The carbon one won't fit, so we gave it back to uncle, and we'll make our own)

DSCF2556.JPG

(Resistor pack is wired in)

DSCF2561.JPG

(Car is ready to start, friday night we bought fuel, began to prime pumps which we found out do not work! Saturday morning, we pull one apart, to find the pump was seized (They had been sitting for a year or two) everything works electronically, and should have pumps ASAP)

AAAAAAAAANNNNDDDDDDDDDDD..................

DSCF2573.JPG

I spent far too long saturday night, mounting the oil pressure gauge and making it light up pinch.gif Gotta work on my soldering....

Thanks to uncle Anthony and Dean for their help on friday!

More updates should come tommorow!

Edited by SlidingAlex

Sorry for the delay, could not find the camera charger.

Both rear guards, and mounted up for the last time, using rivnuts on the inner guard, with a bolt (Getting button heads later) Holding the outter guard on.

DSCF2581.JPG

Apologies for the crap photo, it started raining when i took the photos.

DSCF2582.JPG

Plastic bag to cover up the window, we pulled the lexan one we made out for the time being until we have time to mount it, and it started raining.

DSCF2580.JPG

Got some "Dzus" clips for the front bar.

Begging to do the front bar today, stay tuned!

  • 1 month later...

Time for updates!!! (At last)

Engine runs, no leaks etc. will post a video later.

There is no panels on the car, shell has been for a coat of black. All the panels should hopefully be done tommorow (Yay!) then the car should be just about ready for a tune and it hits the track.

DSCF2938.JPG

New wheel too!

DSCF2943.JPG

  • 2 months later...

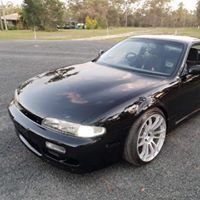
Well I finally got the new engine tuned. Had all of the usual hassles. Wiring drama that stoped it running up under load and sprayed two types of fluids all over the dyno room.

Big thanks to Brad at Turning Point Technology. Long story but had to take my car 4 hours north to Hervey Bay to get it tuned due to eveyone being so busy with powertune coming up.

Any body in the Wide Bay region I suggest going to see Brad for any tuning work. The guy put in so much work to get it absolutly perfect. He also rang, text and emailed me the whole tiime he was doing the car. he also took the time to explain a lot about what he was doing and why.

Now for the good stuff. I ended up with a very safe 485 hp. I will post the dyno sheet when i next get a chance. On full boost by 4300 rpm. very happy with the results.

Create an account or sign in to comment

You need to be a member in order to leave a comment

Create an account

Sign up for a new account in our community. It's easy!

Register a new account

Sign in

Already have an account? Sign in here.

Sign In Now


×
×
  • Create New...