
V35 Coupe Gt Spec Rear Brace Install (With Pics)

Announcements
-
Similar Content
-
-
Latest Posts
-
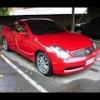
 This is a dc2r lip No modifications required. Installation is fairly easy but you have to screw the middle for it to sit where you want it https://www.ausbodyworks.com.au/products/silvia-s15-dc2r-front-bumper-lip Is the website I bought it from
 -
 Sick! This is exactly what I was looking to achieve. How'd you go about installing it? What modifications we're required?
 -
 nah the heater hoses are fine, I just use the dump pipe as a booster until the coolant warms up
 -
 You don't think he should leave it to torch the heat hoses?
 -

By Dose Pipe Sutututu · Posted
Might as well wrap the dump
-


Recommended Posts
Create an account or sign in to comment
You need to be a member in order to leave a comment
Create an account
Sign up for a new account in our community. It's easy!
Register a new accountSign in
Already have an account? Sign in here.
Sign In Now