

Announcements
-
Similar Content
-
-
Latest Posts
-

By GabsReDeal · Posted
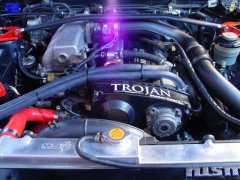
Back in January, I noticed my car felt noticeably weak. I had the injectors cleaned, which seemed to solve the problem -- until now. Recently, the car suddenly lost power again while driving. Suspecting the injectors, I brought it to the mechanic. He recommended replacing them entirely, saying the current ones were getting unreliable and fiddly to work with. I could not find a direct replacement for my current injectors. The closest match I found were 440cc injectors. This led me to look into the possibility of upgrading -- and of course, that would mean remapping the ECU. From my research I found: The OEM Part numbers are 16600-72L20 and 16600-72L21 Both the RB20DE and RB20DET use the same 270cc injectors. There are much better options out there over the old OEM injectors. Nistune could be a viable tuning option. While the RB20DE isn’t explicitly listed on their site, the ECU is essentially the same as the GTS-T version - just with a different map. The ECU code on mine is listed as supported. One concern is finding a tuner who works with Nistune. Aftermarket ECU like Haltech and Link, but this would be the most expensive choice (and possibly overkill for a mostly stock RB20DE) I admit that I am very new to the tuning scene and would appreciate any insight or recommendations regarding this. These are some SAU links where I got some of my information from for reference: https://www.sau.com.au/forums/topic/380324-rb20de-injectors/ https://www.sau.com.au/forums/topic/477396-factory-270cc-injectors/ -
 The inspectors are not forensic by any means but if you forge your documents and/or badgings on vehicle parts and are found out, the consequences are just far bigger than if you just run illegal parts. And their job quite literally is to cross reference what parts you got installed and what your papers say you got. Something as silly as your suspension being 1mm too low will fail you. Nonetheless I asked if someone knew the damn pipe and I certainly did not ask for smartassery or underhanded comments, no idea why you need to be told this. Great way to waste both our time.
 -

By TurboTapin · Posted
As useful as you explaining what forgery is... But then again, I wasn't aware your inspectors were also forensic experts and inspect nameplates on each component to confirm everything is original. They must inspect roughly 3 cars a year at that rate. You're right though, my comment doesn't help you in anyway, so I'll go talk to my wall now. Cheers. -
Say that to the guy that is going to fail your inspection or tow your car for illegal exhaust modifications. If you have anything else useful to say, please go tell your wall.
-
-


Recommended Posts
Create an account or sign in to comment
You need to be a member in order to leave a comment
Create an account
Sign up for a new account in our community. It's easy!
Register a new accountSign in
Already have an account? Sign in here.
Sign In Now