Jump to content
SAU Community

S A U__N E W C A S T L E


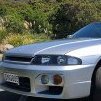
GTR-34A

Recommended Posts

The shims and clips things are the hardware kit...

Heres a hardware kit for S13.

FRSport_240SXBrakeKit_512422538844a0b4a3c5cddb.jpg

No wonder you are broke

They should come with the pads

I CBF fitting the shims when I did the pads in my car and have no problem with noise

Link to comment
Share on other sites

Once funds permit, I'm going to be ordering a vented carbon fibre bonnet from japan

tumblr_m92mcy3ULe1rohi97o1_1280.jpg

Not really in a hurry for rims as Ive got a pretty much fresh set of KU36's on that set of rims atm.

And coilovers etc are going in in January. From where its at, only needs to be lowered 10mm in the rear and then the control arms will be parallel all round. So I dont negatively affect handling, I'd need to spend more money on things like roll center adjustors if I decided to go any lower than that.

Link to comment
Share on other sites

Well -9s orded today vai the forums with Boostnimports, $2382 for a set with actuators. Labor is gona cost me around 1k but that includes gaskets and dyno. shit is so expensive.

Link to comment
Share on other sites

yep - welcome to the joys of gtr ownership.

nice price on the 9's - thats basically what i paid for my -5's (which are usually a few hundred cheaper)

Yeh no shit ay, i think i need a better paying job.

Link to comment
Share on other sites

Come over to WA and keep me company :-)

What is the work situation like over there?

Could realllly consider it in the new year.

As for car stuff I saw Paul today and got the motor back on track. Also picked up a nice shiny catch can/washer bottle

Link to comment
Share on other sites

Mjh, I washed my car today and just polished it afterwards....

do you have any tips on detailing?

Best thing you can get for detailing is a Concours 900 RO kit.

Car looks good as is just get a good sealer and wax to help protect the finish. Check the detailing thread and also check out the Waxit site for quality waxes etc

Link to comment
Share on other sites

What is the work situation like over there?

Could realllly consider it in the new year.

As for car stuff I saw Paul today and got the motor back on track. Also picked up a nice shiny catch can/washer bottle

Work's pretty plentifuly, lowest unemployment rate in the country.

i know that catch can, its really shinny :-)

Did you get a water pump? Paul kept hold of my spare N1....

Edited by wedge_r34gtr
Link to comment
Share on other sites

Work's pretty plentifuly, lowest unemployment rate in the country.

i know that catch can, its really shinny :-)

Did you get a water pump? Paul kept hold of my spare N1....

Yeah just went with a VL pump.

N1 pumps are more for higher revving motors aren't they? EG drags tracks etc

I'm giving some serious thought to a different job.

The one I have now is good but not enough work or pay

Some guys manage to do 12 hour days regardless of how busy or quite it is an I seem to get the easy short run most days

Link to comment
Share on other sites

Create an account or sign in to comment

You need to be a member in order to leave a comment

Create an account

Sign up for a new account in our community. It's easy!

Register a new account

Sign in

Already have an account? Sign in here.

Sign In Now


  • Latest Posts

    • I did manage to do this without removing the engine or front cross member, but I had the advantage that the exhaust manifold was removed. I am not setup to support the engine from the top or remove it. 1. Loosen the engine mount nuts so they only have a nut of thread. If it is a manual, I think you have to remove the gearbox to engine support brackets. 2. Jack up the engine off the bottom idler mount. Jack it up till the end of the slot and nut on the mount. You need this clearance to get the pan out at the rear of the engine. 3.Break the sealant seal to sump. I found a oil pan separator tool helpful to get it started. 4. The oil pick up can be removed with the gap available.  5. The oil pan can be removed now. 6. Before assembling, do not apply sealant to the oil pick up area as your hand will rub it all off but apply to the other three and a bit sides. 7. It is a two man job to put the oil pan back, with the sealant, as you do not want it to touch anything and rub off. 8. With one person supporting the oil pan the other can fit the oil pickup 9. Apply the remaining sealant. This would be more difficult with the manifold or turbo in place, but I think it could be done. As you can see my sealant is a bit ugly, but good enough to seal. 10. Lift the sump up to the engine and bolt it on. We found it was easier to use two long guide bolts at each end to get it nice and aligned without touching.
    • I find building an exhaust a really satisfying job! Looks nice!   Did you consider using an oval pipe to get the same cross sectional area but keep it above the chassis rail?
    • @Dose Pipe Sutututu Sounds good.  Just double checking with the pull up resistor indicated in haltech's info sheet for their SSR - https://www.haltech.com/product/ht-030202-solid-state-relay-100-amp/  I'm guessing that would only be if the ECU did not have an internal pull up resistor? Their instructions are pretty strongly worded lol "1K pull-up resistor MUST be fitted." 
    • I wouldn't think you would need a flyback diode, as it's an OEM replacement parts for a fan controller/relay on a Dodge. Another tried and tested option are the Volvo XC90 (or similar) fan controllers.   
    • Just checking, with this would you need anything else to get yourself up and running? Do I need a flyback diode, pull up resistors or anything else?
×
×
  • Create New...