

Announcements
-
Similar Content
-
-
Latest Posts
-

By PotatoCake · Posted
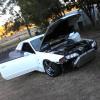
Its got hpi dumps/racepace 4" y pipe & hi flow cat, not sure which brand the exhaust is, ill attach some pics -
 As stated above, if you don't have anything in the mid pipe look at putting a resonator in the mid pipe to reduce drone, the biggest and longest that will fit clearance wise
 -
 Thanks! Safety wise probably should have a cage, but I drive it a few times a week for school drop offs and after school activities. So just hoping to go out and do a glory pass and see what it will do
 -

-
Don't just call around, also call Shannon's. You've just reminded me, I need to call them again and push my premium down and my agreed values up...
-


Recommended Posts
Create an account or sign in to comment
You need to be a member in order to leave a comment
Create an account
Sign up for a new account in our community. It's easy!
Register a new accountSign in
Already have an account? Sign in here.
Sign In Now