
Announcements
-
Similar Content
-
-
Latest Posts
-

-

-
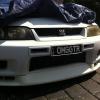
These arn't them, but these are the pieces. I dont think hydrodipping would work. Also, the plastic is very old and brittle, the trims are out of the car atm getting some mounting holes jb welded.
-
 What about hydrodipping? I was looking at it but if the piece is complicated the end result might not be as good, I've seen it recently where if you have a checkered pattern for example and dip it, the area where the plastic bends, those checkered boxes look stretch. Doesn't look terrible but not the best result either. Every rattlecan job I've seen has turned out crap (at least on the skylines, they are always peeling and bubbling) but I haven't seen anyone get a proper spray gun and compressor and go at it. In theory they should last a lot longer. Vinyl wrap is another option (also difficult if there are a lot of complicated sections)
 -
-


Recommended Posts
Create an account or sign in to comment
You need to be a member in order to leave a comment
Create an account
Sign up for a new account in our community. It's easy!
Register a new accountSign in
Already have an account? Sign in here.
Sign In Now