Jump to content
SAU Community

Tom's C33 Laurel


Thomasino
 Share

Recommended Posts

  • 1 month later...

So I picked up another handbrake (one that had a ratchet in it so I can actually park with it), tail shaft and a steering column with a boss kit for my nardi and solid steering bush on it. Boss kit seems to be seized to the column so soaking in WD40 and attempt to remove tomorrow. Also sold the gearbox back to the guy I got it from as it was missing a few bits and pieces and bought one straight from a car with slave, all plugs, cross member, clutch fork and shifter assembly. Then ordered a few bits from GKTECH; shifter, drift button (handbrake has no spring), clutch line and subframe slip on collars.

421150_10152402245405392_1939270934_n.jpg

Attempting the conversion this weekend. Neither myself or my mate have done it so going by the good old trusty internet forums on how to do it. Bound to run into a few issues which hopefully can be cleared up quickly (so, I may be posting here/PM'ing people...). The main thing I'm concerned about is the wiring. I was given some piece of loom with my pedals and clutch which was supposedly needed for a manual swap, assuming this has something to do with the reverse lights. Hoping it all works with the current auto ECU and bridging the Park/Neutral switch isn't too hard to find and do.

And on an unrelated note, had a 'close' call with a motorcycle cop recently. Followed me home off the main road and warned me that my indicators were flashing fast, and they may exceed the maximum allowed flashes per second. He told me to check for LED/blown globes as this will cause it, but I can't find any, so not sure what the issue is. He also asked what the hell my hang ring was, then told me I should probably take it off as other cops might thing something is broken and pull me over, so its now been put to use as a Jesus bar. Was a pretty good guy about it all, didn't mention anything else about the car.

16557_10152396788580392_378931884_n.jpg

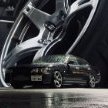
And finally I'm considering changing the rims. While the 15's with 195/50/15's are baller as, to pull them off properly I need to slam it at least another inch, and driving it how it is is already pissing me off, scraping everywhere and smashing into parking bays. So considering these...

42106SAM_6078.JPG

Buddyclub P1's, in 17x8 +22 and 17x9 +37. For reference, not sure on the below sizes:

282448_478843142159503_432700998_n.jpg

More updates over the weekend I'm sure.

Tom.

Edited by Thomasino
Link to comment
Share on other sites

I tried a set in that colour on my 32(which is the same colour as your laurel) , gold/bronze didn't suit imo :) . As for your indicators , make sure the one in the front indicator is a t15 , Alot of peeps put t10s in them and that makes them flash fast

Link to comment
Share on other sites

Well today was reasonably successful. We got all the auto stuff out and all the manual stuff in apart from the handbrake and electrics. Need to continue bleeding the clutch (taking ages) and have a better sus of the wiring. I bridged the park/neutral plug but haven't started it up yet. The wiring loom I got with the pedals (R33 parts) has different connectors for the reverse and neutral plugs on the RB20 box. Can anyone tell me why you need a neutral switch on a manual gearbox? The idle RPM doesn't change when its in or out of gear on a manual does it? We also need to figure out which of the two plugs goes to which on the gearbox, trial and error for that one due to spliced cables.

smugshot_1685285-L.jpg

Few pointers for anyone doing this conversion:

Clutch pedal:

I had an R33 clutch pedal which had a piece of metal tack welded around the threads creating a cylinder around them. I also had this same piece inverted and tack welded to my fire wall. We ground the piece off my pedal and left the one on my fire wall to allow for enough thread to pop out to the engine bay but as it turns out, this one was longer. So we ground it off the fire wall and left the original one from the pedal in place.

Gearbox cross member

The auto on the laurel has the cross member marked 'A'. The one I got on the R32 manual gearbox was marked 'C'. These look identical to me, and do not line up with the holes under the car. We elongated the holes on the cross member in order to fit 2/4 bolts on just to hold it in place until I can get a cross member marked 'B', which apparently lines up.

Auto out and manual in the back ground. You can see how the left of the cross member (even unbolted and hanging there) raises up higher then the right. The holes would line up if it was span around but because of this shape, this will not work.

smugshot_9555451-L.jpg

A and C:

smugshot_6379375-L.jpg

Speedo cable hooked up, cross member off:

smugshot_9191042-L.jpg

Elongated holes to hold for now.

smugshot_1662243-L.jpg

Electrical

I'm not 100% sure with this as I was given some wiring with my pedals/clutch and told I need it. This loom I was given basically consists of an 8 pin connecter at one end with an earth coming off the loom about 5 inches below, and at the other end just two 2 pin connectors. I also had a short, thick earth cable. Does the gearbox need to be earthed tot he chassis? The 2 pin connectors are for the reverse switch on the gearbox (assuming this turns my reverse lights on) and the neutral switch on the gearbox. The 8 pin at the other end (I haven't done this step yet so may be incorrect) is for one of the 4 connectors next to the fuse box behind the battery. It should only fit in one. Two will remain empty. One has two thicker wires coming from it (this connector was at the bottom of the group). I believe this is the park/neutral safety switch (ie a switch in the gearbox is engaged when the auto is in park or neutral, allowing the car to be started, and disengaged when not, disallowing the car to start). These wires must be cut and soldered together to simulate the switch being engaged 100% of the time (ie letting you start the car).

If you follow the loom from the auto box up, you need to unplug all the clips here except the thick white cable with blue stripes as it's not part of this loom.

smugshot_1276262-L.jpg

4 clips undone. The large one on the right with two wires is the one I bridged and will plug back in.

smugshot_1209190-L.jpg

Cut and twist:

smugshot_3846520-L.jpg

Solder and heat shrink/tape:

smugshot_1417590-L.jpg

RB20 gearbox. Yellow cables and connector is for reverse switch, far right black cables and white connector is neutral switch. These are the ones I'm not sure which of the two on the loom I have to connect up to. I'll just have to guess and test the reverse lights.

smugshot_5007568-L.jpg

Spigot bush

Not easy. My mate (mechanic) had his doubts about this step as his spigot bush pullers could not get a grip on the auto bush to pull it out. To make things harder, the auto one is thicker, deeper and made of steel, not brass like the manual one. I googled the problem and found 10x the amount of results as I could with a general manual conversion search. A lot of people suggested putting dry lube, grease, Plasticine, wet newspaper or even wet bread into the bush, and shoving a bolt or metal rod that juuuust tightly fits in, squashing your chosen material at the back and hydraulically forcing the spigot bush out. However many people found this didn't work on the auto as there is no room behind the bush for the material to get to and push from, if there was, a puller would do the trick. Others suggest drilling into it and basically smashing it. Click here for this method. We just hit it with a hammer around the edges to break up the joint a little and kept using the puller to get it out.

Drive shaft

I used a manual drive shaft from a HC33 Laurel for a perfect fit. I have read that the front half of a manual R32 can bolt to the rear half of your auto shaft at the uni joint.

So that's all for today. Tomorrow we will try to finish bleeding the clutch, start it up and mount the handbrake. Does anyone have any advice for this? Can't seem to find any marks on where to drill/weld. There is 3 dimples on top of the trans tunnel but the handbrake only has 2 mounts, and one is on an angle, to be mounted on the side of the trans tunnel. We found a 'flat' spot on the side but mounting it here looks like it is pushed too close to the gear shifter. Where does the cable go through the trans tunnel?

I also have a solid steering bush to put in, rear subframe slip on collars, boss kit for my wood grain Nardi and then to raid a half cut and hopefully get the rubber gear boot and interior pieces I need!

Any advice before tomorrow would be appreciated, if not, I'll be googling a lot tonight...

Tom.

Edited by Thomasino
Link to comment
Share on other sites

when i did my manual conversion i got the gearbox loom with it and it just plugged straight in no soldering required at all.

as for crossmember the standard auto crossmember fit up fine i believe.

you probably should have done the hand brake before the gear box. im not sure home much room is up there with the box in but you need to drill holes and put nut and bolt with big wide washers so you done pull the bolts out when you rip the hand brake up.

i believe when we did mine we had to cut the mounts off for the foot brake release then just slipped the manual hand brake up to the panel join and bolted it down.

Link to comment
Share on other sites

i tack weld a slide hammer on the spigot bush , carefully , works a treat! . i can't remember which Gearbox crossmember i use , but it fits perfect and bolts in the factory position , i think it was r33? . hope that helps :)

Link to comment
Share on other sites

Well, the car runs and spins the wheels in all gears, haven't driven it yet. I haven't used that loom yet, only put back in that safety switch I bridged. So no reverse lights and haven't seen any idle issues as we only had it running from cold to test the gearbox worked.

smugshot_9221826-L.jpg

Don't quite know what to do with this heap plus the gearbox. Is it worth selling or should I scrap metal it and hope to make some spare change from it? The gearbox is bloody heavy.

smugshot_2563369-L.jpg

Got my Nardi on. Still need to remove foot rest as it's a little chunky and gets in the way sometimes.

smugshot_1163513-L.jpg

Pretty bad photo but for anyone's reference, the markings for this part of the handbrake were on the chassis. We just drilled and ground our way through and then bolted it down.

smugshot_443755-L.jpg

And then guessed for the leaver. Once that back section was in it gives you the right length, it's just the angle. Going off photos that Danny sent me I had to guess a spot.

smugshot_2725085-L.jpg

We also put the GKTech slip on collars in yesterday.

Now have injectors and fuel rail out for a clean while changing the leaking seals. Hopefully sourcing some interior pieces and possibly cross member today.

Edited by Thomasino
Link to comment
Share on other sites

handbrake: find a written off r32( maybe r33?) and remove the h/b mount by drilling the spot welds out then weld bolt on trans tunnel

gearbox mount: a) bolt up the box x-member normally and make up adapter plates by drilling flat bar and using that to offset the difference bolting it up on to mount and to the box

b) mod the x-member by cutting the sides down so u can weld up some C Channel under it so both holes can bolt up to the body

Link to comment
Share on other sites

I'm thinking the current setup will hold for easy driving, ie wearing clutch in, getting the car home. Definitely won't be doing any clutch kicks, hard shifts or extended periods of driving. Getting a B cross member is a priority.

And Danny still no console but haven't gone to have a look at that half cut yet. I'll definitely let you know if I need one.

Link to comment
Share on other sites

Nice work mate.

Auto spiogot bushes are the worst!

I've got buddy club P1'S on my cefiro, 17 x9 +27 and they are flush with rear guards at 90mm ground clearance and (stock) rear camber arms set to max positive.

Same size on the front and with R33 LCA (so about 15mm more track each side) they poke around 10mm with 2.5 deg neg camber.

Anyway, the ones you posted (17x8 +22 and 9 +37) id expect to not quite sit flush with the guard, assuming cefiro and laurel guards have similar dimensions

Try the P1'S you have access too, see how they fit. They are a light wheel, lighter than my R33 GTR rims

Link to comment
Share on other sites

Got a cefiro gear surround in at the moment and no center console yet, I think Danny's gonna help me out though.

Got my B cross member in the mail today and it lines up perfectly.

486111_10152429337865392_1465043300_n-L.jpg

Now I need to find an intercooler pipe with a blow off valve attached, manual makes the no BOV flutter so much worse then the smooth power delivery in auto.

Link to comment
Share on other sites

Create an account or sign in to comment

You need to be a member in order to leave a comment

Create an account

Sign up for a new account in our community. It's easy!

Register a new account

Sign in

Already have an account? Sign in here.

Sign In Now
 Share


  • Similar Content

  • Latest Posts

    • From there, as the manual says....assembly is the reverse of disassembly, no tricks worth mentioning Much better (for me)
    • In my case, the standard wheel I had was in good condition but the buttons had more wear, so I swapped them across from the original wheel from the car. The plastic rear cover is held on by 4 tabs, and once the wiring is removed you can get access to 2 screws on each side the hold the buttons in From there I just swapped the wiring over. What was interesting is the standard style wheel is 2.0kg but the carbon fibre one is 50% heavier at 2.9kg. It even has a weight inside the wheel at the top to make up for some sort of imbalance in the design. weird
    • Once the airbag is off, to remove the steering wheel.... Undo the 2 plugs into the clock spring, and the horn connector from it's clip. Hit the 19mm nut with a rattle gun (preferably) or if you don't' have one, you probably want an assistant to hold the wheel in place while you use a breaker bar to undo the nut Then, screw the nut back on 3 turns, and pull the wheel sharply towards you. If that doesn't work hit it medium force with a rubber mallet on either side, or possible behind if you can get there. If that all fails (it shouldn't!) you might need a steering wheel puller
    • So, to next task....the carbon fibre steering wheel was either an expensive factory option or a chinesium special. Either way, I don't like either the flat bottom or thick ring style, so it had to go So...to remove the steering wheel.... First, disconnect battery negative and stomp on the brake pedal for a few seconds. Then, remove the small circular covers on each side of the wheel's rear surround to uncover the airbag clips. You need to push something like a flat bladed screw driver through, to push the steel clip inwards and pull the side of the airbag forward. Once you've done the easy side, same on the centre console side. You can see the tab you are shooting for circled in red Then, disconnect the horn spade connector and for the yellow airbag plug you need to get something small under the black locking tab to pop it out, then the connector releases......airbag is off  
    • @99RS4just wondering if you ever took photos of the footwell lighting / how you bypassed the controller, im keen to haver footwell lighting come on when I open the doors too   
×
×
  • Create New...