Jump to content
SAU Community

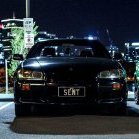
R34 Gtt For Sale 10K, Needs Work, Stacks Of Modds Nsw


Recommended Posts

I purchased this car as is about 6 months ago it was advertised for $21,000 have spent a few grand on it since owning it, selling at as is, driven as is daily since i bought it

The car has faults as listed

dented front bumper on bottom of it lh side

Lh fender ever slight graze

Worn steering wheel and shift knob

Tyres will need replacing

Exhaust blows some smoke, engine idles fine, no rattels or odd noises, doesnt over heat, but the motor is down on power as the head gasket needs replacing, used to make 300rwk now it feels like 170rwk__ rough guess...

Mods

Garrett GT30/28 turbo High mount Tune agent manifold TIAL external wastegate Custome 3.5" stainless dump pipe Stainless 3.5" Metal cat 3.5" exhaust into S&B N1 cannon GReddy front facing plennum Hypertune 90mm throttle body TIAL BOV Custom oil catch can Custom 4" aluminium induction piping Plazmaman intercooler Fabre 19-row oil cooler motorsport connections and braided lines Gates blue timing belt done about 6 months ago Walbro in tank fuel pump 800cc fuel rail with 800cc top feed injectors Speedflow fuel fittings SX fuel regulator ADAPTRONIC hardwired engine management M&W ignition coils Magnacore 10mm ignition leads Champion iridium plugs Adjustable castor rods Battery re-located to boot TurboX dual boost controller with interior switch

Drivetrain

new gearbox installed 2 months ago, jim Berry cushion race clutch TEIN hight djustable coil-overs with EDFC control ROH drift rims 18x8.5 front rear 18x9.5

Interior

TEIN EDFC unit 3x damper control GReddy turbo timer Dark black window tints Autometer cobalt guages Boost, oil temp and volts Blue LED dash lights 7" Kenwood in-dash DVD player running off kenwood hideaway unit and Alpine Vpower 5 channel amp 6.5" splits 12" kenwood sub running off seperlate kenwood amp in boot all TIC engineered for NSW

All work done prior to my purchase by Grim preformance.

intrested in swaps

http://carsales.mobi/cars/details/?R=13418940

Best method of contact is mob txt me 04232 12252

Link to comment
Share on other sites

Create an account or sign in to comment

You need to be a member in order to leave a comment

Create an account

Sign up for a new account in our community. It's easy!

Register a new account

Sign in

Already have an account? Sign in here.

Sign In Now
 Share


  • Similar Content

  • Latest Posts

    • People still have Skylines? I thought they're non-existent now. 
    • Harness update time have had great fun and learnt so much already so far with this project. I started off making both the ignition and injector sub harnesses in the hope any mistakes i made here aren't as hard to undo and learn from as the main harness.  A cool comparison of the old harness using presumably TXL wire and the new which is using Tezel. Also opted to use DTM plugs to keep the whole setup as neat and tidy as possible and tucked the wiring under the coil bracket to try and keep it all from sticking out too much. Although the injector harness, I'm not overly happy with as I'm still using the rubber boots that are supplied with the type of plugs it just looks ugly and sticks out like a sore thumb with the white identifiers so a slight redesign may be done.   Then it was main harness time and most importantly trying to route it nice and away from the heat it will use the OEM heater hose routing which is no longer present to keep the harness up high and secure. it's amazing how much smaller this harness is able to be compared to the old one. plugged everything into the emtron and with the help of the tuner again attempted to start it up and instantly fired up and running smoothly on all 6 which was a big shock to myself. So still some routing and adjusting to be done for the final fit up and installing a knock sensor harness plug which is in the post all has gone surprisingly well.     The old harness for shits and giggles.
    • They do that at random every now and then, with almost no detectable cause. Mine has done it a couple of times (over 25 years!!). Never worked out why.
    • I don't post on here and have been lurking for some time now. Many of the topics have helped me out more times than i can count. I was racing yesterday (11/9) and blew a front right CV shaft. I have spares so I popped a new one in. A thread i read previously said to check the engine mounts if you blow a front CV. Upon inspection, the front right mount was completely separated from the upper plate. This discovery saved me time and money, because i would have blown another CV if i went back out. Just wanted to thank you guys and wish everyone luck with with their builds. (Now if we could only come up with a solution for my power steering belt flying off after hitting the rev limiter, lol)
    • Either way he still need those style of spacer to go into the manifold because the photo he currently has is not going to work 
×
×
  • Create New...