Jump to content
SAU Community

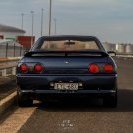
Shoota's R33 GT-R RB30/26


Recommended Posts

Been committing a fair bit of time in the shed lately. Doesn't seem like I've done much though.

Dialled in the cams. They were spot on recommended specs at 0 mark on the cam pulleys so that's re-assuring!

DSC_7337.jpg

DSC_7339.jpg

Stripped the front bar, intercooler, etc off. Putting new (old!) intercooler on plus all new pipes and hoses for intercooler from turbos to plenum.

DSC_7341.jpg

Had to remove the ABS module to be able to get the engine harness out. Wasn't happy about having to do that but ah well!

DSC_7344.jpg

I felt I'd done enough to deserve this sticker....

DSC_7346.jpg

Dropped the trans out to replace with a rebuilt (cryogenically hardened gears allegedly) gearbox-

DSC_7347.jpg

  • Like 1
Link to comment
Share on other sites

This has been one of my favourite builds on SAU for a long time (that's because it's been going for a long time :P) mate. Good to see it getting towards the good end of the build that's for sure. Keep up the updates, can't wait to see it finished

Edited by iruvyouskyrine
Link to comment
Share on other sites

Started stripping the wiring loom to rewire it for the new ECU plugs and to add the additional sensors. With the terminals backed out oof the ECU connector it looks a bit like Medusa's hair do! Unfortunately the terminals are different in the new plugs (Deutsch style) so I'll have to chop them all off and re-crimp on the new ones. I want to try and neaten the wiring up a bit but can't really see a way to do it. I'll run a few wires inside the guards but most will just stay as they are.

DSC_7352.jpg

Ripped the transfer case off the gearbox and was going to just give it a wash and bolt it on to the new tranny but thought "nah, I'll f#$k my brain even more and rebuild the transfer case while I'm at it. In hind sight it was bloody lucky!

DSC_7376.jpg

This is the reason why, when I separated the cases this fell out of the bottom-

DSC_7373.jpg

Which when I pulled it all down resulted in this-

DSC_7377.jpg

Potentially it was gunna go boom at some point!

It was well and truly due for a rebuild (gravelly bearings, blocked filter, bloody filthy etc) so glad I decided to do it now.

DSC_7379.jpg

It took me a good half a day to clean everything up to be ready to be reassembled but she's good to go once the new bearings and seals arrive. I'll be playing around with the plates as well to do the "transfer case mod" as it's known. I've got a spare set of discs (and a chain luckily!) so hopefully that makes a nice difference.

DSC_7395.jpg

  • Like 1
Link to comment
Share on other sites

This has been one of my favourite builds on SAU for a long time (that's because it's been going for a long time :P) mate. Good to see it getting towards the good end of the build that's for sure. Keep up the updates, can't wait to see it finished

Thanks for the very kind words. Yeah it's been a bloody drawn out process I know! Getting pretty close now so it'll all be worth it soon (I hope!!).

I will be pooping washers when it comes time to hit the key for the first time!

Link to comment
Share on other sites

Finally sorted out my turbo oil drains. Was a pain in the arse to get right. I wanted to have both drains going back in to the main oil return but it was just too hard. I ended up using one of the extra AN fittings I had welded onto the sump. I recommend anyone doing an RB30 conversion to do the same. It turned out fairly neat in the end. My poor AN fittings got a bit scuffed from having to remove them a few times.

Almost worked like this but sat a tiny bit too low and hit the drive shaft-

DSC_7411.jpg

DSC_7412.jpg

I tried a 45 degree angle but that then lined everything up with the exhaust so back to the drawing board!

Ended up like this with individual drains. All flows nicely now with good angles, still had to angle everything to keep it away from exhaust and other components-

DSC_7414.jpg

DSC_7415.jpg

DSC_7416.jpg

DSC_7418.jpg

  • Like 1
Link to comment
Share on other sites

Ripped the K-frame out so I can install the engine and tranny from underneath. There's so many things that need painting or cleaning but I'm trying to get it done rather than this turning into a full restoration at the same time. I know I should but I want to get it up and running and if I can be bothered going back later for a resto then great! I learnt on a previous Datto Ute (not my current one) that if you get too deep sometimes you can get so far into it you feel like you're drowning and give up. I'm still painting heaps of stuff don't get me wrong but stopping short of going the whole hog. Some things I'm just doing a quick blow over with some paint to tidy up for now which is a bit rough but meh!

Anyway, a few picks of the car sans K-Frame and front hubs-

DSC_7438.jpg

DSC_7441.jpg

DSC_7444.jpg

DSC_7446.jpg

Link to comment
Share on other sites

I thought I'd do something a bit different this post and do a quick video update instead of photos. I did the video unscripted and pretty late last night so hopefully I don't sound like a complete nuffy!

One thing I discovered is I really hate the sound of my voice!

Anyway, see what you think. If general consensus is that it's shit then I promise to never do it again!


  • Like 3
Link to comment
Share on other sites

Thanks guys. I'll post up another vid once I've done enough to justify it...

As per the video I fit the cam sensor component of my trigger setup (1/2 Hi Octane, 1/2 Ross.

Also fit the balancer for the first time.  I'm leaving off all of covers so I can check for leaks and make sure the cam belt is all fine once it's up and running  

DSC_7475.jpg

DSC_7477.jpg


As a side note, below is a list of all of the bearings required for a transfer case rebuild.  Ignore the last bearing on the list as that's the A/C tensioner pulley bearing that I pressed out and replaced ($7.60 instead of $160 to replace the whole pulley...) 

In addition to the bearings every seal in the transfer case came to about $130 (genuine). So all up around $200 in seals and bearings to reco it.  I'll be reusing the clutch plates and adding some spares I have to change the friction/driven plate combo.  Obviously it would add extra $$ to replace those too.

DSC_7482.jpg

Farken wiring...

DSC_7471.jpg


Link to comment
Share on other sites

Coming together nicely mate. Those braided lines are definitely a pain to make sure no exhaust components or intake pipes get in the way. I did it with engine in and took ages to get the right lengths.

Definitely jealous of that shed/workshop setup you have.

Link to comment
Share on other sites

9 hours ago, Nismo 3.2ish said:

Looks like you dropped a plate of rainbow spaghetti , lol

Any ideas when you could be turning the key , motors looking mad

Thanks Pete, mate I wish I knew when it would be, it's starting to hurt not driving it!  I've got a few days off next week that is purely for working on the car. We'll see how true that is... I've tried before and always seem to get roped into looking after the kids instead...

Link to comment
Share on other sites

7 hours ago, breaker1845 said:

Coming together nicely mate. Those braided lines are definitely a pain to make sure no exhaust components or intake pipes get in the way. I did it with engine in and took ages to get the right lengths.

Definitely jealous of that shed/workshop setup you have.

Thanks! Yeah the turbo hoses are a pain but so much nicer to look at than the crappy hard lines. Definitely a job I'm glad I did out of the car, props to you for doing it in the car!

My shed is my palace, I love it! It's a bloody mess cause I'm a bit of a hoarder but it's so much better than working in a garage where it all started.  

Link to comment
Share on other sites

6 hours ago, Shoota_77 said:

Thanks Pete, mate I wish I knew when it would be, it's starting to hurt not driving it!  I've got a few days off next week that is purely for working on the car. We'll see how true that is... I've tried before and always seem to get roped into looking after the kids instead...

you might have to tie it in a knot for a few years and wait for the young ones to grow a bit so you can get the serious stuff done in the shed, lol

Understand your frustration but at least it is under your control, when there is a builder in control and BS ing to you, it seems worse :(

But mate, it is going to be one of the great builds . Busting to see yours and Paul's on the road again.

I know I do not know much about mods but I believe mine turned out OK in the end and exactly what I was after :1311_thumbsup_tone2:

Link to comment
Share on other sites

3 hours ago, Nismo 3.2ish said:

you might have to tie it in a knot for a few years and wait for the young ones to grow a bit so you can get the serious stuff done in the shed, lol

Understand your frustration but at least it is under your control, when there is a builder in control and BS ing to you, it seems worse

But mate, it is going to be one of the great builds . Busting to see yours and Paul's on the road again.

I know I do not know much about mods but I believe mine turned out OK in the end and exactly what I was after

I've already got the doc to whack a knot in it a few months ago so I can run around the paddock without any mishaps!

You definitely had a bad trot mate but at least you had someone to blame. When mine f**ks up I've got no one to blame but myself! 100% accountability!

Mine is far from a great build mate but hopefully showing some the basic stuff I'm doing (which no doubt bores the more advanced readers) helps motivate people to have a go at it themselves.  It's amazing what can be achieved by just having a crack!  Start on small stuff and grow as your skills and importantly confidence improve. 

Link to comment
Share on other sites

Create an account or sign in to comment

You need to be a member in order to leave a comment

Create an account

Sign up for a new account in our community. It's easy!

Register a new account

Sign in

Already have an account? Sign in here.

Sign In Now


×
×
  • Create New...