Jump to content
SAU Community

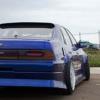
Cefiro #3 - Can't Stay Away


konect
 Share

Recommended Posts

Been a while since I updated this...

Still haven't got the vibration fixed for a variety of reasons but expect to be able to take it in late June. I've spent the time doing a few other bits and pieces on the car.

While chasing vibration issues I noticed one wheel had a lot of movement for I bought new tension rods for the rear. Stock ones were gone and it's much stiffer now.

IMAG0707_zpsdd694bd0.jpg

Finished carpeting over the metal sheet in the back and blocking the boot off from the interior. So much quieter now!

IMAG0722_zpsa6261d39.jpg

When I was tidying up the wiring in the back I noticed there was a heap of sandy gravel in the wheel arch. Upon inspection I found that when the arch was flared they never sealed it up. The passenger side has been fibreglassed at some point but the drivers was wide open. Welded some patches on it, bogged with metal reinforced filler, covered with tar coating.

IMAG0595_zpsae7b254e.jpg

IMAG0596_zps9a4123f5.jpg

IMAG0597_zps64f87a3a.jpg

The car never had an overflow from the header tank when I got it so I finally went to pick-a-part and found a radiator overflow I liked the shape of and would fit in the space I had. Think it came out of an Excel or something. Welded up a bracket for it to slide on to and got some silicon line. Working nicely now and doesn't spew out on the ground like it used to!

IMAG0549_zps0a0daf71.jpg

From November to March I was dealing with GKTech and their tie rod ends. Many dramas and I eventually got them to agree that they actually needed to provide jam nuts for them. I received jam nuts but I know a few people that haven't. Don't buy these - there are a danger without jam nuts and a pretty crap design all round. Also got some new Hardrace tie rods with lock spacers built in at the same time but had to trim them a bit to get the tie rod ends to fit with them.

IMAG0712_zps21f64e81.jpg

Got a footrest and new climate control unit as the old one was busted and stuck on full fan and heat. This was a highlight of the last few months. You can imagine how much it sucks driving with the heater on full all the time.

Painted the drivers rear arch and welded up the crack in the passenger side front arch. The front one cracked the weld on the flare from bottoming out when we blew a strut driving it home from QLD. Came up alright for a spray can job!

IMAG0730_zpsc6b48d23.jpg

IMAG0729_zpsdf381639.jpg

Took the car for a spin, pulled into the servo and noticed the front brake line leaking. Got braided lines. The front ones are really long but looks like they need to be in order to have enough length at full lock. Bit too close to the sway bar for my liking but apparently normal...

IMAG0710_zpsa91d1bc8.jpg

Just this week while the car is on jackstands after doing the braided lines I put new steering rack bushes in. Passenger side took about 1 min. Drivers side took about 1 hour and a lot of swearing.

IMAG0726_zpsafed7ce9.jpg

And now we are here....

Coming up in the next few months:

  • Replace more bushes front and rear (I'm a bit addicted to this at the moment as they are so cheap!)
  • Get a wheel alignment to correct everything
  • Get vibration investigated
  • Get a tune
  • Drive it somewhere
Edited by konect
Link to comment
Share on other sites

  • Replies 47
  • Created
  • Last Reply

Top Posters In This Topic

Top Posters In This Topic

Posted Images

  • 1 month later...

A month since my last post. No pics this time. Drove the car tonight after bleeding the brakes and it felt like crap...hopefully wheel alignment fixes it then its off to the tailshaft shop!

Items completed:

  • New ball joints all round
  • New front and rear LCA bushes (I will never do this job again!)
  • New front sway bar bushes
  • Bled the brakes (still a bit squishy)

Activities coming up:

  • Wheel alignment tomorrow morning - should be interesting as I haven't had once since replacing the arms/bushes.
  • Tailshaft inspection in 3 weeks time!
Link to comment
Share on other sites

  • 1 month later...

The cefiro woes continue. Tailshaft is all good and I was super excited. Put a second hand 2 way in and now it has this stupid vibration under load which I suspect is something to do with the clutch plates in the diff. Had it inspected and they couldn't find anything wrong with it.

Put the diff back in the car today and still rattling and rolling.

Upcoming excitement:

  • Run break in, change to a different oil on diff, if it still vibrates, put stock diff back in and test
  • Tune booked for next Thursday
  • Get new tyres
  • Hopefully get a spot for EXE Winton day 12 October and finally use the car after 2 years of owning it!!
Link to comment
Share on other sites

  • 2 weeks later...

Update time!

So it's been an eventful couple of weeks. I took the diff in to be inspected and they pulled it all down and said there was nothing wrong with it. I got them to put some axle seals in while it was there. $300 later and I was no better off...

I put the stock diff back in to give it a test and it started doing the same banging/vibration it had done with the 2way! I established that it felt like it was the centre bearing (on the brand new tailshaft) so checked it out and boom - massive split through the middle of the rubber. It had only done about 1 hr of driving!!

Took it back to the tailshaft place and after some discussions about soft vs hard centre bearings they put in a Nissan one. I refitted to the car and wouldn't you know...no issues :)

I kept the stock diff in there for the tune just to be safe. Got it tuned last week and made ~220rwkw which wasn't too bad. Gained quite a bit of midrange. The Red line is the original tune, Orange is Trent's tune. Only issue was the VH41 AFM is no good at idle as its too big so its a bit rough now but will be upgrading to a z32 or 35GTR AFM when I get a new turbo kit.

One the weekend I refitted the 2way, swapped a new driveshaft in on the passenger side as it was leaking, test drove and NO VIBRATIONS!

After 2 years I can finally use the car :closedeyes:

DynoChart_zps45bfe74f.jpg

cefiroDyno_zpsd8cb2076.jpg

Link to comment
Share on other sites

Create an account or sign in to comment

You need to be a member in order to leave a comment

Create an account

Sign up for a new account in our community. It's easy!

Register a new account

Sign in

Already have an account? Sign in here.

Sign In Now
 Share


  • Similar Content

  • Latest Posts

    • From what I've seen and experienced first hand with those powder extinguishers, they're good to use to break a window and escape the car, and half the time then do f**k all to stop a fire. You just need much more than 1KG worth of powder. Not to mention, half the time it's an engine bay fire, and you can't easily, and do not want to completely open the bonnet, so you're left pretending to be an American Infantry... Spray and Pray baby!   And then 100% that shit is really destructive afterwards!   Realistically, those little ones at a race track might help you keep the fire from growing and give the fire marshal / truck a chance to actually get to you with their multiple large bottles.   For a road car, these days, prepare to deboard as quickly as humanly possible, and move to safety. Allow insurance to fix replace it (unless it's like a rare classic etc, then do nearly everything possible to save it!) Keep the little extinguisher with you to help protect other things around you from burning while you stand there singing "How can we sleep while our beds are burning?"   Secondly, powder extinguishers I freaking hate for indoor use, (this isn't really relevant to a car) as you will get a powder fog around you, and it can be disorientating.   When I did fire training when at BlueScope Steel, they have (had?) their own fire brigade on site. We did all the training, and at the end we were told, "If it's an indoor fire, and you need to use a powder extinguisher, we as the fire brigade would rather you just exit the building, you're more likely to get lost in the smoke and powder fog than do much help, so just GTFO" And pretty much that was what they said for most other fires too, grab extinguisher, if it's much more than paper in a bin fire, use extinguisher to get you and others out of the building to safety...   Part of me wishes when my Skyline caught alight many moons ago, I let insurance sort it out, instead of putting the fire out... part of me now says "But I've saved a classic before it was a classic!"
    • Hi all,  I have a older model of the Greddy Front facing intake on an RB25DET NEO Head. I've bought aeroflows fuel rail and injector kit (1000cc Bosche injectors) and I'm unsure if the fitment is correct. The injector o-rings fit in the intake hole but it's not snug. I can very easily rotate the injectors even when the fuel rail is mounted. The kit also came with multiple adaptors, they dont make it any more snug and using them raises the injectors up and i cant mount the fuel rail. I hope this makes sense I've asses a few photos.    Thanks so much guys. 
    • So, to run the 4g aerials to the booster, I had to get access to the rear bulkhead....bit of a mission. Hot tip, don't offer to help change the rear shocks for a mate with a v37.... Remove seat base, 2 clips that slide forward to release it the it lifts straight out Fold down rear seat (pull in from boot) The side bolster of the rear seat is not connected to the middle parts that fold. To remove unbolt at the bottom bolt then push it up off the top hook Then there is a plastic surround behind the seat back, 2 pop out clips, 2 bastard clips, some swearing at it is out Pop the rear seat latch surround off Remove door surround lower trim then side trim  Remove c pillar trim - 4 clips, pull inwards not forwards Remove metal brace - 5 bolts 1 nut Then you have got to the rear strut top...what a pain!
    • If you really want squish back, you can have it put on the piston (at least to some extent).
    • Impressive. He's very very smooth.
×
×
  • Create New...