
What Have You Done To Your V-Series Today?

Announcements
-
Similar Content
-
-
Latest Posts
-

By soviet_merlin · Posted
So, how do you feel about the Frenchys surge tank setup @Duncan? Have you had a chance to try it out more? The sketchy wiring in my fuel pump setup has decided to melt and die and I'm looking for a solid replacement now. My fuel hat is toast so the Frenchys kits providing it all look promising. -

By PotatoCake · Posted
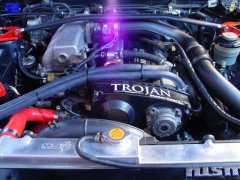
Yeh... literally every time i jump on a forum, see an instagram post or see an engine bay at a car show, i get an idea and add it to my 'to do' list. So what started off as, hey can u just make a couple of intake hard pipes because my dumbass bought the wrong apexi kit, blew out into a 2 week job including braided brake lines & custom bash kit for the front lip haha. Getting Luke from A4E engineering to make a full custom exhaust with a controllable aes dump valve so i can actually switch between quiet and loud, because right now its just loud all day every day. Then after that go and get the tune redone flex e85 & 98 as i get bugger all milage from e85, makes going for longer drivers difficult -
 Car looks clean as. You ended up getting quite a bit done 😂 So what's the plan for the exhaust?
 -
 The only Neo rods that were any different to any other RB25 rods were the DET ones, and they were the same as RB26. Here is a Neo DET rod. O5U part number visible. Here is a post in a thread here on SAU with evidence from someone who has done this before. There are photos in the thread of normal RB25 rods.
 -

By joshuaho96 · Posted
Sure, but why assume that will be the case forever? And why assume you'll be able to do an oil change to swap back to a stock drain bolt before that happens? And does it even matter when I change the oil at fairly short intervals? Life can be funny sometimes and unexpected things can happen. Like breaking a collarbone so you can't do any work on your car for a few months but the oil change is due so you have to take it to somewhere and hope they don't do something stupid like stacking the new drain plug washer on top of the old one.
-


Recommended Posts
Create an account or sign in to comment
You need to be a member in order to leave a comment
Create an account
Sign up for a new account in our community. It's easy!
Register a new accountSign in
Already have an account? Sign in here.
Sign In Now