Jump to content
SAU Community

Recommended Posts

Quick shift -

Shifting that is lightning fast, but also secure. By changing the structure and materials of the installation point, and by a change in the fulcrum position (lever ratio), a dramatically more solid feeling shift change was achieved, with a 25% shorter stroke and much faster shifting.

Short shift -

The Nismo Solid Shifter has been developed to provide a 7.5mm lower shift knob height and increase the hardness of the rubber shift lever. This provides 10% shorter shift distance and less deflection for a more solid confident shift.
  • Like 1

The one i got apparently doesn't. The angle of the shifter is the exactly the same when i compared them. It it just slightly shorter and is solid.
I did lots of reading up on the nismo one to make sure it wouldn't be detrimental to the synchronicity of my gearboxes internal components.
It was the reason I got it over one of the aftermarket short shifter kits. It also came with a new shifter bushing already on it which i liked because i hate changing those things.

To do list:

Put dash in

Paint shiz

Clean shiz

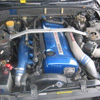
Tidy engine bay (wire tuck, and possibly some paint.)

Install all new braided hoses...

New to buy list:

Nismo rear view cover (new) $220

Nismo leather seat cover set (new) $1500

OEM gearstick/Handbrake boots (new) $100 ish

Possibly Nismo Strut brace....(still contemplating a mines strut brace $1500)

Nismo floor mats (new) $230

4 more bee*R stickers for my wheels $20

and still going...

=$3570.... Start saving. Sigh

  • Like 1

To do list:

Put dash in

Paint shiz

Clean shiz

Tidy engine bay (wire tuck, and possibly some paint.)

Install all new braided hoses...

New to buy list:

Nismo rear view cover (new) $220

Nismo leather seat cover set (new) $1500

OEM gearstick/Handbrake boots (new) $100 ish

Possibly Nismo Strut brace....(still contemplating a mines strut brace $1500)

Nismo floor mats (new) $230

4 more bee*R stickers for my wheels $20

and still going...

=$3570.... Start saving. Sigh

How you can justify 1500 on seat covers I'll never know haha :unsure:

How you can justify 1500 on seat covers I'll never know haha :unsure:

http://www.nengun.com/nismo/skyline-gtr-r32-seat-covers

they are oh so much more!

Honeslty i don't care about cost on the GTR. I want to get it to the best it can be. So i chip away bit by bit. After all it's only money.

Also that isn't including the bran new interior bits i plan to buy at like $140-$200 each. Center console surround has screw holes in it from previous owner mounting a gauge there. $170 for new one without the holes. =\

Yep. Nengun have slower sending times and more in freight. But a good site none the less.

I don't know why Justjap make it so difficult.

Also check:

RhdJapan.com for new OEM products.

  • Like 1

I just bought new lmgt4 centre caps and replacement nismo stickers for them from RHD japan.
Awesome site to navigate. Way too much stuff I want on there though.

Also got new hoses for all my IC pipes, fitted up the turn flow, ready to start it tomorrow and move it into my old mans garage when he goes away for the weekend on a club run so i'll change my turbo.

post-88452-0-58301700-1384411945_thumb.jpg

Edited by azathoth

http://www.nengun.com/nismo/skyline-gtr-r32-seat-covers

they are oh so much more!

Honeslty i don't care about cost on the GTR. I want to get it to the best it can be. So i chip away bit by bit. After all it's only money.

haaaawt.

so much want.

So, I got the bad news today that my ViPec needs to be sent to WA to be repaired and could take 4 plus weeks.

This puts me in a sticky situation as I need a car for work... and tmw.

Sooo, I jumped on the interwebs and sourced a shittah to run around in. Took about 2.5mins to

find this beauty... a 1996 Beep Beep Barina in Goulburn for..... $600 with 5 weeks rego.

IMG_1719_zps8993e23b.jpg

Was totaly winning and drove home (the guy who owned it works in Canberra so gave me a lift from QBN to Goulburn)

Until..... I hit a goddam Kangaroo.

Oh the humanity.. Beep Beep Booooop.

Create an account or sign in to comment

You need to be a member in order to leave a comment

Create an account

Sign up for a new account in our community. It's easy!

Register a new account

Sign in

Already have an account? Sign in here.

Sign In Now


  • Similar Content

  • Latest Posts

    • As GTS mentioned, it takes a bit of faffing, some fiddling and a little modifying.  With the strainers, you can buy different styles. Some sit flat on the pump, some angle down.  Here are some photos of mine, ignore the ugly welds lol. 
    • The smart thing is to actually locate the pump at the right point down the hanger, so that the strainer can stay sticking out at a right angle, but near the bottom. This is the perpetual hassle with retrofitting any different pump to the factory hanger. Some just go where you need it to, some need fiddling and faffing, and modifying of stuff.
    • Some updates. After a lot of praying and some inspecting of crank threads, we've found that they were both kinda munted but nothing seemed terminal. The other option was drilling and helicoiling the crank. That is obviously the last option so we decided to at least try to get a OEM GM bolt in to GM Specs. So after honing/linishing the balancer from it's .002" interference fit to a .0018" to .0015" to .0013" it eventually slotted on to the crank. ATI state the interference is nominally 0.0007-0.0009... so it's still snugger than ATI reckon and explains the issues we had to fit the thing to begin with. New GM bolt went in at 37 ft/lb then torqued 140 degrees after which was EXTREMELY   but it tightened up to 140 degrees and it was a lot of force. So all things considered, the balancer is secured to the exact specs that GM want with the OEM Stretch bolt, (that ATI say you can use..) and the balancer itself is seated and snug AF. So WOO. Engine is now back in the car with lots of swearing. Bellhousing bolts done up, driver side manifold is on, AC Compressor and hard lines are back on the car. Next step will be to connect various engine bits/wiring/intake/radiator etc. Then oil and coolant and ... test start it? And of course, looking into this issue... which actually doesn't look so bad - It looks like it can be twisted back into shape with a set of multigrips. Anyone wanna buy my bonnet? Boy it looks good over there and sunk cost sucks.
    • Also this may be a stupid question, but how would you recommend getting the strainer on a downwards angle ? as they tend to obviously clip to the bottom of the pump which usually sits level 🥴
×
×
  • Create New...