Jump to content
SAU Community

Recommended Posts

Sprayed some black touch ups, and some gold pearl on the black bits. (mirrors, bumper lip)

Its black in the shade and gold bling in the sun. :happy:

My respirator filters were a bit old and didnt work too well. Nasty stuff, i dont feel too good. :sick:

So i decided rather than buy new filters everytime i want to spray something, ill make a constant air supply mask.

Easy, all i need is some small ducting, and i have everything else to make it.

Acrylic.

Gotta wait for it to cure.

If i knew how to set up the shed for 2 pack before i did it, maybe i would have gone 2 pack.

Not keen to ever strip it back to metal again, so any re-sprays will be acrylic.

If i ever get another one ill go 2 pack for sure.

Acrylic.

Gotta wait for it to cure.

If i knew how to set up the shed for 2 pack before i did it, maybe i would have gone 2 pack.

Not keen to ever strip it back to metal again, so any re-sprays will be acrylic.

If i ever get another one ill go 2 pack for sure.

acrylic is HEAPS easier to paint with for a beginner. Much easier to fix issues. Can't wait to see the final product. How long now mik?

Breathing is highly overrated. :laugh:

Black / Goldish and Green looks Awesome in my mind, I'm sure it's going to end up better in reality.

Can't wait.

Tweaked the door latch striker plate dealies on the Wagz this arvo and got all 4 doors to sit flush when closed.

Much Better. :D

acrylic is HEAPS easier to paint with for a beginner. Much easier to fix issues. Can't wait to see the final product. How long now mik?

3 or 4 weeks

Maybe ill start rubbing it in 3 weeks and finish buffing by 4 weeks.

Dont want to wait at all but thats the way it goes.

And yeah, i got a couple of runs in the colour, they were easily fixed. No runs in the clear.

Being a commercial painter helps, using the gun is only a little different to a brush, a steady and precise action.

Thats actually black, only shines gold in the sun. Gold ghost pearl.

I couldnt do a large area with pearl, as its very tricky to make it even, only the pros can do a whole car with ghost pearl in the clear.

Want to buff it but i cant.... :/ Gotta wait.

Edited by D.I.Y. Mik

Still sitting on Jez's dyno at the moment.. Been a fairly long day. First issue was fuel pressure. Pump only had 10v. So we wired that straight to the battery on a relay to fix it. Still had issues. Pulled it out.. The whole mesh filter on the Bosch 040 was blocked with crap. We grabbed a walbro pump and threw it in to fix that. Huzzah fuel pressure!

Then came the misfire. Put splitfires in and fixed that.

No misfire but it still made no power. No variable can timing. We just found out the vct valve was faulty. Replaced that and variable timing is back! Will update later!

Edited by dontyellpl0x

Want to buff it but i cant.... :/ Gotta wait.

Can't wait but gotta... Lovin' the colour combo. ;)

Will update later!

Good that you're ironing out some serious issues, unfortunate but it'll be worth it!

Interesting you didn't already have split fires.

or OEM coils like I got. :D

(you shoulda got some when I posted up the Ebay link months ago Chris as they have more than doubled in price now) :O

Today I washed the Micra, washed the Wagz, then went Nutz and Polished / Buffed it and gave it the mad Sprucing it so surely deserves including a good clean of the doorjambs and whitening the "NISSAN" on the mudflaps. :D

Will get pics in the light of day tomorrow.

Finally home!

Haha it's always the way. Interesting you didn't already have split fires. They are high on my list of mods.


Can't wait to see the final figure, make sure to get a dyno graph.

Yeah if there was something wrong with my oem coilpacks I would have upgraded. Jez said I wouldn't have known they were crap because they are normally fine for stock-12ish psi and anything above that they start to struggle just because they're getting old.

Good that you're ironing out some serious issues, unfortunate but it'll be worth it!


or OEM coils like I got. :D
(you shoulda got some when I posted up the Ebay link months ago Chris as they have more than doubled in price now) :O

Yeah lots of small issues but worth it to have them fixed..

Haha if only!

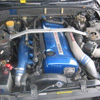
Anyway after throwing in another vct valve it fixed that issue. Although now there was another restriction... It was making 212kw @ 14psi and only 220kw @ 18psi... Dropped the cat and hello 254kw! So we had to do a sneaky and break the catco cat. Anyway after Jez did some more tuning I ended up with 231kw @ 14psi and 245kw @ 18psi.

I'm a little disappointed that the extra 4psi didn't do a lot but Jez said whenever he tried to add any timing it was just detonating.. :( He said he's never seen such a sensitive engine haha..

Oh well, 245 is plenty to play with and I can turn it down to 14psi at the track to keep it safe. Feels pretty great so far! :woot::D

post-109116-0-12723100-1400941353_thumb.jpg

Edited by dontyellpl0x
  • Like 2

Great Results Chris! Good on ya. :thumbsup:

Must be a huge difference in drivability and Wow.

Sounds like your engine has some mysteries like mine. :/

Did Jez say anything about acting as if higher compression than normal?

Mine made Trojan John & Jake think this.

Stoked for you. :woot:

Great Results Chris! Good on ya. :thumbsup:

Must be a huge difference in drivability and Wow.

Sounds like your engine has some mysteries like mine. :/

Did Jez say anything about acting as if higher compression than normal?

Mine made Trojan John & Jake think this.

Stoked for you. :woot:

Yeah it's different to drive alright! Great changes seem to come up so quickly haha

Yeah said he didn't really know why. Almost like it had 95 octane in it or something. But I've only ever used 98 and had just filled up with v power from a shell servo earlier that day. So yep.. it's a mystery :(

Time for a new exhaust.

What's on there now?

Generic 3" dump/front bellmouth to catco 3" "cat" ( ;) ) and then a hks high power cat back

Create an account or sign in to comment

You need to be a member in order to leave a comment

Create an account

Sign up for a new account in our community. It's easy!

Register a new account

Sign in

Already have an account? Sign in here.

Sign In Now


  • Similar Content

  • Latest Posts

    • I believe there was a similar one posted by @duggyphresh. They were re-routing their battery positive cable in the way I am also trying to achieve. Sorry, I’m new to this forum, so was a bit late to the party by a few months and so reignited the old thread, as I wanted to know how they got on with doing it.
    • Wasn't there a thread on this very subject just a few weeks ago?
    • Hi all! Looking to relocate the battery to the trunk of an R34 GTT. I want to do it using as many stock GTR components as I can (including the harness protectors from the 34 GTR that run underneath along the chassis to the engine bay). So far I’ve purchased the battery tray from a 33 GTR, as the captive weld nuts are already there just asking to be used. There is also the slight issue of now having to relocate the ABS/TC/Fuel Pump Control ECU, which in GTT’s sits right above where the battery will then sit on the tray. Has anyone already achieved this, and if you have any pics that you wouldn’t mind sharing? It would be great to see how others have done it and where you put them, as there are countless holes in the parcel shelf panel to potentially use. Just trying to get some ideas bounced around, and to help uncover any potential problems I may encounter by  my choice of location. TIA for any help!
    • Brand was ard.   I also threw a brand new battery at it and beefed up the wire from the alternator to battery and added an extra earthing point from the battery 
    • Evening all,       I'm replacing some bolts on my RB25 with probolt Australia bolts.       Does anyone know the following, m5 m6 etc 10mm 20mm etc       Coil cover   Cam covers   Plazamaman fuel rail   Front cover (timing cover)   Etc   Any help would be awesome   Or any lists anywhere
×
×
  • Create New...