Jump to content
SAU Community

Recommended Posts

Hey everyone,

Bought myself a "dash cam", It's a small camera that is quite nicely hidden behind the rear view mirror to capture the drive ahead.

The problem i have is that i can't think of a good way to make the power cable for it tidy and out of site, The cable just goes to from Mini USB to the cigarette lighter.

Is there anyone that has an idea of how i could do this? Possibly running the cable along or under trim to get towards the cigarette lighter?

Had a look to see if anyone has written up anything about it before with no luck, Any help would be great!

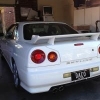
Car is a 2000 R34GTT Coupe, as a note if it helps... it has a stock sunroof and the stock triple gauge cluster above the A/C.

I tucked mine under the head liner and then in the A pillar trim then between the dash and door seal, then behind the glove box to the cig lighter. I'm planning on wiring a new lighter port in behind the dash to plug it into.

I tucked mine under the head liner and then in the A pillar trim then between the dash and door seal, then behind the glove box to the cig lighter. I'm planning on wiring a new lighter port in behind the dash to plug it into.

Yeah i think that will be my first option, if i can tuck the wires neatly enough under the head liner and trim i'll just leave it like that.

Does the wire stay under the head liner without any adhesives or clips/ties?

Generally it'll stay in the liner if you give it a good tuck in the wedges, did this for my gps in my old car and was stuck in forever.

I've been looking for a dash cam too, mind linking me the one you got?

Got a GS1000 model off ebay.

Exact one i bought: http://www.ebay.com.au/itm/GS1000-Camera-Car-DVR-HD-1080P-30FPS-Built-in-GPS-G-sensor-IR-LED-Night-Visin-/251128301500?pt=LH_DefaultDomain_0&hash=item3a7869c7bc&_uhb=1#ht_6727wt_1148

Full HD 1080p 30fps, read a lot on the Whirpool forums about it. (good camera thats better than the cheaper entry level ones)

Whirlpool Thread http://forums.whirlpool.net.au/archive/1952995

Website with a shitload of good reviews and examples http://dashcamtalk.com

Hey everyone,

Bought myself a "dash cam", It's a small camera that is quite nicely hidden behind the rear view mirror to capture the drive ahead.

The problem i have is that i can't think of a good way to make the power cable for it tidy and out of site, The cable just goes to from Mini USB to the cigarette lighter.

Is there anyone that has an idea of how i could do this? Possibly running the cable along or under trim to get towards the cigarette lighter?

Had a look to see if anyone has written up anything about it before with no luck, Any help would be great!

Car is a 2000 R34GTT Coupe, as a note if it helps... it has a stock sunroof and the stock triple gauge cluster above the A/C.

Easy

Pull the screws out of sun visor hold clip

Pull screws out of visor

Now the headliner will be loose enough to push wires under from the front but use a tiny bit of duct tape or gaffer tape to tape down under headliner away from copper tube in front of the sunroof ( its a roof heater to keep ice off sunroof and flinging it off at speed do not break open or drill thru it)the tape will keep wires from walking around under your screws too , so you dont screw thru wires

Undo the a pillar molding -gentle!!!! Or you will break it or clips

slide loose from door arch trim

Remove the rubber around front of door on car

Now you have a path for the wiring down to fuse box or to cig lighter

you can hardwire to switched 12v with a 1 amp fuse you just need to figure out polarity of the factory cig plug , unscrew it and trace the fuse solder joint Note which wire it is , marked or not

The fuse wire is positive

The twin metal tabs ground

You're a legend Troy! that's exactly what i was looking for actually, i never knew about that copper pipe! very interesting.

With the pillar moulding, It's just clipped in and has no screws? So i just need to be careful when prying it away?

Cheers

You're a legend Troy! that's exactly what i was looking for actually, i never knew about that copper pipe! very interesting.

With the pillar moulding, It's just clipped in and has no screws? So i just need to be careful when prying it away?

Cheers

The A pillars are brittle and most are broken already

Use a plastic or wooden panel popper tool if you have one , or a thin plastic or wooden spatula / bog spreader/ putty knife or worse case a old butter knife slid into the small gap by the bend , your trying to put tension on the middle of the panel vertical and walk it around slowly towards the back of the car,( which has two little hook hoop catches on the end holding it by your head

Gently moving it open they pop out leave the lower front till last

Once you start working the front lower half its final holding part is a hoop of plastic on the very end ,

two hands and some flex will pop it free without breaking ( the little white clips on the back check for all of them and if missing replace for a few bucks) also superglue any broken black holders now ( ca model glue from hobby shop works best)

Dont bend the rubber molding in the door ( skylines worse feature ! damn doors that wont stay open )its $$$$ and will cause water / wind wistles/ fumes to enter

the sunroof model has a butt load of room hidden behind the center sunroof switch plate , mine has a tv and gauges embedded in the area in carbon surround now !! Haha

Use care fixing wires by pedals if you go to cig lighter power nothing worse to deal with while driving

Haha sweet, Thanks so much for your advice dude, I haven't got a panel popper tool but do have similar tools that i can use. Also have some model glue (from when i used to make model planes and cars) so i think i'm all set!

Your set up sounds swish, do you have pics on the forum somewhere?

Haha sweet, Thanks so much for your advice dude, I haven't got a panel popper tool but do have similar tools that i can use. Also have some model glue (from when i used to make model planes and cars) so i think i'm all set!

Your set up sounds swish, do you have pics on the forum somewhere?

No current ones of the inside or out

Performance auto and sound mag in north america had it in readers rides issue and it was tuner of the week last year

Car of the year for SAU-SA first year

Its undergoing major mods with new upgraded gear , carbon kevlar body kit , some suspension and engine mods just in time for repaint haha

its being documented for a feature car shot in magazine , pointless to post photos now everyday just about something changes lol

Plush black carpet and racing seats and lots more today

Edited by Carbon 34

Sounds amazing mate, look forward to seeing photos some day

Thanks again for the help!

Premod exterior photos from tuner of the week

http://www.pasmag.com/features/reader-rides-from-your-garage-to-ours/2135-tuner-of-the-week-troy-edmonds

Absolutely immaculate car dude, photos are amazing!

Great example of a white 34

Thanks I took those with my old camera 10mp sony alpha

New 25mp more better haha

Will post the build up after done and edited

It includes many how too's and why's

Car wont even look close to that except white still

whoops, just noted the article says Polar White! nevermind!

Lol its most likely going to be painted another white absolute pure with white epoxy primer

That creates a blueish purple hue in street lights at night , almost a colour flip but no pearl its the light spectrum refraction ( my old rx7 was painted a variation of that ,it works )

I love the storm trooper look but carbon attracts the police around here, so sadly those body parts will get paint

Create an account or sign in to comment

You need to be a member in order to leave a comment

Create an account

Sign up for a new account in our community. It's easy!

Register a new account

Sign in

Already have an account? Sign in here.

Sign In Now


  • Similar Content

  • Latest Posts

    • That ring thing is interesting how it's holding everything together 
    • Hey guys. I have a 400R on its way to Australia from Japan currently and have a few questions I’m hoping others may be able to help with.   Wondering if anyone here has had any luck getting the Sat nav unit to work in Australia!? Assuming the Stereo is as simple as a band expanded and tv won’t work?  Seeing as they’re based off a Q50 which is Aus delivered is there any way to link that system to the nav? Nav modules and head unit are different part numbers and appear slightly different at the rear with plug ins etc. can I put my xtrail sd card into the rv37 and will that convert the maps or update to Australian? Has anyone got any advice here?     also has anyone fitted the factory remote start and Security system once it’s landed in Australia? I put an enquirey to Nissan Japan in via a third party, and they suggested it needs a Nissan Japan dealers device to setup and couldn’t guarantee if one here could do it or not. They can supply and I can physically fit it but to setup I would need a dealers device. Any information here would be appreciated also. I’ve seen one here with it fitted already prior to leaving Japan at a dealer/inporter, so clearly passes compliance and works when fitted Japan and doesn’t need changing here.      also, does the tyre inflation sensors work here? Does anything change with them when the vehicle arrives? Where are they actually situated? I’ve read they have batteries and they need to changing at times and seems like resetting involves the nav system?    any help here would be appreciated and any other aust specific information to help would be great. Looking forward to see what the current generation skyline is like and eager to see how many of the gadgets can be utilised here.  Thanks in advance 
    • Do need to take it with a pinch of salt. One of the adapter failures, they clearly had setup issues with the flywheel.  One of the slipping ones I spoke to and it was pretty clear the throwout was riding, rather than fix, just swapped to a new clutch.    These clutches are being put in anything from 5k offroad 4x4 beaters, GR yaris, 500hp commodores to 1200hp barra monsters. Bound to be some issues in some of them when they are not a simple bolt in affair due to the changes in height.    There is a lot going on in this picture and unless I did the job myself no way to tell what really happened. 
    • I did this mod in 2019  You just have to modify the top bracket of the ABS/TC/Fuel Pump Control ECU so it sits more upright and closer to the back seat and run a good quality positive battery lead from the engine bay, the negative lead i just bolted down to the body in the boot.
    • Damn... Not the feedback I want to hear.
×
×
  • Create New...