Jump to content
SAU Community

R34 Gtt With Gtr Front End Conversion/ Rims / And Mfd How To Do, Info, Pics, Parts Listing, Prices Etc...


Recommended Posts

Hi all!!

Due to a number of people asking me how I have done my gtr front end conversion on my r34 4 door GTT I have decided to post up here the information on whats involved, rough prices, part listing and a run down on what I had to do. Hope this helps out those looking to do the conversion and people can enjoy the finnished project as much as I do. I do not know if any of this applies to conversions on stageas however.

There are two conversions you can do, the basic and complete.

For the basic you can get away with only replacing the bonnet and bumper along with supporting parts, or to do it properly you can do gaurds also giving a completely flushed finnish and wider front end. I will detail for full front end conversion.

PARTS NEEDED

GTR BONNET

GTR BONNET HINGES

GTR BONNET LATCH CATCH SUPPORT

GTR BUMPER

GTR ALUMINIUM BUMPER REO BAR

GTR INNER HEADLIGHT BRACKETS

GTR UNDER HEADLIGHT BRACKETS

GTR SUPPORT BAR BETWEEN HEADLIGHTS

GTR RUBBER STRIP THAT SITS ON TOP OF BUMPER (THIS NORMALLY COMES WITH THE BUMPER)

GTR LOWER LIP ON BUMPER

GTR FRONT DIFFUSER

GTR FRONT FENDERS

GTR FENDER RISERS

GTR FENDER RISER PLASTIC WASHERS AND BOLTS

GTR FENDER PLASTIC INNER GAURD INSERTS

GTT PARTS THAT CAN BE USED

GTT headlights are the same as GTR, however if you are using exenon headlights these have a differnt plug/loom setup to the normal non exenon setup. I replaced my loom with one I had that was compatiable for the exenons, but my understanding is that this can be avoided by replacing plugs etc. The advantage of replacing the loom is that you have the headlight leve adjuster toggle and direct plug and play

.

GTT front and side indicators are the same, but the front indicators have have a different plug on the back where the globe is insterted, so I found it easier to stick with the GTT front indicators to avoid the plug issue.

GTT gaurd inserts can be dodged up to work in the fenders but they really dont do the job properly with mis-alignment and tyre scrapage and doesnt look right or flush.

GETTING STARTED

1. Remove GTT bonnet and bumper.

2. Once removed you can easily access the front end and remove the front reo bar, along with the inner headlight brackets, under headlight brackets, bonnet catch latch support, support bar between headlights.

3. Remove bonnet hinges

4. Fenders can be removed after bumper is off, unscrewing bolts and being careful to not scratch front doors with the metal tabs that sit behind the doors.

FITTING GTR PARTS

1.Its pretty simple from here on to replace the removed parts with the GTR parts. Everything is a direct bolt up and fits into place perfectly with all of the brackets and hinges. (fit the bonnet hinges, innner headlight brackets, support bar between these, and latch catch support only)

2.The only one that I had modified was the catch latch support, with changing the position of the bottom hole slightly to meet up with the spot on the chassis. This is a simple as flattening it a little with a hammer and re-drilling the hole in its new spot.

3.The gaurd risers are next. These are different from Left and Right, and are obvious which goes where. These bolt down to the chassis where the GTT gaurds would normally sit. The purpose of these is to hold the gaurdat the right height. The GTR gaurd sits about a cm off the chassis and therefore needs the risers to hold it.

4.Once the gaurd risers are in place the fenders can be placed back on. Firstly, use the plastic washers and clip them together over the holes in the gaurds where the bolt to the gaurd risers. There are two parts to the plastic washers, a top and bottom, and they clip together on each side of the gaurd bolt holes. When this is done you can bolt the gaurds to the gaurd risers and inside the doors. the front part of the gaurd bolts to the side of the bottom of the headlight

5.Its now time to fit the GTR reo bar. This bolts up perfectly unless you have a Front Mount Intercooler that pretrudes out a lot. I have used a Blitz return flow Intercooler and the GTR aluminium reo bar clears this perfectly with next to no room to spare.

6.You can now fit the under headlight brackets. These attatch to the end of the reo bar, and bolt onto the GTR fender on the other side next to where the gaurd bolts onto the headlight. These brackets sopprt the bumper and align it perfectly below the headlights.

7. Fit the bonnet to the hinges getting the alignment corret. Its easier with two people so as to avoid scratching and panels and getting alignment correct. You can now test close it and get the alignment correct with fenders, and the latch catch support before fitting the bumper.

8.Once you are happy with the bonnets fitment, you can now fit the front bumper with the lower lip attatched. Bolts up in all the origional spots on fenders and across the top on the support bar between headights. There shoudnt be an issue with fitment unless intercooler hoses are in the way. I had to slightly cut out one of the lower vent holes to make mine fit properly, although modifying the intercooler piping may of have fixed it also.

9. Connect indicators an plugs and you should have a very nice flush finnish on the front end. Now is a good time to check all bolts are tight and that for any gaps and tightness.

10. The next step is to fit the front plastic fender lining. Put the car on jack stands and remove both front wheels. You can now get into the wheel arches and remove the GTT liners and fit the GTR ones. Its barely possible with the wheels on.

11. I found it easier to fit the top half of the GTR gaurd liners first. These fit perfectly and use existing holes on the gaurd, and the chassis. The bottom sections are alomst perfect also. I found that one or two holes didnt align on the chassis, but this wasnt an issue. The rest of the holes line up on the bottom of the lower lip of the bumper and the bumper itself.

12. While the car is still on jack stands you can get underneath and attatch the front diffuser. This will be best with two people to support it to prevent damage and also bending the tabs on the lower lip that hold it. Once fitted, fit rims and remove jacks stads and lower down.

13 If you have a sideskirt, it is now time to attact to the bumper. The GTR fenders being wider make a gap behind the sideskirt, so you need to sickaflex these to the gaurds and tape to them firmly until set and holding tight. The front holes also do not align and you will need to make a new hole to attatch with. I have factory series 2 skirts on mine and this was simple and easy. I had these attatched when the car was painted and I beleive that if the plastic is hard to bend into place to heat with a heat gun to soften it enought to be more flexiable.

You should now have a complete GTR front end on a GTT!!! Keeping the bade is optional. I personally removed mine after repping it for a while. I am running GTR wheels all around, and due to the front fenders being wider I am planning on running 25mm bolt on spacers on the front to bring the wheels out flush with the gaurds. Those with different rims may not have this issue due to offsett etc, and its a personal choice on what looks best!

If your car is lowered already, running the front diffuser may be lot of fun!!!! My car sits perfectly on legal eyebrow height and has 100mm clearance only just with the diffuser. I found with low tread and a car load this does sit lower than 100mm. Also to add,Imeasured this on a perfectly flat cement surface not bitumen or your average road where it tends to change a lot. It is a pain in the arse a most will know trying to navigate many spoon drains and roads etc with less than 100mm clearance so I'd strongly suggest for the sake of saving a very expensive diffuser to raise the front end up a bit if possible. My predicament is that I am running Tein superstreet coilovers that are not height adjustable, but set on legal height permantley, and therefore cannot raise or lower it. I have opted for another choice to avoid defect and inconvenience of spoon drains etc and had a 10mm thick meta plat made up that sits on top of my coilover inbetween the strut tower to gai another 10mm of height. To do this I had to order in 40mm thick studs to replace the existing ones on the top of my Teins so that I can run the spacer and strut brace and still have a bolt on the end. The cost of this was $100 for a pair of spacers and around $50 for 4 new studs and nuts, but in my opinion worht while to avoid ruining a diffuser with scratches and also to have it sitting a tad over 100mm ground clearance to keep the boys in blue happy!!

Here is a part list of pretty much every part needed for the GTR front end conversion, with part numbers and prices from Nissan. These are the RETAIL PRICES that Nissan list to date. I have on the list also the price for a full set of GTR rims and the MFD digital dispaly screen also. The rims normally you can get a second hand set for around $2000 or less with tyres, and the digital MFD screen you can pick up from as cheap as $1500 or there abouts. Most import yards, SAU, ebay, import monster, jesse streeter can help easily with sourcing rims, and I have seen that import monster regularly list MFDs for sale. These can be purchased though Streeter and yahoo auctions too. There is a HOW TO DO to connect up the GTR MFD screen avilable, and how to modify a series 1 screen to link to dvd player/AUX/reverse cam etc, as I have done. http://www.skylinesaustralia.com/forums/topic/223920-r34-gtr-mfd-info/

post-60709-0-60476200-1362630758_thumb.jpgpost-60709-0-17487400-1362630973_thumb.jpg

GTR PRICELIST.pdf

(above is a pricelist of GTR PARTS including GTR Rims And MFD screen. Missing from the list I believe is the front diffuser and the Support bar between the headlights and also the rubber strip. Everything else however should be listed with part numbers) Headlights have been included (these are meant to be prices and numbers for exenon so i presume this is correct. I know second hand pairs of good condition can go for around 1200$.

Wreckers, Import Monster, SAU Traders section and private classifieds, Yahoo auctions, Jessee Streeter, Ebay, etc are all good places to source second hand parts and save a lot of oney, otherwise Nissan is your next best bet.

For those of you doing this conversion to a two door, Nissan can also supply rear GTR fenders that can be welded in the place of the GTT fenders. and come at a cost of roughly $2700 or there abouts. I do not have part Numbers sorry.

I do not have a part number for Diffuser and a price sorry, but be careful buying fibreglass copies due to chipping and cracking that looks nasty.

I will now list a series of photos I took while doing the conversion and also while i was doing engine swap. I apologise for the lak of qualty and for not taking many pics.

GTR PRICELIST.pdf

headlight brackets that sit on the inside with the support that ges in between headlights. also bonnet hinges and the rubber strip that sits on top of the bumper and the latch catch support.

post-60709-0-46071700-1362634303_thumb.jpg

GTT reo and brackets

post-60709-0-83054600-1362634378_thumb.jpg

GTR reo bar fitted with headlight brackets an bar between headlights

post-60709-0-26521500-1362634470_thumb.jpg

GTR under headlight brackets fitted

post-60709-0-54660700-1362634558_thumb.jpg

again...

post-60709-0-47169500-1362634623_thumb.jpg

reo bar, headlights brackets, support bar between headlights, fitted to fender, and fender bolted to headlights.

post-60709-0-70034000-1362634727_thumb.jpg

Inner headlight bracket

post-60709-0-75293200-1362634798_thumb.jpg

GTR hinges ftted

post-60709-0-57215000-1362634866_thumb.jpg

Gaurd riser fitted

post-60709-0-69762300-1362634972_thumb.jpg

Gaurd riser again

post-60709-0-42487900-1362635032_thumb.jpg

Gaurd fitted to the gaurd riser also showing the plastic washers needed.

post-60709-0-05055400-1362635109_thumb.jpg

Factory sideskirtwith the GTR fender

post-60709-0-76579900-1362635169_thumb.jpg

Gaurd riser application

post-60709-0-80446300-1362635243_thumb.jpg

Bumper fitment

post-60709-0-40440600-1362635320_thumb.jpg

Fenders, Bonnet and Bumper fitted

post-60709-0-29640800-1362635394_thumb.jpg

post-60709-0-52908100-1362635446_thumb.jpg

post-60709-0-21436800-1362635517_thumb.jpg

10mm raisng of front end

post-60709-0-13512400-1362635592_thumb.jpg

First Project Completed

post-60709-0-39267600-1362635635_thumb.jpg

Doing the honours in my first project

post-60709-0-11050900-1362635703_thumb.jpg

post-60709-0-84947200-1362635742_thumb.jpg

post-60709-0-53017500-1362635824_thumb.jpg

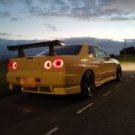
Second project completed and painted in Milenium Jade with diffuser and gtr rims and mfd

post-60709-0-74554500-1362635884_thumb.jpg

post-60709-0-40976800-1362635972_thumb.jpg

Gaurd inserts fitting

post-60709-0-55548200-1362636147_thumb.jpg

post-60709-0-76063100-1362636176_thumb.jpg

post-60709-0-60482700-1362636207_thumb.jpg

post-60709-0-61081100-1362636242_thumb.jpg

post-60709-0-59050500-1362636384_thumb.jpg

BEN SIMPSON CRUISE ADELAIDE 2013

post-60709-0-82383200-1362636638_thumb.jpg

GTR MFD screen fitted to the GTT

post-60709-0-30273800-1362636674_thumb.jpg

Linked the screen to the dvd player.

post-60709-0-90783200-1362636735_thumb.jpg

WHAT I WOULD LIKE TO DO

post-60709-0-72082000-1362636768_thumb.jpg

WOULD LOVE TO DO THIS

post-60709-0-73187100-1362636802_thumb.jpg

post-60709-0-93269200-1362636823_thumb.jpg

post-60709-0-67286800-1362636903_thumb.jpg

ALL JAPAN DAY ADELAIDE 2011 First Project

I hope all this info can help people doing the same project, and I hope I have coverede all bases. Any questions I am happy to help where I can. Please enjoy- these were long projects, taking up a lot of time, money, patience and sourcing info an parts was a big job. For those wondering you are able to source fiberglass rear flared fenders/doors for the rearflared end pictured in the last pictures, but Im not sure where and at what cost, although Ive been told its around $1500 in fiberglass panels and a lot of effort to blend them in.

:) Thanks for taking the time to read!!

  • Like 3

No problems- hope this helps you-when I started doing mine I found very little info and pricing and part listing so this should help everyone needing this info..

hell........that is very very awesome. and useful, for if i want to convert any bits and pieces here!! having said that i'm happy with my GTT being a GTT and not a GTR. but there are bits and pieces i'd like to upgrade. cheers!

Thanks for the write up. Each to their own, but I would think a GTT looks good as is - you really have not completed the conversion as the rear guards need to be pumped more, need you sideskirts and the rear bar needs to be changed with the diffuser piece and a pair of bigger rims are needed in my opinion...and what's with the GTR badge? I know you have put it on and taken it off then put it on a few times...no need for the bagdges mate...call it a GTT with GTR front end and that's it...if you done a AWD and RB26 conversion than fair enough...

This isn't a Gtr conversion bud, it's a gtt with a Gtr front end, and I had also added rims and mfd to it as a tasteful option that I liked. If I had the money to rb26 it and pump the rear end it would be nice, but it was a case of a front end job!! This thread was created to help a number of people who had contacted me asking for info on doing the conversion with details etc...so I hope this thread helps those.

How much of this applies to a 2 door?

As in, I'm in the process of putting a gtr front bar on my car (not oem, aftermarket) but I won't be using any of the brackets between headlights, etc you spoke of. Purely just fitting the front bar, guards, and bonnet.

This isn't a Gtr conversion bud, it's a gtt with a Gtr front end, and I had also added rims and mfd to it as a tasteful option that I liked. If I had the money to rb26 it and pump the rear end it would be nice, but it was a case of a front end job!! This thread was created to help a number of people who had contacted me asking for info on doing the conversion with details etc...so I hope this thread helps those.

Fair enough buddy and you did a good job too.

I can understand that these conversions cost heaps that's why many people just opt to save and buy a GTR...All you need is to pump the rear and it would do matey...

How much of this applies to a 2 door?

As in, I'm in the process of putting a gtr front bar on my car (not oem, aftermarket) but I won't be using any of the brackets between headlights, etc you spoke of. Purely just fitting the front bar, guards, and bonnet.

It all still applies for coupe. You will find u can cut ur existing reo bar to make the Gtr bumper fit over it, but without gaurd risers and brackets it will have next to no support and will not fit up properly. You can make ur own brackets etc but cosmetically it won't look great with your bonnet open if you manage to make it work 100%. My opinion is if you are going to spend the money on gaurds/bonnet/bumper your best off forking out a few more $$ and doing it properly.

Thatt said, the part Listing I supplied is for brand new genuine parts. Doing my conversion I hunted for a long time to source a lot of these second hand and therefore didnt pay anywhere near the price of genuine so it wasnt a very expensive project like the part pricing suggests it was. That list is more intended as a guide if you are buying brand new, and also so part numbers are available to track down parts with.

  • 11 months later...

hi. I have finally finished my r34 gtr front end conversion to my r34gtt.i was wondering if you would know if the gtr front mudflap/skirt on the front fender below the badge would match up with the gtt side skirts. Not sure of the body kit. It was the one with the shopping trolley handle spoiler. Lol

  • 1 month later...
  • 2 years later...

What side step/skirts are these 4 doors running with the GTR fenders/guards?

URAS is the closest so far. Ive read suggestions to use the 2 door skirts and modify them a little, can someone confirm? Thanks! 

Create an account or sign in to comment

You need to be a member in order to leave a comment

Create an account

Sign up for a new account in our community. It's easy!

Register a new account

Sign in

Already have an account? Sign in here.

Sign In Now


×
×
  • Create New...