Jump to content
SAU Community

Dan's Rb25 A31


Recommended Posts

Hi all,

Thought id post up a thread on my Ceffy.

I'm now starting to get this ready for road rego, the old gal was just sitting there and only taken to a few track days a year.

I've managed to track down every stock part needed to put this back to original but its finding the time and the energy to actually do it is another thing!
.
The ceffy came over with an RB25 conversion that was wired up very average (was factory RB20DET Auto), standard clutch, worn stock lsd, mixed matched AVS wheels and a knackered original RB20 fuel pump!

I spent a few months re-wiring the entire car. Started off with a new RB25 loom and a second hand A31 loom, removed all the crap from both and wired in only what was needed.


So here is a quick run down:

New set up:
Series 2 RB25DET
RB25DET gearbox
Extreme custom made button HD clutch
Cusco 2 way
Z32 ecu with Nistune
AM Performance Screamer
3" Straight through stainless exhaust
VG30 turbo
Trust front mount intercooler
R33 GTST brakes all round
Hydro handbrake
Walbro fuel pump
HKS pod

213rwkw, 598nm on 12psi

Suspension:
CST Zero-1 coilovers
Nismo extended LCA's
Ikeya formula tie rod ends with 5mm lock spacers
Kazama castor rods
Cusco rear camber arms
Cusco front & rear strut braces
Cusco front sway bar
Solid subframe spacers

Interior:
C33 Laurel dash conversion
Nardi wheel
Bride Brix on Super Low rail
Stripped interior
Sound deadening removed & painted over
Greddy boost gauge

Exterior:
Re-spray in R33 GTR midnight purple (done in j-land)
Autech front & rear bars
K&M missile side skirts
Late model headlights & taillights
Chrome grill
Work Rezax - 17 x 9 +4 (20mm spacer)
Rays Gram lights 17 x 9 +6
R33 gtr wheels (spares)


Now its the process of getting this back to stock so it can be complied....

1988-Nissan-A31-Cefiro.jpg

1988-Nissan-A31-Cefiro.jpg


1988-Nissan-A31-Cefiro.jpg

1988-Nissan-A31-Cefiro.jpg

1988-Nissan-A31-Cefiro.jpg

1988-Nissan-A31-Cefiro.jpg

1988-Nissan-A31-Cefiro.jpg

1988-Nissan-A31-Cefiro.jpg

1988-Nissan-A31-Cefiro.jpg

Edited by A31-RB20
Link to comment
Share on other sites

compliance Sux so much , mine has sat around for 6+ years because i keep getting it almost passable , then either Rob bits for another car or put it back to drift spec (not recommended! )

Yeah I know man but at least the pre-89 cars are relatively straight forward to get complied. Only needs intrusion bars, rear brake light and some lables for the fuel and tyres. Its only going to cost me around $1800-$2000 for the work to be done, decided it was about time to get it on the road... Its such a nice car that I want to enjoy it both on the track but also to drive around on the occasion.

On another note, I managed to track down some new door cars that are mint and no rips or faded.

Link to comment
Share on other sites

  • 2 weeks later...

Ok I've managed to track down everything needed for compliance besides an exhaust. Ill get one made up to get it through.

Now it's the grueling process of taking all my mods off and putting it back to stock.

I'll start taking pics of the progress (when I start lol)

Link to comment
Share on other sites

  • 1 month later...

Just purchased a set of CST Hyper Zero wheels in 17x9.5 +15 all round. Stock should be here late June. Needed another set of wheels as I sold all my other pairs I had...

cst.jpg

I think they should suit the Ceffy well, once I have them Ill post up some pics of them fitted up.

Currently I run 17x9+4 on the rear with 215's. Might need to pull the guards a little more or run a little bit more camber.

Also, can anyone help out giving me advice on how to remove the bonnet heat protector thing without destroying it?

1988-Nissan-A31-Cefiro.jpg

Link to comment
Share on other sites

  • 2 weeks later...
  • 2 weeks later...

So my wheels arrived on friday, very happy with them considering how cheap they were.

Had some 215/45's lying around so got these chucked on saturday and got them fitted to the car.


Ill post up some pics of them on the car, I need to pull some more camber out to get the wheel flush but so far it looks good.

1988-Nissan-A31-Cefiro.jpg

Link to comment
Share on other sites

Can't wait! Keep up the good work! and take lots of pics!!

Thanks mate! appreciate it :)

Here is a few of the trial fitment, Again, I need to pull some more camber out for these as these CST's sit different to my Gram Lights.

1988-Nissan-A31-Cefiro.jpg

1988-Nissan-A31-Cefiro.jpg

1988-Nissan-A31-Cefiro.jpg

Link to comment
Share on other sites

  • 3 weeks later...

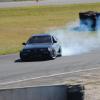
Got the car ready to go for Matsuri next month.

Need to get a proper wheel alignment though, front end is still a bit off.

Loaded up with tyres and got the trailer ready. Cant wait!

Link to comment
Share on other sites

Create an account or sign in to comment

You need to be a member in order to leave a comment

Create an account

Sign up for a new account in our community. It's easy!

Register a new account

Sign in

Already have an account? Sign in here.

Sign In Now
 Share


  • Similar Content

  • Latest Posts

    • From what I've seen and experienced first hand with those powder extinguishers, they're good to use to break a window and escape the car, and half the time then do f**k all to stop a fire. You just need much more than 1KG worth of powder. Not to mention, half the time it's an engine bay fire, and you can't easily, and do not want to completely open the bonnet, so you're left pretending to be an American Infantry... Spray and Pray baby!   And then 100% that shit is really destructive afterwards!   Realistically, those little ones at a race track might help you keep the fire from growing and give the fire marshal / truck a chance to actually get to you with their multiple large bottles.   For a road car, these days, prepare to deboard as quickly as humanly possible, and move to safety. Allow insurance to fix replace it (unless it's like a rare classic etc, then do nearly everything possible to save it!) Keep the little extinguisher with you to help protect other things around you from burning while you stand there singing "How can we sleep while our beds are burning?"   Secondly, powder extinguishers I freaking hate for indoor use, (this isn't really relevant to a car) as you will get a powder fog around you, and it can be disorientating.   When I did fire training when at BlueScope Steel, they have (had?) their own fire brigade on site. We did all the training, and at the end we were told, "If it's an indoor fire, and you need to use a powder extinguisher, we as the fire brigade would rather you just exit the building, you're more likely to get lost in the smoke and powder fog than do much help, so just GTFO" And pretty much that was what they said for most other fires too, grab extinguisher, if it's much more than paper in a bin fire, use extinguisher to get you and others out of the building to safety...   Part of me wishes when my Skyline caught alight many moons ago, I let insurance sort it out, instead of putting the fire out... part of me now says "But I've saved a classic before it was a classic!"
    • Hi all,  I have a older model of the Greddy Front facing intake on an RB25DET NEO Head. I've bought aeroflows fuel rail and injector kit (1000cc Bosche injectors) and I'm unsure if the fitment is correct. The injector o-rings fit in the intake hole but it's not snug. I can very easily rotate the injectors even when the fuel rail is mounted. The kit also came with multiple adaptors, they dont make it any more snug and using them raises the injectors up and i cant mount the fuel rail. I hope this makes sense I've asses a few photos.    Thanks so much guys. 
    • So, to run the 4g aerials to the booster, I had to get access to the rear bulkhead....bit of a mission. Hot tip, don't offer to help change the rear shocks for a mate with a v37.... Remove seat base, 2 clips that slide forward to release it the it lifts straight out Fold down rear seat (pull in from boot) The side bolster of the rear seat is not connected to the middle parts that fold. To remove unbolt at the bottom bolt then push it up off the top hook Then there is a plastic surround behind the seat back, 2 pop out clips, 2 bastard clips, some swearing at it is out Pop the rear seat latch surround off Remove door surround lower trim then side trim  Remove c pillar trim - 4 clips, pull inwards not forwards Remove metal brace - 5 bolts 1 nut Then you have got to the rear strut top...what a pain!
    • If you really want squish back, you can have it put on the piston (at least to some extent).
    • Impressive. He's very very smooth.
×
×
  • Create New...