Jump to content
SAU Community

Recommended Posts

Hahaha Many Kudos to L33SH indeed, as without letting me know the simple term BMW E30, I'd never EVER have thought to search it on ebay, and probably would have spent quite a while searching through more and more topic posts for suggestions to clear indicators.
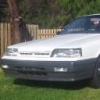
I've ended up finding these two beauties, cheap, and exactly what I'm after! Will probably end up hitting the side ones with a bitta white on the spots that are black/plastic:
http://www.ebay.com.au/itm/BMW-E23-E24-E28-M5-E30-3-5-6-7-Series-M3-Alpina-CLEAR-Side-Indicators-Repeaters-/370680718895?pt=AU_Car_Parts_Accessories&hash=item564e4ae62f&_uhb=1

&

http://www.ebay.com.au/itm/BMW-E30-318is-320i-325i-ALPINA-C1-B6-Clear-Turn-Signals-/370281160610?pt=AU_Car_Parts_Accessories&hash=item56367a1fa2&_uhb=1

Got out in the shed today and did a couple things, garnish is nearly finished, needs a few days to properly cure, perhaps even a week, then a light sand, and cut and polish and will throw her back on. Will get around to "shaving" or de-badging the boot during the week. eventually I'll get a U/V permit and get her to the tyre/exhaust shop too for some new kicks and zorst. Then she'll have a sexy looking rear end i.m.p.o
20130512_122420.jpg
^ In the process of getting rid of all that hidden excess dirt inbetween working on the garnish/paint

20130512_133045.jpg

^ Paints all done, just gotta dry/cure and another half hour or so tending to it for a final finish and she'll be right ;)

Some new toys showed up late this afternoon. Got the door speakers down and out anyway. Will tackle the 6 x 9's next. Had to use 6.5'' Spacers for the door speakers. And will be using 6x9 spacers for the Cadence going in the parcel shelf.
20130516_151821.jpg

^_Kenwood KACM646 500W 2/3/4 Channel Amp with High/Low Pass Filters AU $135.00
Cadence XS694 6 X 9'' 250W Speakers. (Will be amplifying) AU $88.00

Cadence XS652 6.5'' 135W Speakers (Not amplified) AU $69.00
Spacers AU $11.00 & $5.00

20130516_180115.jpg
^_Cadence XS652 6.5's.

Nothing special but just another update/change/mod.
Pulled out the old Numberplate bulbs/lenses and am going to silicone these puppies onto the garnish right before I put it all back together as so I'll have plenty of pure white illumination! Far better than faded yellow!
20130526_134117.jpg

20130526_134045.jpg

So I took apart the whole dash purely to get to my instrument cluster, only to find after being re-assured that I'd bought the right globes for an R31 Dash, that I'd been given the wrong globes... f**king frustration at its finest. So now I'm left with this:
20130527_163850.jpg

Which ultimately isn't too bad, gives me an excuse to put my neons/switch in and also get the headunit done.
On a more positive note; Here is my newly glossed rear garnish and tinted tail lights:

20130527_163906.jpg

20130527_163922.jpg

Here's how I went about mounting the new LED Number plate lights. (Gave it a clean up afterwards too)
Held in place by liquid silicone:
20130527_140757.jpg

END RESULT:
20130527_170000.jpg
20130527_170016.jpg

Simple. Fun & super effective! Highly recommend doing!

A few more goodies turned up today! Stoked!
930fda87-84e7-443a-b5eb-141919fc49ba.jpg
Eagle 8mm Ignition leads
Kicker 12'' Subwoofer
Pioneer Head-unit
Car Seat Covers
& Re-usable K & N Panel Filter.

Edited by GXE23

PURCHASES / WORK DONE / FUTURE PLANS / PRICING:

  • VARIOUS SPRAY PAINTS / GLUES FOR MINOR REPAIRS $25.00
  • CAR COVER XXL $17.00
  • CAR SEAT COVER SET $36.00
  • WHITE LED PARKER LIGHTS $2.50
  • CHROME CHECKERPLATE FLOOR MATS $19.00
  • CANNON/DUMPY MUFFLER $90.00 (Minus Installation Costs)
  • WHITE LED REAR NUMBERPLATE STRIP LIGHTS $16.00
  • WHITE INTERIOR/CABIN LED LIGHTS + SWITCHES/WIRING $20.00
  • PIONEER HEADUNIT $105.00
  • CADENCE 6 X 9'' SPEAKERS $88.00
  • CADENCE 6.5'' SPEAKERS $69.00
  • SPEAKER SPACERS $8.00 + $11.00
  • KICKER 12'' 300W SUBWOOFER $115.00
  • KENWOOD 500W 2/3/4 CHANNEL AMP $135.00
  • WHITE LED INTERIOR MAP LIGHT x2 $12.00
  • WHITE LED SPEEDO/DASH CLUSTER LIGHTS $15.50
  • WHITE FUZZY DICE $1.50
  • NITE SHADED TAIL LIGHTS $15.00
  • K&N AIR FILTER (LIFETIME WARRANTY) $65.00
  • EAGLE 8mm IGNITION LEADS $60.00
  • K&N OIL FILTER $30.00
  • BOSCH FUEL FILTER $25.00
  • NGK SPARK PLUGS $35.00
  • SUPERCHEAPAUTO 4GAUGE AMP WIRING KIT $52.00
  • GREGORY'S R31 SKYLINE WORKSHOP MANUAL $55.00
  • SUPERCHEAPAUTO 14'' SET OF 5 WHEEL COVERS $35.00
  • TURTLE WAX ICE LIQUID WAX $29.00
  • TURTLE WAX ICE SPRAY POLISH $15.00
  • TURTLE WAX COLOUR MAGIC POLISH W/CHIP STICK $19.00
  • BMW E30 SIDE CLEAR INDICATORS $39.00
  • BMW E30 FRONT BUMPER CLEAR INDICATORS $14.00
  • CALIBRE BRAND 10mm OIL CATCH CAN $32.00
  • SHEVRON CHARCOAL DASH-MAT $49.00
  • REMOVED MUD FLAPS
  • RESPRAYED REAR GARNISH GLOSS BLACK
  • RESPRAY FRONT GRILLE MATT WHITE
  • INSTALL ALL NEW STEREO EQUIPMENT
  • INSTALL LED NEONS TO A SWITCH

    GRAND TOTAL SPENT SO FAR:
    $1,354.50

That basically sums up what I've purchased or honestly plan on purchasing as far as "changes" I will be making or "mods" I will be adding to my 1989 R31 Nissan Skyline. Should have all this work done and have her ship shape within the next month or so.

"Spur of the moment thought/online buy" BUT I've opted to stick with 14'' stock wheels/mags instead of scoping out some 17'' 5 spokes.
I'll be throwing these hubcaps on: *Preparing for potential 'burns' here*
Chrome14Covers.jpg
Lame as they may be, I'm just thinking ahead, mainly for hassles/money's sake.

(As every single time I've had rims on any of my vehicles, the police just love to pull me over and take a look at all my treads, and more times than not, argue what the 'Tread-depth indicator' on the tyre or the little Beaurepairs one I keep in my glove-box).

So I'm just going to clean my stockies up, sand/prime them and hit them with a matt black paint a few times over then clear coat them, so hopefully they stay black and consistent over the years. (Will be using heat-proof paint due to potential heat that may come from excessive break use. Pictures will be up in due time, as this was only just decided on within the last 10 minutes hahaha! Cheers!

Mate dont bastardize an r31 with those HEINOUS sex-spec dinner plate contraptions.

My first car was an R31. Ill post some before and after pics.

Before was how I bought it, after was when I sold it. 31s look great low and with nice wide, low offset wheels.

*note you can get the wheels on my after pic for $800 posted man... theyr xxr's. 8" wide and an offset of 0 is perfect fitment front and rear on an r31.

Before:

970f44.jpg

After:

23tkrp3.jpg

Edited by Bennis
  • Like 1

Create an account or sign in to comment

You need to be a member in order to leave a comment

Create an account

Sign up for a new account in our community. It's easy!

Register a new account

Sign in

Already have an account? Sign in here.

Sign In Now


  • Similar Content

  • Latest Posts

    • Dissimilar metal corrosion. Aluminium is less noble than steel/iron, and will corrode preferentially when in contact with it and a conductive solution (ie, wet road salt). Tends to suggest that those brackets should be made in steel for a shitty climate like the UK.
    • Here is picture of the rear brackets again seeming to have eating itself or corrode or whatever. Can’t describe it , hope someone could explain this    
    • No i am in the uk so maybe road salt etc but checked rear and same story where handbrake cable seems to have eaten part of the bracket. Have emailed alpha omega waiting for reply
    • I've not looked at a GTR without the booster there. Is the hole and mount on the firewall not just the same as GTSt? I would have expected it to be. Nissan don't change panel stampings if they don't have to, and you'd think they'd just order/design the booster to mount to the same place.
    • They have all sorts of "failure" modes. When they are brand new, the can either be very very tight, or reasonably mobile. If they are reasonably mobile, you'll probably have a good start. If they are very tight, then they can catch/grab at every little motion, and they mark the ball or the outer race, tearing off whatever teflon lining is in the outer race, then they can rapidly degenerate from there. If they get wet, they can just rust. They are just steel and will turn red pretty quickly. Water can get in behind them and sit and cause them to become crunchy and then proceed to tear themselves up, as above. Same with grit and dirt. Manufacturers and OEMs of the arms that use them will tell you that because they are teflon lined (well, the good ones, anyway), you shouldn't grease them. If you do grease them, then the grease will catch any passing grit and dirt and hold it in place where it can cause damage. Race teams that have them will lubricate them thoroughly. They will also inspect them every 5 minutes and replace them every 10 minutes, if need be. Some manufacturers of arms will provide dust boots. These can help, but they are seldom perfect, and sometime just make the situation worse, being a place where crap can collect. I have made nappies for some of mine with PVC sheet and race tape, to try to minimise the access of crap. When they wear, you can get a tiny tiny amount of movement between the ball and the outer race. This will make clicking noises. It will also make the arm have "slop" in that the tiny amount of movement available at the inner end of an arm can cause a lot of movement out at the outer end. 0.05mm at 5mm from the pivot becomes 4mm 400mm away from the pivot. If they are too tight and binding, they impede the proper motion of the suspension arm and put loads into it and the rest of the suspension that are not supposed to be there, and can cause failure. Think broken welds, broken threaded sections on the adjustable parts, mounts ripped off the chassis, etc. All of these are possible, which is the main reason why they are essentially illegal on the road in Australia.
×
×
  • Create New...