Jump to content
SAU Community

Recommended Posts

Hi guys,

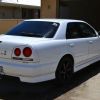
Have had this issue with my R34 N/A sedan for a little while now.

Probably about 3 months ago, whenever i would flick to high beams, my cd player would turn off and then turn back on.

My speedo backlights would also flicker.

I had my battery tested (which was the same battery which came with it from Japan), and was told it was not performing well,

and purchased another. I believe that my alternator was also tested at this stage, and came up fine.

A few weeks later, I had the same issue.

So, I popped the bonnet and had a look at the battery terminals, just out of curiosity.

The positive terminal appeared very SLIGHTLY loose, so i tightened it, and also cleaned it up a bit.

Problems were gone, and no issues for another 2-3 months.

Until tonight.

Driving home, popped high beams on, and boom, headunit goes off, backlights flicker, and even the A/T light is glowing at me.

I was pretty spooked by the A/T light, as I hadnt had this issue before.

Anyway, I arrived at my home, and the light was off, and my high beams no longer affected any other components in my car. (I had been driving for 30 minutes - discovering the issue again in the meantime)

I have these Ebay LED's in my parkers. And the rest of my headlights are standard Xenons. My headunit was also professionally installed.

Can anybody lend any thoughts? Thanks!

Link to comment
https://www.sau.com.au/forums/topic/436250-r34-electricslights-help/
Share on other sites

  • 3 weeks later...

I think I had similar problems before, but headunit and other stuff restarts or flickers.

Solved my problem by finding all the earth points in the engine bay, clean them all up and sand back the contact point a little.

So try checking all your grounds to make sure they are okay :)

Ah cheers guys!

Do you have any reference pictures for the ground points in the engine bay?

I'm not very clued in with this kind of work, but could easily manage if I know where they are.

Thanks!

  • 2 months later...

Ah cheers guys!

Do you have any reference pictures for the ground points in the engine bay?

I'm not very clued in with this kind of work, but could easily manage if I know where they are.

Thanks!

How did you end up going with this? I'm having a similar problem, will need to start checking my grounds too! Did this solve your issue? Mine is that I keep blowing my tail light fuse, so it's either bad grounds or a loose wire somewhere

How did you end up going with this?

Hey man.

Funny you ask, because I just fiddled with my electrics yesterday.

Headunit had only flicked off once since my last post, although my headlights still flickered.

Yesterday I sanded back my negative terminal on my battery to give it a better connection (Best I could do without knowing where the chassis earths are), and my headlights don't flicker anymore.

The old man thinks it'd be easier to chuck the R34 on a hoist to find the earths on the chassis and tidy them up, as they look in a hard spot to reach.

OK, I was thinking of just doing the bicarb soda and brush approach first, then clean/sand the engine bay earth points. Will let you know how i go with that, as otherwise I'm going to an auto-electrician and hoping for a quick/easy fix!

Have you had any issues with your fuel gauge, btw? Mine keeps setting itself to full (the needle isn't stuck, its just reading incorrectly) and im hoping that fixing the grounding will help this.

Nah haven't had any fuel gauge issues, sorry.

Yeah I did the bicarb trick with mine a while back, but it didn't do much for me.

Had to physically sand a layer back.

Do you think you could take a couple of photos of your engine bay with a couple of arrows pointing to the general area of the earth points for me? :whistling:

I'm keen to do the same thing to mine, but I have no clue where they all are, and how to reach them (crawl under car or whatever)

Would give me something to do this weekend, and would definitely put my electrical issues to bed once and for all!

I've searched the entire first page of Google and checked most forums, but have not been able to find any photos of where the grounding points are, and i've peeked at the engine bay myself and couldn't find them - maybe you have to get at them from underneath. All i know is the main one is 'near the alternator'. Will try and ask someone at work tomorrow - sorry I can't be any help mate!

Yeah too easy Mick. Cheers for having a look.

Next time my car is on a hoist or above a pit, I'll try and take some snaps for future reference.

Might help someone else who has no idea with this stuff, like myself. Hah

Im pretty sure that it's almost directly under the battery, you can sort of see the bolts from above the engine bay when you pop the hood, but i think you need to get underneath the car to access them! Just follow the cable from the battery :)

  • 4 weeks later...

Only just saw this again, but there are a few ground points inside your engine bay.

One noticeably is on the left hand side of the engine (if you are facing the car), on the chassis rail? right of your battery.

Forgot where the other ones are, I can check tonight for you guys if you still haven't solved your problems.

And no, the car doesn't need to be on a hoist to access them lol.

Might be worth adding an extra ground or two around the engine bay, or buy a ground kit.

I had similar problems with my r34, i got my mechanic to look at it and i think if i remembered right he said that it was because who ever set up the stereo didnt put it on the right power and it was taking power from something else or rather. maybe get ur circuits checked as well?

Yeah i think my problem got fixed when i pulled out the stereo and saw that the boost gauge had been spliced into stereo wiring without it being taped up. So basically i covered every bit of exposed wire in electrical tape - all good!

  • 7 months later...

I had the same dramas with my 34. I cleaned up as many earths as I could find and I also checked the charge at the battery and it was charging at 12.7 volts. I checked it at the alternator and it was 14.5 where It should be. I made a cable to connect the power terminal on the alternator the the positive battery terminal and it has fixed the problem. I used 8mm wire and some large crimp terminals. I'm sure your local auto electrician could make this up for cheap. Hope it helps.

Create an account or sign in to comment

You need to be a member in order to leave a comment

Create an account

Sign up for a new account in our community. It's easy!

Register a new account

Sign in

Already have an account? Sign in here.

Sign In Now


  • Similar Content

  • Latest Posts

    • Thanks Duncan! Yeah it's street use for me only. Maybe occasional track day. Any difference in noise when running with the two pumps? I would expect the lift pump to be more quiet than the main pump so hopefully not? And yes, unfortunately quite a big price difference to the simple hanger setup. Though I'm usually willing to trade money for better reliability and future-proofing. Buy once, cry once and all that. I'd be very happy to never have to deal with fuel pump / wiring issues again  
    • The old manifold was quite under the GTR strut brace.  The new manifold is quite [unknown] the GTR strut brace. The GTR strut brace was needed to clear the bonnet vents. The Old strut brace will almost certainly clear the new manifold, but not the bonnet vents. The old strut brace will almost certainly clear the new manifold, and the new bonnet without vents. But I am hoping the GTR strut brace clears the new manifold :p
    • On the bright side, at least you knew that it happened and remedied before anything happened. A friend of mine just took his Fiat 124 to a shop for an oil change and they didn't tighten the oil filter housing properly. 4.5 quarts spewed out and even after refilling + tightening the cap the engine has a tick now.
    • So, more pain. The FAST manifold is a little larger than the stocker. This is problematic because there really wasn't much clearance to begin with, so going from 'barely enough' well into 'no' is sad based on the external dimensions of the thing, even though where it bolts to the head is the same. Result is the fuel rails sit a good 25mm higher, and this is a bit of an issue with the wiring that runs behind the motor, and the fuel lines, and everything else. When pushing the manifold on, it required a huge amount of force to crush wiring looms to fit it, sensors like the MAP sensor are about 1mm from the firewall, and the FPR just has to bend ABS lines to be forced into place. After some brainstorming and some sad drinking, the loom for some reason ran from the grommet behind the ABS sensor, then to the driver side head, then back to the passenger side head. So all of this was pulled back and stripped, a few wires cut and rejoined, so that the 'branch' was now on the passenger side's head as below: Before you basically couldn't see anything behind the driver head. This is much improved! The MAP sensor is now pointing up (instead of at the firewall) Brackets have been made up for the rail. The rails are for a LS1, the manifold is designed around a LS2 as it's base. Which of course has slightly different bracketry and water pump clearance, hence the mods people need to do. Should be hopefully mounted tonight. I spent money on a new FPR that is slightly more compact than my Turbosmart FPR1200. The gauge has also been moved to the rail. There's also apparently an ORB to AN Union instead of the adapter, because the ~25mm of the current adapter is going to make the difference. Provided this all goes together and arrives today, it'll be the totally not stressful attempt to start it.
×
×
  • Create New...