Jump to content
SAU Community

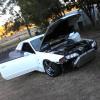
Currently Wrecking R32, R33 And 180Sx In Brisbane


Recommended Posts

I have wrecked a few skylines and s13's and have lots of parts avaiable


Good rb25det gearbox - $950

Full r33 manual conversion - $1300

Full s13 manual conversion - $1000 brand new clutch

sr20det engine good runner no hotside or injectors - $1000

rb25det s1 engine good runner no turbo - $1000

rb25det engine suit rebuild - $350

Rear reo bars - $30 each

Rb25 s1 and s2 super spark coilpacks - $270 per set

Walbro fuel pump in s13/r32 cradle - $80

Garrett 3071r turbo setup - $1300

R32 front strut brace - $70

S13 rear strut brace - $70

R33 front strut brace - $70

R33 headlights - $170

R32 headlights no pairs - $80 each

180sx rear seats - $20

R32 passengers seat - $20

R32/r33 heater and ac boxes - $30 each

Misc speakers - $20 per pair

Ignitors/afms/cas - $60-$80

R32 sedan genuine skirts and pods - $500

R32 sedan vertex skirts - $150

R33 front bar - $100

R32 coupe full kit veilside style - $250

R32/r33 5 bolt shafts - $100

S13 3x2 bolt shafts - $50

S13 catback exhaust - $150

R32 coupe boot lid - $60

R32 coupe rear bar - $60

R33 coupe rear bar - $50

R33 steering rack - $70

R32/r33/s13/s14 stock suspension arms - $20 each

Lots of gauges from $30 each

Turbo timers from $20 each

Gfb boost tee - $40

Npc rb25 lightened flywheel - $150

Stock rb25det flywheel - $70

Momo course steering wheel - $100

R33/r32 front guards - $50 each

R32/r33 parcel trays - $50 each

Rb20/rb25 engine parts heaps of bits – from $20 each

Rb20/25 top mount manifold with external gate - $200

Rb26 injectors - $170

180sx hatch mint - $150

180sx doors - $30 each

S13/r32 window motors - $70 each

R33 rear windscreen - $60

Pod filters – from $20

180sx tail lights - $70

R33 tail lights - $70

Lots of interior bits from $20

R33 front seats - $70

S13 front seats - $50

R33 radiator - $70

R33 catback exhaust x3 - $150 each

Rb25det s1 engine looms - $130

X2 rb20det gearboxes one with broken 2nd one with broken 5th - $100

R33 tail shaft - $100

R33 door shells - $30 each

door cards - $20

lock and ignition sets - $150 each

boot linings - $60 each

Rb starter motors - $50 each

r33 gtst airbox with snorkel - $150

r32 window switches - $60

r33 window switches - $80

lots of mag wheels as well from $500 per set

this is only a small portion of whats available if you need something just ask

please cont 0420 767 957 or pm me

springwood 4127
but can post most items

Link to comment
Share on other sites

  • 2 weeks later...
  • 1 month later...

Create an account or sign in to comment

You need to be a member in order to leave a comment

Create an account

Sign up for a new account in our community. It's easy!

Register a new account

Sign in

Already have an account? Sign in here.

Sign In Now
 Share


  • Similar Content

  • Latest Posts

    • 8v - 2.48ms 9v - 2.15ms 10v - 1.74ms 11v - 1.41ms 12v - 1.15ms 13v - 0.99ms 14v - 0.89ms 15v - 0.82ms 16v - 0.81ms I'm running these values on my RB20 Neo with 570cc Denso R35 stock jets and it's great. Also bought a set for my Legnum VR4, love these injectors!
    • Thanks for your reply,  Those blue/green wires running to the actuator aren't attached to anything, so I'm not sure how the central locking is still working. I will have to take a good look tomorrow, I don't have the car with me. After googling it seems like a pretty common aftermarket actuator which even uses the same green/blue wires the immobiliser required. i'll test everything tomorrow and if it's working i'll melt the solder, strip it, resolder and neaten it all up with some heat shrink. I don't have to understand it if it works hahaha I just don't want a fire/ short circuit. That R32 diagram looks more like a continuity chart? Can you make sense of this form the R34 manual? 10V is probably due to very flat battery, i'll recheck as well tomorrow, I did have to jump start it haha. Thanks again!  
    • So, COM doesn't mean comms. It means common. What common itself means will depend on the type of device. For a two directional actuator (ie, one that can push and pull on the same output rod) then the common will typically just be the earth connection. There will be at least 2 other wires. If you put 12V on one of the other wires, then the actuator will push. On the other 12V wire, it will pull. Can't quite make out what is going on with the wiring of your actuator. It appears to have several wires at the actuator plug, but there only appears to be 2 wires where its loom approaches the door control module, with at least one of the others cut off. I don't know these actuators off by heart. I'd have to look at a wiring diagram for one before knowing what the wires were about, and that's despite me having to replace one in my car not all that long ago. Just not interesting enough to have dedicated memory set aside for trivia like that any more. That actuator is an aftermarket one, not the original one, which probably died and was replaced. That might require some sort of bodge job on wiring to make it work. Although nothing should justify the bodginess of the bodge job done. As to the soldering job on the door module's loom plug. Ahhahhahaha. Yes, very nasty. Again, I cant tell you what any of those wires do. You'd need to study the R34 wiring diagram (if you can find one that shows the door module). I don't think I have any. I'd have to study the R32 diagram to start to understand what mine is doing, and again, even though I've had a problem with mine for the last 25 years (where it locks the passenger door when the driver's window reaches top or bottom of travel) I'm just not interested enough to try to to work it out. So long as it's not burning down, it's fine with me. Here's the R32 GTR diagram, which, confusingly, has rear door lock actuators and window motors on it!! As you can see, unless you understand the functions of the door lock timer and the power window amplifier, you'll never be able to work out how it works just from the diagram. I don't imagine that the R34 one is any better. Hopefully an R34 aware bod can help. FWIW, the two wires that are cut and joined look like they are both power supply - so hopefully it is not fatal to join them. The 10V you measured on the cut off free end of one of them is concerning. You'd expect 12V, and it might be the reason for the bodge job joining them together.
    • Yeah, so try to post images with extensions that the internet can handle, not HEIC files which only arstyphones can handle.
×
×
  • Create New...