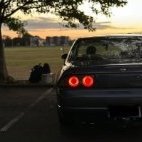
Jump to content
SAU Community

Recommended Posts

Hi guys,

I thought I'd post up some pics of a pair of headlights I repaired and restored. They arrived to me in average condition with damaged rear housings, some severe yellowing and previous internal lens coating work.

The damage on the rear housing was tidied up and the sharp broken edges were cut away. Some new plastic of a suitable shape was found and cut out to suit. Once I was happy with the shaping, I plastic welded the replacement plastic into place.

(The green is a ball of tape to stop any cut off plastic falling into the housing)

IMG_4372_zpsd6fdc8fd.jpg

IMG_4373_zpscfe5ef49.jpg

IMG_4374_zpse8883920.jpg

The outside of both lenses were wet sanded, starting off at 1500grit and working up to 2500grit (In the future I would go up to 3000grit).

IMG_4379_zps66cc4331.jpg

This revealed the coating on the inside of the lens which meant the headlight had to come apart. It's hard to see, but there is an odd shape on the surface. That is where I've started wetsanding. Once done I then polished the inside of the lens.

IMG_4413_zps0aca7d95.jpg

IMG_4412_zpsc266c65b.jpg

The reflectors and internals were given a tidy up and the loose indicator lenses were fixed into place. Here they are back together ready for external polishing.

IMG_4415_zps2e2373d9.jpg

I used Scratch-X to begin with and worked my way up from using Menzerna 1000, 2500, 5000.

IMG_4417_zpsb5e34040.jpg

IMG_4418_zpscda2c9a8.jpg

From this they were then hit with Menzerna UF, followed by 4 layers of AMMO Skin and AMMO Creme.

IMG_4437_zps6ca87839.jpg

IMG_4438_zpsbb76bd14.jpg

IMG_4439_zpsa6bbc0b9.jpg

IMG_4440_zpsdc87f76d.jpg

Enjoy!! :D

  • Like 1
Link to comment
https://www.sau.com.au/forums/topic/440962-r34-headlight-restoration/
Share on other sites

Thanks for the kind words guys. As has already been explained, the headlights can be removed with either a hot air gun or a putting them in the oven. I prefer to use a hot air gun.

excellent! i'd love to carry out these restorations, as buying good condition headlights are so expensive, and all it takes is a little time to fix up a damaged set. great work mate

Thanks mate. A little time and effort gives the best results ;)

we need ppl like you in sydney :(

Cheers. Shoot me a PM ;)

Great work on the 34 head lights btw

Thanks mate.

  • 1 month later...
  • 4 months later...

Hows the protectabt holdng up...i fond the heat from.the lights just tends to burn it off very quickly...

Really need to let some proper UV protectabt on there because once you strip off the coating it will cause them to yellow from.the inside out...

Have also heard about clearcoating them, haven't tried it tho...but a clear heatpeoof paint should work well in theory..

  • 2 weeks later...
  • 1 year later...

Rubbing the lenses back and clear coating them is the best option.

Digging up an old thread here, getting desperate.

Mine are pretty bad, followed a lot of advice via SAU and my mechanic who reccomended to buy a headlight restoration kit, but much of the discolouration is on the interior, not exterior.

I've just tee'd up a cut and polish for mine (black, looking very dull at the moment) and was wondering who might be able to do this work for me as I'm not that comfortable whacking parts of my car in the oven :P

I've never seen them fade on the inside. If they're that stuffed, find a replacement set.

Digging up an old thread here, getting desperate.

Mine are pretty bad, followed a lot of advice via SAU and my mechanic who reccomended to buy a headlight restoration kit, but much of the discolouration is on the interior, not exterior.

I've just tee'd up a cut and polish for mine (black, looking very dull at the moment) and was wondering who might be able to do this work for me as I'm not that comfortable whacking parts of my car in the oven :P

Where are you located mate?

  • Like 1

Where are you located mate?

Latrobe Valley, Victoria - had a recent cut and polish done, cherry glaze etc (came up a million bucks) and spike of the lights, was quoted 100 per light. Sound about right? Not sure if that's interior or exterior.

I know some of these guys are just gonna be like "get new ones" but id rather have a crack at another solution before I dish out bulk coin because they are quite expensive

  • Like 1

Create an account or sign in to comment

You need to be a member in order to leave a comment

Create an account

Sign up for a new account in our community. It's easy!

Register a new account

Sign in

Already have an account? Sign in here.

Sign In Now


  • Similar Content

  • Latest Posts

    • I steam cleaned my near new set of volk gtc wheels 14 years ago and farrkkked them lol. The clear coat cracked like spider webbing in several areas. Lesson learnt don't do that. 😭
    • If you don't touch the CAS, then you're fine.
    • Yeah, my moulds and seals are 32 years old now. I think I will continue to not use a pressure washer on it.
    • I hear the old "I'd never use a pressure washer on my motorbike" BS in the dirtbike community too.  The only people that have had a problem from using a pressure washer on anything are the people that aren't using them properly.  If you hold the wand any more than 45 cms away from pretty much anything (radiators, wiring connectors, paint, etc) you aren't going to cause any damage.  We've had detailers wreck moulds and seals on cars at work before and the only reason why is they held the pressure washer too close and on the one spot for too long.  If you have 5% more brain power than a detailer then you know not to not do that and you'll never have a problem.
    • I'm pretty much healed up post surgery so I spent another almost full day out in the shed re-arranging everything to make room for all of the shit that I've taken off the car.  I need to get everything off the floor and away from the car for when I start making a massive mess stripping off the remaining body deadener and then for the the painting process.  Almost got the shed to a point now where I feel I can actually start working on the car again (clean shed clean mind or something!).  Almost 11 years of accumulated car parts, building supplies, tools, junk, etc have taken a long time to get in some sort of order again!  Most stuff is now boxed up and in the back shed if it's not car related.  Most people would still be horrified walking into my shed but it's significantly better than it was before!   For those that saw my separate post the other day, yeah I ordered one.... This version- I convinced myself to stop being a clown, wake up to yourself and realise it will take you 5 weeks to make one by which stage you're over working on the car again...  Maybe I am getting on top of my "mental ailments" and making smarter choices.... $1450 delivered which will take my miserable half-dutch arse a few days to get over having spent that much!  If I don't have a use for it straight away after my car is off it I might even see if there is a "rental market" for them.  See if anyone wants to hire it for a period of time.  $25 a week or something like that.  I'll worry about that when my car is actually ready to come off it though as that might be a while away!! There's now no excuses now for not ending up with an underside you could eat off! Away for kids sport the next few weekends so hopefully can get the rotisserie assembled ready to go for the car to go straight on it the next available weekend.    
×
×
  • Create New...