Jump to content
SAU Community

Recommended Posts

Hey guys

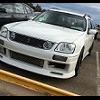
Im looking at taking my wife's v35 head lights apart and painting the insides back and polishing up the lenses.

I have never done this before so any help would be great.

I plan on starting it on Friday night and finishing it by Sunday night as this is her daily car.

Does anyone have any suggestions with method? paint? what not to paint etc?

Any help would be much appreciated

Thanks

Kris

Link to comment
https://www.sau.com.au/forums/topic/443329-v35-headlight-modifications/
Share on other sites

I finished mine a few months ago, split the headlights painted surrounds and resealed. Fairly simple stuff, the mistake I made - and it was a huge mistake - was to try and clear coat the lights for more protection/shine. I'd watched some youtube videos of people clear coating with great success, apparently they wern't using acrylic. When I sprayed the lights they looked good for a few minits then they literaly melted! The fist milimeter or two of the light surface crazed like a turtle shell. I ended up sanding from 300 up to 2000 to get a clear lense again - literaly days of sanding and polishing.

Anyway, the process is all over the net, take out the screws (about 3 or 4 from memory), bang em in the oven and pry them appart (google the temps). The lights are made up of lots of pieces, so painting them is easy. If you want to get rid of the orange indicator you need to cut it out, I just wanted my lights back together at this stage. A full weekend is just enough time to do it right. I used auto paint for the satin black - no clear coat. I wouldn't try and polish the inside, it has some tight corners that would be virtualy impossible to do right.

IMG_1947_zps0c40b1f5.jpg

IMG_1946_zps40986c2c.jpg

IMG_1949_zps2e28ca57.jpg

cheers for the reply bud,

whats your lights like at night??? i see you painted most of the light black, looks great but i was worried about the lights not being bright enough coz they cant "reflect as much?

The reflector is separate, painting the surround doesn't effect the light output. If you look at the surround you will see that there is no surface that helps light output, they are just for looks. There is a separate section to the high beam light that is under the low beam tube (hard to explain) I didn't paint that. The early lights don't even have that part.

So, im gonna start taking the lights out tonight.

anyone have any suggestions on best way????

i knoe front bar has to come off, which is gonna be fun but anything else we should remove to amke it easier???

i ahve also tried googling the temperature we should use to take lights apart in oven but can see to find anyhing consistant

There are 4 bolts and wiring holding in the lights (also indicators in bar), once you drop the bar you will see them, one in the engine bay at the top, one in the side, 2 at the front.

Can be done by undoing the top and sides of the bar and pulling it forward, very high chance of scratching the paint unless you tape the sides... even then?

So, after a loooooong weekend the lights are finally done.

Took a lot longr than what i thought, being old lights the insides had a few cracks on them, i tried to repair them but just didnt look right, so cleaned them up and tarted again, ypu cant really see the cracks anyway once the lights back together.

Faitly simple process, but polishing the clear lenses took the longest, there was a film on the inside of one and it took about 4 hours to clean off.

Heres a few pics of how they turned out, will post a pic of them on the car soon once i have chance to take a better picc in the day time.

When prying them apart though i lost some of the glue, i had some sikiflex that i used to put on her roof spoiler so i used some of that. seems to be good s its been raining since sunday and no water in lights so very happy

post-107907-0-03098200-1401318194_thumb.jpg

post-107907-0-45228700-1401318197_thumb.jpg

post-107907-0-77762100-1401318199_thumb.jpg

post-107907-0-77222600-1401318201_thumb.jpg

Create an account or sign in to comment

You need to be a member in order to leave a comment

Create an account

Sign up for a new account in our community. It's easy!

Register a new account

Sign in

Already have an account? Sign in here.

Sign In Now


  • Similar Content

  • Latest Posts

    • have you rotated the car yet? if so how smooth was it?
    • And finally, I had the driver's side airbox off while adding a long drain hose under the oil can to down near the oil filter. Doesn't look good, it has definitely had an turbo oil seal leak and looks like it has been for a long time.....guess I'll have to get a pair of highflows to put on the shelf It's also worth mentioning it has a really strange clamp between the bottom of the airflow meter (which has a big barb/lip on it) and the intake pipe. I've used the magic of MSPaint to show, basically you have to clip out those 2 steel springs which unlocks the hose from the AFM. I used 2 flat screwdrivers, the spring sort of clips into the unlocked position. Reassembly you just pop them both back flat once the hose is far enough up the AFM that the spring clamp is above the barb. Weird to use but much more convenient once your'e used to it compared to trying to do up a hose clamp under the airbox like on 32 GTR
    • The other thing I started was a fire extinguisher bracket.  As with a few other cars previously (350z, Leaf), I'm going to add a bracket between the navigator seat's front bolts, then mount the extinguisher on that. Unfortunately Nissan (probably the same engineer who did the A/T fluid interwarmer) decided that the front seat brackets would be recessed and uneven so the bracket shape was a bit tricky; I ended up doing 1 part under each seat mount (the large hole is because there is a flange under the seat mount to allow for the carpet thickness)   and then a horizontal part between those 2 No final pic yet as the paint needs to dry, I'll post up once that's done  
    • OK, a few half jobs on the skyline this weekend because its booked for a test day at Wakefield Park on 27-Feb. While the Ecutek dongle and app provide display and logging of a heap of engine parameters, they annoyingly don't have access to the auto trans temp. So I grabbed an oil temp gauge from Raceworks which apparently has warning colour change and peak hold, about $95  and their 8mm hose sender adapter Now, I foolishly thought these 2 might work together, but no, the sender needs about 30mm clearance in the fitting and the adapter only had about 8mm. I've cobbled something together with an NPT T piece and blank for now but will try and work out something more permanent as I intend to use the same fitting for the data logger in the future. Under the car, Nissan's engineers decided that only one opportunity for coolant and trans fluid to mix (the radiator) was not enough, and they also added an interwarmer near the sump on the passenger side like the engine oil has: I've cut the hose between the auto trans outlet and the interwarmer inlet and inserted the sender there as that gives the best indication of temp inside the transmission.   From there it is back to the pain of running that sender wire to the cabin, I've run it up near the passenger headlight, into the battery box, across the channel at the back and into the master cylinder area where I ran out of wire length (and patience). Remainder of the job is through the grommet near the accelerator pedal that I've used previously, then across under the dash to where I will temporarily mount it on the console for track days (and remove it other times). The gauge will also need IGN, BAT and earth (I'm not going to worry about illumination as I'll unhook it between track days)  
    • This piece is obscenely discontinued. I honestly hate the frameless window design because the rubber gets stressed and the guides as well every time you open and close the door.
×
×
  • Create New...