Jump to content
SAU Community

Recommended Posts

Here we go, my first build thread. Now I must admit, it is not going to be to the calibre of most of the builds on here, but some people might take some interest in any event! The aim is to build a budget R32 drift car, to be used in drift days and motorkhanas. The emphasis is mainly on costs, we want to see where we can get while keeping the $$$$ as low as possible.

Since forever I have been wanting to get into the drift scene. However, I have always been abit scared to take my 33 out onto the track - for fear of putting it straight into the wall. Maybe I am being too sensible, but starting to "learn" how to slide in 255rwkw car seems like a recipe for disaster to me. I live in Rockhampton, Central Queensland, and lets just say track's are non-existent and its a 1.5 hour drive to the nearest drag strip.

After years of whining, the local drift guys managed to convince our local motorsport club to hold a Khanacross day with a difference - being that there would be a more open, "drift orientated" feel to the day. Not wanting to let an opportunity pass, and also wanting to make sure there was enough support to keep them running, I decided to enter the 33.

Skills were lacking, as was my LSD, but all in all, I was hooked.

10273397_10152083689731835_8912532129399

A few of my mates also took their registered cars into the event, and afterwards we decided it would be best if we all chip in and purchased a joint project. So the forum searching begun, however most were not in our region, so not being able to simply check a vehicle out without spending $500 in travel expenses kills many options. Luckily for my, I was contacted about an R32 that was going cheap. Reeeeeeeeeeeaaaaalllllllll cheap.

32_start.jpg

The known problems were:

1. Missing brake lines (including hard lines);

2. Car not going into gear;

3. Smashed rear quarter panel;

4. Some of it pulled to bits.

We organised to view the car asap. The car was actually a lot tidier then anyone expected. The front mount had been stripped and was in the boot, so for a test run the piping was rigged up missile spec. She started and purred like a baby, and after a very brief once over, we decided it was well worth the risk. A hand shake was made and we were making arrangements to pick the car up the following day. 3 of us chipped in and for less then I've spent at the casino in one stupid bet, I was now the 1/3rd owner of a Type M GTST. Under the cover of darkness, we got the car home.

32ontrailer.jpg

The plans at this stage are to have the car ready for the next Khanacross drift day on 13 July 2014. That essentially leaves us with weeknights and this coming weekend.

First things first - we did the usual stripping of interior. Back seats, boot platics, amps, speakers, spare tire and jack all removed. The next focus was the clutch. Turns out, for some unknown reason, the previous owner had changed a bolt on the clutch pedal. The result was a bolt that was far too small and didn't push the rod enough to disengage the clutch. After about 45 minutes work, removing the pedal box, drilling out, and fitting a new pin, the clutch was working and it was cutting hoops in the back yard to celebrate.

The car still had no brakes at this stage so it was a good thing we didn't go too hard. Next up HEL braided lines were ordered to replace the missing lines. We also managed to use a spare S13 hardline, and bend it to fit. So this coming weekend all this should be installed and brakes should be sorted.

hicas.jpg

A GKtech HICAS lock bar has also arrived, ready for fitting

hicas2.jpg

The cooler pipping at this stage is less than idea. It appears to have been rubbing on the clutch fan previously, and it missing joiners etc. To get the car running for the 13th, the likely plan is to obtain a stock cooler and piping and revert back to the side mount just so we can have it running.

As is always the case, unexpected things crop up and money gets spent on them, instead of more necessary items. An AP Engineering PFC and hand controller came to my attention locally, and there was no way we were letting that slip by. It is causing some problems with the cars its plugged into, but we are hopeful the unit itself is fine and the issue lies in a loom wiring/not getting enough volts problem. This will not be installed for quite some time, and will likely only be used when a turbo upgrade is performed.

pfc.jpg

Which brings me to where the car currently sits.

image.jpg

This weekend we need to install the cooler (stock or front mount), fix and bleed the brake lines and sort something out for the cracked glass. Then, a fresh oil change, some new sparkies and an all round tidy up and she will be ready to rock her for her first on the track.

At this point our ability does not exceed the vehicle, so we are hoping to lay down some decent track time, and build this up as we progress as drivers. Keeping the budget aim in mind, we are probably looking down the road of an RB25 turbo, RX7 injectors, and the power FC to make perhaps 160-170rwkw.

Link to comment
https://www.sau.com.au/forums/topic/445214-budget-r32-drift-build/
Share on other sites

This is a build to watch.

People can spend money and then ultimately end up with far more car than driving ability, Sensible progress should see a proper race seat/harness and then some suspension fettling.

Will be tuned in Grant - good luck :yes:

Good progress today! HICAS removed, braided lines fitted and we have brakes now! Also scored a PWR R32 intercooler for a ridiculous price :D

I agree Nistune has some great benefits... But for the price I scored the AP Engneering FCC and hand controller, I would have to be a lunatic to say no!

Total price so far (all together, not each, including all purchases) is $1644.

Got through abit of work on the weekend. Not before another impromptu purchase however, being this PWR intercooler for an R32. I have no idea how this would be mounted in a road car, given the piping seems to go directly into the REO. Luckily ours isn't going to be rego'd again, so the REO was simply removed. We are hoping we can rig some piping up for this prior to Sunday. The return flow aspect of the cooler means we don't have to have cooler piping hugging the clutch can and causing issues.

PWR.jpg

So it was up on the stands for the work to being. All of the HICAS lines were removed and binned. the GKTech HICAS lock bar was installed, and the HICAS pump was re-routed to simply pump straight into the reservoir.

progressshot.jpg

HEL brake lines were installed. The S13 hardline we salvaged was near on perfect (gotta love Nissan's crossbreeding). We did notice right at the end that a bleed valve on the front right hand caliper has also been nicked, so we pinched one from an S15 rear caliper that was lying around. Finally, the car has brakes!

HEL_lines.jpg

The dump pipe was hanging on my one dodgey bolt when we purchased it. And know we know why. All of the studs in the rear of the turbo housing were missing. Someone has drilled them out, so unfortunately there was no thread to wind new studs into. That left us with nuts and bolts, and washers haha. We should have trimmed this bolt back after the test fit, but the day was getting long in the tooth. This will do for the first day.

dump.jpg

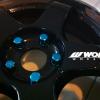
A mate dropped these ROTAS around for the front steerers. This gives us two sets of stockies for the rear this Sunday. They are 18x9.5 plus 12, so will probably look abit ghey with the height and no camber, but hey, free is free right?

rotas.jpg

THE PREP

Ok this past weekend was our first drift day, and in reality, the first time we have even driven the car. As it is unregistered, I organised to borrow a car trailer from one of our mates who is fairly into his sliding. The problem is its got a tire rack and everything. So we were abit nervous about looking the part, and not delivering.

trailer.jpg

Once the trailer was sorted we started doing some of the little things required. First step - fix the smashed rear glass. Duct tape or fabric tape would have been ace, but all we had was electrical tape. Enter dodgey window fixing here...

window.jpg

We bolted up the steerer rims. They are 18x9.5 + 12. It's high as a kite but they are a great size for a 32. We will tuck them in abit more with some lowering and camber arms (in the future that is).

fitment.jpg

Next up - intercooler. We were nervous about the piping we had, and even after borrowing a mates box of joins and bends, it was becoming apparently it just wasn't going to happen for us. Time was running out, it was Saturday afternoon at this stage and the car needed to be at scruit by 8.00am the next morning. We mounted the PWR cooler, and made brackets to suit, but with no piping to match up we ripped it and put the front bar on (zip tie style).

front_bar.jpg

At this point we put our thinking caps on. We mocked up a stock 33 cooler, but once again we were lacking pipe work. All shops were shut, and we were left with no other option but to bite the bullet. This took abit of a group discussion, and my mates German Shepherd decided if the car wasn't running, he would put it to another use.

helper.jpg

Enter "biting the bullet time". In reality, its a dead stock 32, doing short runs in winter. We decided that the cooler (although being a heat sink) probably wouldn't be doing that much work, and lets be honest, who hasn't sat on the spot for over a minute in 2nd gear doing a skid in their car before? Exactly.

Out came and angle grinder and we made the best use of two dodgey pipes we had. They had blow-off valve outlets that needed filling, buts it was our only chance of getting the bloody car running for the day. The two pipes were welded together and my mate went about filling the BOV holes. Turns out a large washer was a PERFECT fit, so it was tacked in and simply filled over with weld. As seen here....

welding.jpg

Everybody get ready to cringe... here is the finished product.

finished.jpg

It kinda has a factory appeal about it... and needless to say lag was not an issue!

factory.jpg

A quick wash...

ready.jpg

Probably its best angle...

back.jpg

All loaded up and ready to hit the track.

trailer2.jpg

Passed scruit and I was given driver number 32 (my mate was 31). Quite fitting for its first shake down!

image.jpg

THE DAY

Now to the day. First things first, I must say it is such a comforting feeling knowing you have not invested huge sums of money into the car you are about to deliberately get sideways next to concrete walls. I can't help but feel that last time in my R33 my mind was half on driving/half on worrying about hitting the wall. It just took a lot of my concentration away, and as a result it was a lacklustre day.

I took the first few runs pretty gingerly. In fact - I was copping flack from my mates saying I needed to open up the throttle. Funny part is, its easy from the stands, not so much in a car you have never ever driven before. I built up and built up, to the point where I felt I had the car control enough to start increasing the throttle.

The drift hand-brake button is awesome - worlds simplest yet best invention.

The car itself was pretty good! It wasn't very good at baking second gear, but I put that down to a stock clutch and a lack of speed from us drivers. We simply weren't getting enough speed to carry the car in second well. I decided after a failed attempt at second that I would stick to first for the day.

I am glad I did. I ended up making leaps and bounds in the drift demo's. Basically in one day I went from never having drifted, to being able to get used to hand-braking the entry, clutching and steering. I was managing to link a few corners in the end, but they were not smooth by any means. I guess by link I mean come out of a corner, set up the next, hand brake and keep going without losing it.

The car didn't have too many troubles. Power steering leaked from the res because it was over-full. That was obviously a simply fix. The biggest issue was that there was fluid over the opposite side of the engine bay. We couldn't work out what was doing it, so we kept cleaning it, doing a run and checking to see if we could work it out. While looking for the leaks we noticed the rubber line from the FPR was badly deteriorated. Figuring this was from 20 years of heat, we didn't think much of it at the time.

We replaced it with some new vac line we had and went again. However upon checking the under the bonnet again, we noticed this.

acid.jpg

At this moment everything just clicked. Just as we were doing this, we noticed our hands were burning from the fluid we were touched. Then the pipe. Then the paint on the cam cover coming off.

Yup. The battery was absolutely spewing acid out on every run. Must have an issue with a dead cell and over charging or something, but in any event, 7000rpm was resulting in acid going everywhere. A battery change and quick clean up (to hopefully stop the acid from doing too much damage) and we were back out there fore the final runs.

I guess we will now need to radiator hoses, most vac lines etc simply as a precaution before the next day. But we have a lot of work to do before the next day anyway... The clutch has an issue and the car wouldn't go into gear to drive off the trailer when we got home :(

The car was one of the least impressive out there smoke wise, so I doubt anyone bothered to take pics. I will try and track some down of it in action, if any exist. I'll also chase some videos, if anyone bothered to take some.

  • Like 1
  • 2 weeks later...

Turns out on the first drift day the battery was leaking and spraying battery acid throughout the engine bay. We were struggling to work it out for a while (just where the liquid was coming from), but after noticing our fingers were burning - it clicked. Then the pipework was the dead giveaway. Good paint stripper unfortunately.

Underside of the bonnet

bonnetasc.jpg

Cam gear cover

camgear.jpg

Cooler piping

cooler_pipe.jpg

Now we have to wire brush everything, reseal it and paint it. I am sure some of the hoses would have copped a beating too, so probably some new lines to assure reliability at its next drift day. Until then, its parked up.

topview.jpg

OH - and I also found this phot of how the car used to look, prior to becoming skid spec. Was quite tidy but not my taste (although I don't mind the Advans!)

nostaliga.jpg

  • 1 month later...

Verrrryyyyyyy little has been happening by way of updates. We have so few drift days up here that it is a loooooooooong time between drinks. Next time the car hits the track will be November 9. So in preparation, we have:

1. Installed a nicer wheel, alot smaller, should kept it clear of knees;

nardi.jpg

2. Purchased a set of 18 inch Advan VS5's to keep the 90's jap feel flowing!

rims.jpg

Good score on the car mate. I'm looking for something cheap ATM similar to this to give drifting & street sprints etc a crack. I live in gracemere and was out having a look at the sale yards setup when one of the events were on. I will be heading to have another look on the 9th of November as I hear a couple of the big boys might be coming up for a demo/play.

  • 2 weeks later...
  • 1 month later...

Update time. They are few and far between, because sadly, the events up here are also few and far between.

The last event for the year was held on November 9. Of course, we leave everything until the last week. We really needed an intercooler on the car this time. Temps up here are now reaching 38 degrees, so the dodgey "direct intake" pipe we made last time was not going to cut it. As I have already said, we picked up a PWR intercooler for cheap. We just needed to sort out pipe work.

Even though it is a drift car at heart, we were still aiming not to hack it to bits yet. We wanted to utilize the stock cooler holes, given this was a return flow cooler aswell. Our welder usually wants to make every pipe level, plumb etc, but we said it wasn't a big deal. Time was of the essence, and its really function over form for this car.

Step 1:

Purchased a whole heap of stainless bends and straight. Not cheap, but do it once and do it right I guess.

2LAorRF.jpg?1

Step 2:

With the help of a mate, we cut, angled, marked and taped the route for the piping. Taping the cuts together was great, as we could build the whole pipe and then check to see if it was fitting. They were then tacked, and test fitted.

pCliG9h.jpg?1

oF1UiYz.jpg

Step 3:

Fitting the pipes. Here is how they turned out. They were "fusion welded", which in essence means only the two pipes and an arc was used. No extra weld added. The welder gets the pipes to line up so well that they simple fuse to each other when the arc is produced.

OFjPMOc.jpg

Fitted up

N4fTt87.jpg

Example of the "fusion weld"

oZbREns.jpg

Pipes into the outlet and intake

Ha0UaTt.jpg

Pipes in the wheel arch

mSovzOQ.jpg?1

Edited by Granthem
  • Like 1

So we bolted every thing up the night before. We also fitted a new clutch master. Prices in town were 99 for a rebuild, 165 if it needed sleeving. Kudos Motorsports sold me a brand new genuine Nissan master for 130 bucks delivered express over night. The decision was a simple one.

The day finally arrived, but the course was abit more suited for the motorkhana guys as opposed to us drifters. We started making our own fun around the barrels. Here is a short video of me enjoying some barrels and trying to give the crowd something to cheer about. We were limited to 3 hoops maximum sadly (it was technically still a timed motorkhana event).

https://vid.me/DPsC

By the end of the day I was getting close enough to the barrels I managed to rub them without moving them! Here is the proof (never mind the missing indicator, it got ripped out when I accidentally caught the front bar on the trailer. In any event - makes it more drift spec :P)

3jODMBI.jpg

Create an account or sign in to comment

You need to be a member in order to leave a comment

Create an account

Sign up for a new account in our community. It's easy!

Register a new account

Sign in

Already have an account? Sign in here.

Sign In Now


×
×
  • Create New...