

Announcements
-
Similar Content
-
-
Latest Posts
-

By TurboTapin · Posted
I've also been eyeing their rear axles for my car. I purchased seat mounts from them about 7 years ago and they were hot garbage so I've been a little wary about purchasing them. With that being said, please buy them and get back to us haha. -
 Can a moderator please move this into the right category.. I've accidently put this into racing build thread 🤦🏽♂️
 -
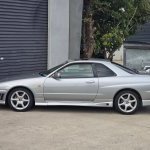
Being a manual, we very quickly ordered new R34 gearbox (From Nissan) and remaining parts from Kudos motorsports. Would highly recommend the team there. Ultra helpful and quick to share advice and upgrades. We are in the middle of taking the Auto out (Genuine 94,000/kms) and putting the Manual in this weekend. Part 2 of the build will include likely a Plazaman Intercooler and Plenium, Hks Exhaust with Tomei Dump (ordered).
-

-

-


Recommended Posts
Create an account or sign in to comment
You need to be a member in order to leave a comment
Create an account
Sign up for a new account in our community. It's easy!
Register a new accountSign in
Already have an account? Sign in here.
Sign In Now