Jump to content
SAU Community

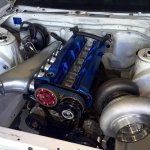
275 Radial R33 Drag Build


2rismo

Recommended Posts

  • 4 weeks later...

Head back from CNC. They roughed most of the hard stuff out. Now getting measured, hand-finished, all the usual stuff. Valves, seats and whatnot are all there too now and the cams should have arrived in the shop today. Tyres arrived at my place too.

TwgWh5M.jpgppgx11l.jpgD0bPuW7.jpg0IslIHy.jpgBMpJP3a.jpg

  • Like 1
Link to comment
Share on other sites

Cleaned out some of the engine bay today. Took hours. Barely scratched the surface and then one of the bloody wiper arm bolts has corroded itself in. Bugger. Still sooo much crap to remove.

Before:

juMO4qq.jpg

After:

A8teoPC.jpg

Link to comment
Share on other sites

It's not a proper build thread until there's a foot in a photo :)

Those ports look huge, can't wait to see some results.

They're a tiny bit bigger now and the exhaust is matched to the manifold. Plenty of meat in the 6boost runner/flange to make it perfect. I pick up the new Plazmaman billet runner intake next week. Will be interested to see how much, if any, work that needs.

  • Like 1
Link to comment
Share on other sites

Ordinary engine builder: "Hey mate, your cams arrived."
My engine builder:
Chauayn.jpg

Caps, girdle etc all arrived. Deck given a light machine before going out for line boring at Jack Bros.

GS9ge6u.jpg
DYwB1rY.jpg
Link to comment
Share on other sites

I've done the street car thing, now I'm doing the race car thing. No water in the block (or between the head and the block, but that comes later), methanol, comp', big boost, 7s.

Buh-five-tah is a legendary car. :D

Edited by 2rismo
  • Like 1
Link to comment
Share on other sites

  • 4 weeks later...

Progress on engine assembly. Got the block back from Jack Bros after a line bore and hone and being tapped for 12mm head studs as well as being fitted for the steel caps.

5hprh3o.jpg

Osama bin Grindin'.

oPZeYMp.jpg

Needs a couple of thou off everywhere and a few off the thrust. Was too tight everywhere but very consistent (maximum .001 either way of the middle.)

TSqanSH.jpg

5rNdoKv.jpg

Turbosmart FPR-3000 showed up too. Will be running Siemens 2400s x 12 by the looks of things. There goes $2k.

tpXeGiW.jpg

Link to comment
Share on other sites

Create an account or sign in to comment

You need to be a member in order to leave a comment

Create an account

Sign up for a new account in our community. It's easy!

Register a new account

Sign in

Already have an account? Sign in here.

Sign In Now


  • Similar Content

  • Latest Posts

    • Much less twat-tastic. CF wheels are too garish for civilised use.
    • From there, as the manual says....assembly is the reverse of disassembly, no tricks worth mentioning Much better (for me)
    • In my case, the standard wheel I had was in good condition but the buttons had more wear, so I swapped them across from the original wheel from the car. The plastic rear cover is held on by 4 tabs, and once the wiring is removed you can get access to 2 screws on each side the hold the buttons in From there I just swapped the wiring over. What was interesting is the standard style wheel is 2.0kg but the carbon fibre one is 50% heavier at 2.9kg. It even has a weight inside the wheel at the top to make up for some sort of imbalance in the design. weird
    • Once the airbag is off, to remove the steering wheel.... Undo the 2 plugs into the clock spring, and the horn connector from it's clip. Hit the 19mm nut with a rattle gun (preferably) or if you don't' have one, you probably want an assistant to hold the wheel in place while you use a breaker bar to undo the nut Then, screw the nut back on 3 turns, and pull the wheel sharply towards you. If that doesn't work hit it medium force with a rubber mallet on either side, or possible behind if you can get there. If that all fails (it shouldn't!) you might need a steering wheel puller
    • So, to next task....the carbon fibre steering wheel was either an expensive factory option or a chinesium special. Either way, I don't like either the flat bottom or thick ring style, so it had to go So...to remove the steering wheel.... First, disconnect battery negative and stomp on the brake pedal for a few seconds. Then, remove the small circular covers on each side of the wheel's rear surround to uncover the airbag clips. You need to push something like a flat bladed screw driver through, to push the steel clip inwards and pull the side of the airbag forward. Once you've done the easy side, same on the centre console side. You can see the tab you are shooting for circled in red Then, disconnect the horn spade connector and for the yellow airbag plug you need to get something small under the black locking tab to pop it out, then the connector releases......airbag is off  
×
×
  • Create New...