
Announcements
-
Similar Content
-
-
Latest Posts
-
 PRICE : $1400 LOCATION : NSW Central Coast FIT : All Nissan 350Z type Z33 and Infinity G35 Coupe. See delivery note. Hi, brand new, unused, still in the box. ($1850.00 is what i paid ) My bad luck !!! I thought my right front Bilstein was cactus so i bought the ST 's to replace all. Turns out the right front is fine ( loose mounting after service by a well known importer of Bilsteins ) So im selling the ST's. They are made by KW ( no intro needed ) . Iam on the Central Coast and im willing to meet up in Sydney metro, within reason and Newcastle.
 -
 Yep, yeah would need to do the flywheel although the 6 bolt NA clutch can handle a 20de if just wants to replace the stocker.
 -
 No it's fine. Heat sleeve is a thing. With oil running through it it is unlikely. Engine off heat soak can be a thing though. There is no way that you have a leak through the hose. That has pressure behind it and any small hole will turn into a large one in very short order. It is so much more likely to be leaking from the connection.
 -
Really? That's piss weak. I didn't know they hobbled the shitboxen that badly. OK. So probs need to buy a flywheel too. But that's not too bad.
-
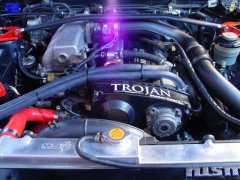
 Hi all. I already posted some newbie-ish questions here and there but this will be my first "big" post. Last summer I went and fulfilled a kind of childhood wish, because I just thought I needed this experience in my life no matter what. The car I bought is a mildly modded 1995 BCNR33 Vspec. It was repainted to a metallic orange color all around and it had all windows reseated. Not so well done black respray in the trunk and a metallic black in the engine bay. From outside it looks very nice except for a minor paint error on the roof and the rear spats needing new adhesive tape. The inside is pretty clean and no broken plastics, missing or faded buttons. Even the adjustable mirrors and trunk antenna work like a charm. Despite a moderately long list of issues I don't (yet) regret buying this car. Most mechanical problems are just due to age, like worn rubbers here and there. The underside sadly has lots of corrosion, especially to the back. It looks like it either has been driven in the winter for a while or it lived near the saltwater in Japan, the rust is nothing terrible but it'll require to be looked after. Mostly panel gaps and all the mounted components underneath are a bit crusty, but I don't think anywhere has progressed so badly that there's going to be holes. Front right jacking rail is crushed and needs some care so it doesn't develop into a rust crater at some point. Worst part is definitely the strut towers. I thought they looked fine but after taking off the strut bar I noticed that it actually started bulging up on the passenger side. Probably would have passed on the car or negotiated down by some thousand Euros more if I had noticed this before buying, but here we are. Trunk area also has signs that there was a water leak to the interior once but nothing too crazy, I guess lots of Skylines had this at some point. As for the list of (known) issues, I'll try to make this compact. I hope the coloring is self explanatory. Mechanical: -Various busted or soon-to-be busted rubber bushings and ball joints. Will replace ball joints with OEM or better and bushings with polyurethane where possible. -Shaking steering wheel at above 80kph -downshift from 5th to 4th is a bit crunchy unless I rev-match, might just try to renew the shifter assembly, but it's not a priority issue -tailshaft centre bearing could use a replacement, is it worth going 1-piece tailshaft as it doesn't look too fresh all around? Chassis: -underbody corrosion on many spots and in hollow spaces, needs to be treated -corrosion on many bolts, hoses, lines, suspension components, subframes, will be treated when replacing of the bushings is needed as time goes on -strut tower top panels and some of the surrounding panels are rusty, so needs fixing. Will look into doing this with a buddy in the winter, otherwise bite the bullet and pay a professional -driver side door is misaligned to the body and needs to go a slight bit more inwards -both door windows are misaligned and have an airgap where the window meets the door at the B pillar -The Aerocatch latches for the bonnet have locks but no keys, need new keys. -driver side door window is kind of gritty and could use a polish -damaged jacking rails and front frame rails, from people lifting the car the wrong way, might have this fixed by a bodyshop Electrical: -Nismo tachometer is just bouncing and displaying nonsense, supposedly worked fine when the stock ECU was still in the car -An old Greddy boost controller sits on the dash which will be removed as it servers no purpose anymore. -a led segment rpm gauge is on the steering column, will probably also be (re-)moved once the Nismo tacho is working correctly -there was an attempt to make the sound system better by the previous owner but it was just inducing noise all the time, ripped out the amp and filters in the back, no music for now -trunk antenna goes up as long as the radio is on regardless of the mode, I want it to only rise if I choose Radio specifically or per switch -3rd brake light is a bit dimmer than the taillights but everything was converted to LEDs so mabye now it just seems dimmer? -reverse light flickers, have to test if that behavior changes when I fiddle with the gear stick. Hope I can get around changing the switch. -Left side taillight, blinker section has minor water intake and is humid after washing. Other side has a hole in it, probably for that exact reason. I'll probably reseal them entirely and plug the holes. Engine: -minor coolant drips on one or the other hose -rear turbo leaks oil onto the exhaust making the car essentially undriveable due to fire hazard -Oil filter relocation kit has an oil drip at the Dash lines, will probably make a new connection there and tighten real good and pray -throttle body assembly is slightly stuck for the first throttle pedal input after sitting for a while I'm always open to suggestions and advice from more experienced people, I'm sure half of this list is easily dealt with and just requires some time and effort to sort out properly. Once I have some proper pictures of the car I will post some in this thread, I just have to remember to take some more once I get the chance to. Will post updates when I have news on anything, I want to try to keep this thread as kind of a logbook as well. Ultimately my goal for this car is to just enjoy it. An engine rebuild is probably going to happen sometime as well, because it is old after all. It will never be fully new again, I am just not that rich. But I want it to look good, work well and not rot away while I drive it. I'm probably gonna spend a lot of money on this journey, hopefully not an unreasonable amount.
-


Recommended Posts
Create an account or sign in to comment
You need to be a member in order to leave a comment
Create an account
Sign up for a new account in our community. It's easy!
Register a new accountSign in
Already have an account? Sign in here.
Sign In Now