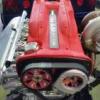
Gtr R34 V-spec In The Build
Announcements
-
Similar Content
-
Latest Posts
-
They see me rollin' they hatin'....... Took me most of the day to make the necessary mods to the mounts to make them fit the car. Fortunately I was able to just use the mounts that came with the rotisserie. The rear ones are really secure, the front I feel i might reinforce a bit more as it doesn't seem like enough attachment to the vehicle. I'm sure it's fine but better to be safe than (extremely...) sorry. I drilled and tapped thread into additional M12 holes to each car mount where it attaches to the rotisserie as an extra fail-safe. Without them the side to side movement is just restricted by the allen head pinch bolts, nothing actually goes though the beam. Does now! I still need to adjust the rotisserie to get the car centred in terms of centre of gravity. If it's too high or too low relative to the rotational centre line of the car, it will be like a turtle and roll onto its back or as it currently sits, I dont think I'd be able to rotate it as it sits as it needs to lift the whole car up as it rotates. Ain't happening... I'm going to be nervous as hell the first time I go to spin it on its side...
-
Oh yes done this when the window started flopping around. Turns out the guides that run along the rail chanel had crumbed way. Took off the door card and pulled out the window mech, then the window, which you have to pull out through the top. As said unbolt the guide rail and don't spend 30 minutes getting frustrated trying to find a way to slide it out upwards cause that don't frigging work. Drop it down and out through the door hole. All I did to repair it was slice some 10mm clear plastic tube, vertically, then screw it to the guide rail both sides. This tubing rolls inward on both sides and leaves a gap wide enough to hold the window. To finish all I did was lube the plastic tube with olive oil and Bob's your uncle . . . well if he has the operation he can be your Aunt ! ! 10 bucks in plastic tube and another 5 minute job done again . . . . YEH BULLSH#T ! My love for Skylines knows no bounds !
-
By BourneToLive · Posted
So was there a solution to this problem? I’m having this issue now. -
not expensive, just irreplaceable if you don't go sub 60 at wakie in that thing people will start talking
-
I haven't replaced that, but I have had the doors apart on the r32 a couple of times The door skin will be held on by a combination of clips and bolts, just take it slowly and make sure all the sneaky hidden bolts are out Once the skin is off you should be able to pop that piece off pretty easily, looks like there are only 2 bolts holding it on
-


Recommended Posts
Create an account or sign in to comment
You need to be a member in order to leave a comment
Create an account
Sign up for a new account in our community. It's easy!
Register a new accountSign in
Already have an account? Sign in here.
Sign In Now