Jump to content
SAU Community

Recommended Posts

Hey guys,

My name is Josh and after being a member of this awesome page for a while and seeing everyone else's builds, I decided I'd muster up the effort to post up my build this far!

I hope you all enjoy it as much as I am building it!

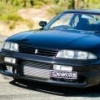
So in May of 2012, after passing my second phase L's I bought this beauty for 8k. It was completely stock apart from a Pod Filter, which is just the way I wanted it as I never saw a point in starting off with someone else's work, I had to make it my own from the beginning! (Unfortunately these are the only photo's I have of when I first bought it).

post-104024-0-06618000-1428562203_thumb.jpg

post-104024-0-67593100-1428562209_thumb.jpg

post-104024-0-34975200-1428562214_thumb.jpg

post-104024-0-13624000-1428562218_thumb.jpg

Link to comment
https://www.sau.com.au/forums/topic/455557-the-black-pearl-my-r33-s1-build/
Share on other sites

So after having this car for a couple of months I started to see other modified Skyline's and just got bit by the mod bug!

So I got to work on getting idea's on which way I wanted to go with my car. When I was younger I had always wanted a Skyline painted green with some nice gold dished rims, however I realized that was just a fully hektik ricer phase and I wanted to make a really clean example of an R33 as a lot of people do ruin them these days.

So after some thinking I decided to go with a Red and Black scheme! I decided to change the steering wheel first, so $240 later I had a genuine Momo steering wheel which was a nice shade of black and red. This is when I got my first taste of being annoyed with my car, as we all do at some point! As this steering wheel didn't turn out to be as easy as I thought, the steering wheel was fine, however the boss kit was not. I made my way to my local Super Cheap and bought a boss kit. After installing it I could not move the wheel very easy as it was super stiff and felt like it wasn't a correct fit.. So I went back to the store and they assured me this was for my car, but it still didn't work. So I ended up getting my money back and buying a HKB Boss Kit from Japan and hooray! It worked, I finally had everything back to normal + a nice new wheel!

So I decided to update the interior a bit more! I also bought a Momo shift knob and red and black leathers for the hand brake and gear knob surround. Unfortunately I was and still to this day am unable to find a Momo handbrake handle in red and black to complete the set :glare:

(The red dash was done after, but this is the only photo I can find that shows the interior) :P

post-104024-0-54064100-1428621804_thumb.jpg

post-104024-0-83302600-1428621820_thumb.jpg

Next on the list I wanted to hear a nice note coming from my car, so I took the car to "Carline Mufflers" and brought a brand new X-Force 3" Turbo-Back Exhaust System. So out the stock exhaust came and in went my shiny new exhaust! I didn't take any immediate photo's, but here's one. (You should all know what an exhaust looks like anyways :P)

post-104024-0-82730400-1428622130_thumb.jpg

After getting my new exhaust, I went back to the interior and decided to get a double din as I wanted something a bit nicer with GPS functionality etc.

So I bought a Clarion NX302A and some clarion speakers for the rear (Still am yet to replace fronts, but will be doing this soon).

2 years later and it's still working great!

Ps, Lucky for my a sub and amp came with the car when I bought it, so score! :D

PPs, the other photo was install day (Excuse the try hard pose & wheels haha).

post-104024-0-92978000-1428622397_thumb.jpg

post-104024-0-09528900-1428622408_thumb.jpg

After this I bought a new sticker and after being annoyed at that sticker on the rear of the car (The one that says "GTS25T") Being faded and looking shit I decided to see if there were any replacements out there. By chance I managed to find this and bought it straight away! Lucky too, it was the last one. Definitely looks good and goes with the colour of the car IMO, I've been told it's a four door badge, but I still don't know haha.

post-104024-0-38338300-1428622715_thumb.jpg

post-104024-0-10445800-1428622750_thumb.jpg

So I drove around like this for a while and then wanted to do the next step engine wise to the car

So after a while of searching and reading up on Front Mount Intercooler's I had decided I would rather not cut up into the engine bay yet and so I opted to get a Return-Flow Style Intercooler. So I hopped onto JustJap.com and bought a brand new Blitz Return-Flow FMIC and got it installed.

Btw, yes I know the intercooler looks wonky, it annoyed me and so I have fixed it haha :nyaanyaa:

post-104024-0-00651200-1428624160_thumb.jpg

Edited by MC-WOSHY

I then decided I wanted a dash colour change and so I paid for it to get plasti-dipped, at the time I liked it but now I am looking to do something different.

This is the new look I want and will be doing soon, it's Hydro-Dipping, really interesting stuff! and it looks a lot cleaner IMO :P

post-104024-0-69384500-1428624760_thumb.jpg

post-104024-0-10663900-1428624783_thumb.jpg

Here are some photo's of how it stood at that point in time, I still wasn't convinced on the S1 look, wasn't aggressive enough. But then again, it didn't get me cop attention, which is always a good thing :cool:

post-104024-0-49773900-1428625117_thumb.jpg

post-104024-0-92242400-1428625119_thumb.jpg

So I again felt the need for more upgrade's so I saved up for about 3 months on Video Shop wages :P and brought myself a brand new Apexi Power FC w Hand Controller for about $1,200 from Nengun.com

Ps, everything on this build so far was brought brand new and genuine, which I pride myself on given the fact I was @ a Video Shop only getting about $300pw. Thankfully I have a full time job now, which makes things a bit easier

It arrived rather quickly too!

I was then off to the tuners (No photo's sadly) and made about 250hp w a Boost Tee on 13psi (stock turbo) @ HyperDrive Motorsport in WA.

post-104024-0-70038500-1428627103_thumb.jpg

So I was content with the engine setup the way it was, keep in mind at this time I was still at the Video Shop and so I didn't want to do anything more in case anything went wrong because I was worried I wouldn't have the funds to fix it.

So I moved onto some more aesthetic things :happy:

One of the things I've never liked about the S1's is the horrible spoiler on the back, so I decided I'd change that.

I didn't want to go for the GTR spoiler as I didn't really want to put a GTR part on a GTST

All of the after-market spoilers I had looked at also didn't take my fancy

So I opted for the straight swap and bought a S2 Spoiler

Here's the before and after, much better IMO! :thumbsup:

post-104024-0-12870800-1428629741_thumb.jpg

post-104024-0-45601900-1428629749_thumb.jpg

post-104024-0-33312300-1428629757_thumb.jpg

post-104024-0-58678000-1428629766_thumb.jpg

I was loving the look of the new spoiler and upon looking at it I had an idea, probably been done before but eh

My rear washer arm never worked and so I planned to remove it, weight saving yo! ;), and plug the holes up with a rubber bung

I got to work on this, the only issue I had was removing the nut holding the motor to the window as it was rusted AF!

I had to get a mate to carefully dremel it off.. once this was done it was a matter of finding the bungs to fit and I was good to go. Again, IMO I think this makes it look a lot cleaner too!

post-104024-0-08411700-1428630193_thumb.jpg

post-104024-0-22313900-1428630198_thumb.jpg

post-104024-0-93232800-1428630201_thumb.jpg

Next in the aesthetic changeover was new plates

Now, these new plates don't mean much now, but they will! I have a few things planned :thumbsup:

So $500 later and 3 weeks of eager waiting and I had my new plates!

post-104024-0-56230400-1428630907_thumb.jpg

So next on the agenda (If I remember correctly) I decided I had to get rid of those ugly wheels!


So after searching for a while I found some wheels that went with the car and I decided they would do until I bought my desired wheels (Enkei RPF1)


I scored them for $300, so no complaining there


Offset isn't great either, but they are so much better than my previous rims and that's nothing spacers can't fix :P


So then I was off to the tire shop to get tires for them and get them fitted!


Out with the old, in with the new :cheers:

post-104024-0-14520000-1428631644_thumb.jpg

post-104024-0-85722700-1428631654_thumb.jpg

post-104024-0-84257700-1428631662_thumb.jpg

post-104024-0-14604800-1428631667_thumb.jpg

post-104024-0-97654600-1428631674_thumb.jpg

So now that she was looking mostly schmick on the outside, I drove around for a while with an endless list of stuff I still wanted to do

The mod bug is definitely crazy! The car is never complete, there is always something new that can be done and that's what I love about building a project car. There's always room for improvement and changes!

So, by now (If you're still reading :P) you are probably wondering why my thread is called "The Black Pearl", if you weren't wondering then shhh, play along ;).

As most of you know 33's have adopted the "boat" name and so instead of sitting there trying to justify this I decided to embrace this

If my car was going to be a boat then it would be one of the fastest boats known, and so "The Black Pearl" was the nickname my car was given and goes by today!

In commemoration of this, I got a custom sticker made up :D

post-104024-0-65849500-1428632741_thumb.jpg

post-104024-0-35742100-1428632768_thumb.jpg

  • Like 1

At this point, I liked the look of the car but wanted to give it more of a modern feel

So I decided I wanted to get LED Rear Tail-Lights but there weren't really any that appealed to me as they all looked cheap and you lost the circle part from the light and got a little indent instead, similar to how the R34 Tail-Light's are.

After a while of searching I came across a set of Tail-Lights that were made to order from a place in Japan, the best part about these lights was that they took genuine Nissan lights, professionally opened them, converted them to full LED (Brake, Indicators & Reverse) not just LED globes, full LED conversion and then resealed them and sold them.

The only issue was they were super expensive but I just had to have them!

So $670 later and my new lights had arrived :D

Please keep in mind, these photos don't do it justice and they have to be seen in person to really be appreciated!

These were by far the easiest upgrade as they didn't need any modification done (As they were genuine Nissan R33 Tail-Lights) they just bolted straight in and used my existing light plug thing :thumbsup:

Here they are:

post-104024-0-77296500-1428636016_thumb.jpg

post-104024-0-85942000-1428636021_thumb.jpg

post-104024-0-13450600-1428636025_thumb.jpg

So after my LED Tail-Light install I fell in love with these lights, they were super bright, full LED and made the car look great at night

So I decided to get in contact with the people who made my Tail-Lights and also bought genuine Nismo Shaded Indicators (Side) which they had opened up and converted to full LED and genuine Nissan S1 Front Indicators also converted to LED

My car was now full LED and it looked amazing! The shaded Nismo Indicators definitely went better with the black paint

Inc Tail-Lights and both sets of Indicators I paid just over $900, so was expensive but these things were the real deal!

post-104024-0-88265900-1428636600_thumb.jpg

post-104024-0-71214400-1428636605_thumb.jpg

post-104024-0-30894800-1428636613_thumb.jpg

post-104024-0-41586300-1428636715_thumb.jpg

Create an account or sign in to comment

You need to be a member in order to leave a comment

Create an account

Sign up for a new account in our community. It's easy!

Register a new account

Sign in

Already have an account? Sign in here.

Sign In Now


×
×
  • Create New...