Jump to content
SAU Community

Blackkers 2630 - Almost Ready, Few Queries.


Recommended Posts

I didn't have any issues with cam timing when fitting the belt. All the marks lined up but I'm not convinced timing will be 100%; that's where adjustable gears come in handy.

post-113447-0-86849800-1431508162_thumb.jpg

I installed the 1000cc bosch injectors I bought from Kinkstahh who was kind enough to get scotty to knock up some plugs that will go straight into the factory injector loom.

I'm using the factory rail and reg as there isn't much point in going aftermarket. I gave it a lick of paint though as it was looking pretty rough. Bunnings high temp black FTW

post-113447-0-70153300-1431508175_thumb.jpg

I'm not sure who to get to tune it. I will need a dump pipe made up and possibly a pipe from the RH guard to the plenum.

I'm tempted to either tow it somewhere like JEM where they can finish it off for me and do the run in tune. Any ideas there?

edit: not sure why the pictures came out sideways

Edited by Blackkers
Link to comment
Share on other sites

Thanks for the tip luke I'll be sure to do that.

I can't wait either!

I'm putting the intake back together currently. Cleaning the throttles and scraping gaskets has taken hours today.

remembering where all the vac and coolant hoses go is a nightmare as well!!

Be careful with those throttles as you can remove the seal and cause more leaks. The intake side is never fun when putting back together.

I've seen some good work come out of JEM and they seem to be able to do it fairly quickly which is a bonus. Maybe give them a ring if you are inclined to go to them and see what they can do for you.

Looking forwards to the results from this build.

Link to comment
Share on other sites

What's the issue? I just used degreaser on the throttles and scraped off the old baked on paper gaskets.

Should I reassemble with a bit of sealant? I was going to leave it dry but now you have me worried

Link to comment
Share on other sites

phew. yep didn't touch that. I think I will use hylomar. After assembling all this outside of the car I would hate to think what it's like diagnosing a leak once the engine is in

Link to comment
Share on other sites

I poured some Kerosene in the throttles to leave it for a while and see if they leaked. Well sure enough all of them leaked almost immediately. I don't know whether to worry about this or not.

After using some gasket remover on the plenum some of the paint started peeling. I ended up painting that too although it doesn't look much better than before!

post-113447-0-64222900-1431581789_thumb.jpg

starting to look like an engine

post-113447-0-30203300-1431581798_thumb.jpg

Link to comment
Share on other sites

I'd say if the degreaser didn't clean it off the kerosene did, the easiest/suckiest way to find out is to put it all in and see if it idles at 1,200rpm

Link to comment
Share on other sites

Personally to minimize the risk of it all going bad, id clean them right up and reseal them or grab a set you know haven't been cleaned/messed with and fit them.

I had to clean some throttles up today for a plenum I have off a car and just used a razor blade to peel the gaskets off

Link to comment
Share on other sites

You can buy the Tomei sealant and reseal it all properly if you want to be sure. Otherwise you will find out when you have a high idle after putting the motor in the car and you'll be up for more work.

There is a guide/thread about it all on here as people think to clean them out while its off but ends up causing more drama.

Link to comment
Share on other sites

That guide was written by me, pictures are long gone (dont know what happened there) but it fixed it and its still working fine today (years later)

Dont be afraid if you do clean off the coating, its no big deal to fix, more a frustration hoping you get it right as you cant test it till its all back together again.

Link to comment
Share on other sites

  • 2 weeks later...

Hey guys back again.

This week I'm going to have some AN fittings welded onto the sump before I remove the diff and have it all cleaned up.

Fittings I'm using:

2x -10 AN

1x -12 AN

The first -10 will go as a breather to the rear of the head

the second -10 will go to the bottom of the Catch can as a drain back to the sump.

The -12 will go as a breather to the top of the catch can

The head will have a -10 rear breather to sump

2x -12 push on fittings for the cam breathers connected to the catch can as well

The catch can I'm tempted to use will be the Hi Octane direct with 3x -12 breathers (1 sump, 2 cam covers). and a -10 drain (sump).

A breather will be connected to the vacuum from the turbo inlet

I know that's confusing so I drew a (also confusing) diagram:

post-113447-0-61675100-1433049212_thumb.jpg

Does anyone see anything wrong with this? The hi octane catch can will need to be modified for the extra -12 breather if they can't do it in house (http://www.hioctanedirect.com/index.php?main_page=product_info&cPath=67_74&products_id=1448)

Thanks

I guess I should mention I'm using 1.25mm and blank oil plugs in the block with an R34det neo oil pump that's been overhauled.

Standard sump size and RIPS pickup/awd adaptor with tomei baffles. The engine is unlikely to break 7500rpm

Link to comment
Share on other sites

Considering I already have the rear fitting tapped and installed and I have not opened up where the oil drains back down the block I'm just going to do it anyway as it's easy.

Also I have 2 - 12 breathers from the head and only one - 12 from the sump so it will help equalise pressure without interrupting oil return.

You're probably right it's not needed but I'm set up for it

Link to comment
Share on other sites

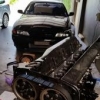
Couple of mock up glory shots.

Massive exhaust wheel (approx 62-63mm) in the tiny .63 T3 rear housing.

ATR45SAT should make a responsive 400-420rwkw. I'll probably run it around 22-24 psi. I hope a Walbro 460 and 1000cc EV14's on the stock rail/reg can keep up

I'm waiting on fittings to arrive then I can put the sump together.

Catch can should be ready next week. I might get it powdercoated in black

post-113447-0-45533900-1433410102_thumb.jpg

post-113447-0-71384500-1433410116_thumb.jpg

post-113447-0-42772700-1433410186_thumb.jpg

Link to comment
Share on other sites

  • 1 year later...

Create an account or sign in to comment

You need to be a member in order to leave a comment

Create an account

Sign up for a new account in our community. It's easy!

Register a new account

Sign in

Already have an account? Sign in here.

Sign In Now
 Share


  • Similar Content

  • Latest Posts

    • Much less twat-tastic. CF wheels are too garish for civilised use.
    • From there, as the manual says....assembly is the reverse of disassembly, no tricks worth mentioning Much better (for me)
    • In my case, the standard wheel I had was in good condition but the buttons had more wear, so I swapped them across from the original wheel from the car. The plastic rear cover is held on by 4 tabs, and once the wiring is removed you can get access to 2 screws on each side the hold the buttons in From there I just swapped the wiring over. What was interesting is the standard style wheel is 2.0kg but the carbon fibre one is 50% heavier at 2.9kg. It even has a weight inside the wheel at the top to make up for some sort of imbalance in the design. weird
    • Once the airbag is off, to remove the steering wheel.... Undo the 2 plugs into the clock spring, and the horn connector from it's clip. Hit the 19mm nut with a rattle gun (preferably) or if you don't' have one, you probably want an assistant to hold the wheel in place while you use a breaker bar to undo the nut Then, screw the nut back on 3 turns, and pull the wheel sharply towards you. If that doesn't work hit it medium force with a rubber mallet on either side, or possible behind if you can get there. If that all fails (it shouldn't!) you might need a steering wheel puller
    • So, to next task....the carbon fibre steering wheel was either an expensive factory option or a chinesium special. Either way, I don't like either the flat bottom or thick ring style, so it had to go So...to remove the steering wheel.... First, disconnect battery negative and stomp on the brake pedal for a few seconds. Then, remove the small circular covers on each side of the wheel's rear surround to uncover the airbag clips. You need to push something like a flat bladed screw driver through, to push the steel clip inwards and pull the side of the airbag forward. Once you've done the easy side, same on the centre console side. You can see the tab you are shooting for circled in red Then, disconnect the horn spade connector and for the yellow airbag plug you need to get something small under the black locking tab to pop it out, then the connector releases......airbag is off  
×
×
  • Create New...