Jump to content
SAU Community

Recommended Posts

  • 5 months later...

I have done my dash inserts, looks sick......I did it in silver, then put 4 to 5 coats of clear on to it. word of advice is to remove all the silicon coating off the plastic, rermove with thinners only alight whipe with a rag, that breaks down the silicon then you can scratch it off if your finger. lighty sand plastic and use a wax and grease remover to stop fish eyeing then paint! I will post some pics of my dash sometime today!:P

Link to comment
https://www.sau.com.au/forums/topic/4576-painting-my-dash/#findComment-223558
Share on other sites

Guest INASNT

i just did this recently

attachment.php?s=&postid=126582

attachment.php?s=&postid=126583

attachment.php?s=&postid=126589

This is how i did mine.

Sand with light grade paper.

Apply 2 coats of primer, sanding between coats

apply 3 coats of gloss paint

apply 3 colts of fast dry enamel.

of course let each layer of paint and enamel dry before applying new coat.

do it like this and u wont have any pealing off etc.

It will peal off if u just paint it with the gloss paint without priming or applying clear.

Link to comment
https://www.sau.com.au/forums/topic/4576-painting-my-dash/#findComment-224051
Share on other sites

when you mean 3 coats of gloss paints and 3 coats of enamel is it:

1 x gloss paint layer

dry

1 x gloss paint layer

dry

1 x gloss paint layer

dry

1 x dry enamel

dry

1 x dry enamel

dry

1 x dry enamel

or

1 x gloss paint layer

dry

1 x dry enamel

dry

1 x gloss paint layer

dry

1 x dry enamel

dry

1 x gloss paint layer

dry

1 x dry enamel

????

Link to comment
https://www.sau.com.au/forums/topic/4576-painting-my-dash/#findComment-224249
Share on other sites

INASNT:

Im not sure if I like it or not (might be just the blue colour) but thats a top effort.

I've been abit happy in the last few days with the spray can and I have found the black plastic door handle cover on the drivers side (that holds the elec window buttons inplace) to be abit warn and tacky, im sure a nice coat of black would go down well :D

Link to comment
https://www.sau.com.au/forums/topic/4576-painting-my-dash/#findComment-224341
Share on other sites

Guest INASNT
  Quote
Originally posted by rs73

what did you do with the film layer on the original trim, did you peel it off first?? or you just don't give a whack abt it and just slam on a thick coat of primer and sand them?

my series 2 did have any film layer.

but i sanded all the parts down anyway

Link to comment
https://www.sau.com.au/forums/topic/4576-painting-my-dash/#findComment-224453
Share on other sites

  Quote
Originally posted by GTS-4OrCeD

That silver dash looks very good, well done. (not sure about the yellow tho.)

A good job.

Greg.

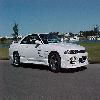
the car has been resprayed in yellow perl!

here is a crap photo of the line to show the colour!;)

mmmmmmmmmmmmmmm..........yellow!

Link to comment
https://www.sau.com.au/forums/topic/4576-painting-my-dash/#findComment-226943
Share on other sites

Create an account or sign in to comment

You need to be a member in order to leave a comment

Create an account

Sign up for a new account in our community. It's easy!

Register a new account

Sign in

Already have an account? Sign in here.

Sign In Now


  • Similar Content

  • Latest Posts

    • Forgot to include this but this is the mid section of my steering rack that looks like it has a thread/can be turned with that notch mentioned in the post:
    • Hey everyone, Wanted to pick some brains about this issue I'm having with rebuilding my 33 rack (PN is 49001-19U05). All of the tutorials/videos I've seen online are either R34 or S Chassis racks which seem to be pretty straightforward to disassemble but this process doesnt carry over to my rack. Few of the key differences that I've noted The pinion shaft on the other racks bolt on with 3 torx bolts: Whereas my rack bolts on with 2 allen head bolts: These changes are pretty inconsequential but the main difference is how you pull the actual rack out of the housing. The other skyline/s chassis racks can be taken out by tapping the rack out of the body with a socket and it just slides right out. I'm unable to do that with my rack because there's a hard stop at the end that doesn't let the seal/shaft be tapped out. Can also see a difference in the other end of the rack where mine has a notch that looks like you're able to use a big wrench to unthread 2 halves of the rack whereas the other racks are just kinda set in with a punch. My rack: Other racks: TLDR; Wanted to know if anyone has rebuilt this specific model of steering rack for the R33 and if there were any steps to getting it done easier or if I should just give this to a professional to get done. Sorry if this post is a bit messy, first one I've done.
    • I would just put EBC back on the "I would not use their stuff" pile and move on.
    • Can I suggest you try EBC directly again and link them to as many competitor catalogues as you can to show their listing is incorrect, eg https://dba.com.au/product/front-4000-series-hd-brake-rotor-dba42304/ If you have access to an R33 GTST VIN and your VIN, you could also use a Nissan Parts lookup like Amayama to show them the part number is different between 33 GTST and 34 GTT which may get their attention
    • So i got reply from EBC and they just this site where you can clearly see those 296mm fronts on R34 GTT. I send them photos and "quotes" that 296mm are not for 34 GTT and they are too small. But it will be very hard to return them cuz nobody here knows 100% and they just copy those EBC catalogue :-D https://ebcbrakesdirect.com/automotive/nissan/skyline-r34
×
×
  • Create New...