Jump to content
SAU Community

Recommended Posts

5 hours ago, Leroy Peterson said:

cabin loooks great!

Thanks! Ive fitted a few more things since, and ill finish off the door trims before it goes so it'll be a bit more complete.

  • 2 weeks later...

well everything is finished, and its now on its way to be wired and tuned. Should be done by friday, rego goes back on this week, hoping i can sort an alignment next saturday.

Keen.


IMG_1867.jpg


IMG_1887.jpg

  • Like 2

Yeah, I think I paid like $650 including delivery, might have been more. But I was sick of Chinese shit that didn't fit, and wanted the full replacement quarters. I'll be sad if I mash 'em

ALL fibreglass needs work, but my front and rears both needed very little. Rears needed a little trimming on the c pillar section to make them even, and some filing, then drilling but they went on good. Fronts just needed drilling.


Heres a couple of pics, its only held on the car with gaffe tape, so shows you the shape is pretty damn good.


IMG_1136.jpg


IMG_1134.jpg


you're also welcome to come have a look, ill have the car back either tomorrow/staurday or monday all being well.


  • Like 1

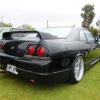
So for the first time in 2 years, I drove it home today.

IMG_1959.jpg

Made 300 at the wheels, the turbo is simply out of puff. Goes like a raped ape though.

IMG_1960.jpg


Just a few small things to finish off, getting an alignment 8am Saturday, then ready to finish log booking and start racing.


Been long time, with a lot of hours, a lot of money, but was all worth it. Couldn't be happier right now.

  • Like 4

Cheers guys, was a bit excited to say the least.


20 minutes ago, admS15 said:

Congratulations man. I've been following your progress for a while. Power curve looks nice and meaty. Car is looking awesome, enjoyemoji106.png

You're dead right, only made 30kw more peak power, but the midrange is pretty stupid. Bakes 265 semi's pretty easy. Was fun to drive home this arvo haha.


And Launch control is the best.:27_sunglasses:

  • Like 2

Thanks! Still need to finish making some door trims, and some other stuff for cams regs, install the extinguisher system, couple of other bits and pieces. But yeah, was pretty excited yesterday arvo. All been worth it.

Also starting to look at some aero, big wing out back, splitter, canards, under trays etc. any suggestions?

You and ssxRicho seem to have a handle on that stuff.

don't know if ive got a handle on it but am giving it a go haha

lots of different theories etc out there but like anything the basics remain the same. Aero totally changes a car an the way you drive it from my experience

Make sure the car drives good and handles well without it, then if adding aero add with balance and adjust the car from there.

I went with cheaper version of front splitter etc to trial and error and in case of mistakes at first rather than go all out (im currently making V2) but as you've seen gone pretty speno on the rear cause I doubt I'll smash that.


A lot of people use the marine ply for the front splitter, I used ally composite (ally honeycombe middle and 0.5 ally each side)


Best thing is now just drive the car and enjoy it !!  nothing better than getting in the seat and driving on the track and finding out what the car you've built can do, and also cant do... then adjust from there


  • Like 1
  • 4 weeks later...

Had it aligned, then changed it a bit and realigned, now have a set of 25mm extended LCA's to go in so I can run some more camber up front.

Been doing a bit of street driving, which is hard with it being so damn loud. Might put another exhaust on it and shut it up a bit. But then I can come home later at night and not wake up everyone in my street haha.


But yeah, runs flawless, life's good. Goes back for log booking etc in a couple of weeks, need to finish door trims and install lifeline extinguisher system. 


14202796_305003733192771_2120467165_o.jp

My cusco camber arms went straight to max when they went in. But now with some better rubber up front and knuckles I need a bit more. They're just simple cut and shuts with adj. lock stops, but they'll do the job. Just need to whack a new set of ball joints in them.

  • 2 weeks later...

Create an account or sign in to comment

You need to be a member in order to leave a comment

Create an account

Sign up for a new account in our community. It's easy!

Register a new account

Sign in

Already have an account? Sign in here.

Sign In Now


  • Similar Content

  • Latest Posts

    • I recently got their dbw 74mm throttle body and pedal kit. It is sensational quality especially the wiring harnesses. Unfortunately I can’t answer u about the fitment to stock inlet manifold as I’m going Rahjab Racing forward plenum. Only one thing to be careful of is understand u have to pay gst and import fees if your purchase is over $1,000 in one shipment.
    • yeah i agree paint match stops it from standing out so much, oh that's actually really good to know i was wondering if it would help with air flow now actually having an outlet in the bonnet. Will have to focus on ducting into and out of the radiator now to make the most of it.
    • I would paint match the whole thing to avoid unwanted attention  I had a similar bonnet, paint matched, on my old R33 GTST, but mine was a fibreglass jobbie made by Blitz in QLD, they work extremely well for radiator efficiency and under bonnet temps
    • Does anyone run this kit with factory plenum? Does the adapter and bosch tb fit under factory strut brace? I wanted to get this setup before going forward facing manifold. Thanks
    • small update time, after always wanting a "cool" looking bonnet for my car and always struggling to find one for the series 2 that i liked and wasn't an insane amount of money. Saw one i liked on RHDjapan from D-speed in Japan the price was very good for a carbon bonnet so good infact i was a little unsure how much i trusted it, decided to bite the bullet and with the help of jesse streeter in not long at all it was at my door. Once it was delivered i ran in from work and quickly unboxed it and to my surprise the quality was actually pretty good i quickly removed the old bonnet and placed on the new one to test it out and even the fitment wasnt too bad at all. Then decided to paint the little grille in the bonnet black to stop it sticking out so much.   I decided to not mess around with the hood latch and just install some aero catch hood pins, having never installed them before did some YouTube university classes and i was good to go. fair to say it is not a fun job at all from making brackets so the pins sit nicely and actually cutting through the bonnet but also being very scared of cutting the holes too big it took wayyyy longer than i would like to admit but finally got it there. Then it was time for a quick test drive to ensure the latches actually worked and thankfully the bonnet looked very stable. I still think paint matching the bonnet and leaving just the part that sticks up as carbon would help make it all look alot neater as im not sure how i feel about all that carbon on a very fridge white car but will leave it as is and see how i feel with time.  
×
×
  • Create New...