Jump to content
SAU Community

Recommended Posts

Ben - 1990 R32 GTR

Alright, here we go.

For those who don't know me I recently posted my introduction in the Newbies thread, so won't get into that here. In early August I picked up my 1990 R32 GTR after lots of searching and researching, admittedly it wasn't the perfect example of what I was looking for and I did kind of jump into the purchase a little bit. When purchasing the car I was never naive as to think it would all be smooth sailing with 0 problems. Boy was I completely unprepared for what happened next.

On the freeway on the way home, a slight squeaking noise could be heard from the engine under boost, so figured it was a boost leak, got her home and realised just how done the stock inter cooler piping was (unfortunately no pics as it was) so the first thing to do was replace the piping. I decided on Greddy hard piping to ensure reliability. After having the stock piping pop off completely on the passenger side and the car losing all power, I did not want that happening again. I picked up the piping kit second hand in very good condition (could use a polish which I will get around to). 

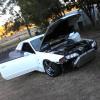
Snapchat-1934196776724498670.jpg

Please excuse the snap chat photo (car is in shop and only photo I have at the moment)

After fixing this issue, the car ran fine for a month or so until one morning it didn't start. Managed to narrow the issue down to a fuel problem as it was ticking over and sparking, pulled out the fuel filter and found out that it was almost 100% blocked. Happy days as this was only a cheap fix and did it the same day. Again unfortunately no pictures as I never thought about doing a build thread but will be sure to document my work a lot more from this point on.

After daily driving my car for a while all was looking well. That was until my friend accidentally reversed into my car ON MY BIRTHDAY at 4am after what was admittedly a very big night at Marquee in The Star casino. He called me straight after it happened and I was thankful for his honesty, we got it all sorted thru insurance pronto.

20160902_172520.jpg

As you can see the whole grille snapped out of the front bar.

20160902_172527.jpg

Cracked the whole bar in numerous places

20160902_172533.jpg

The blinker was hanging out by it's wiring, so a temporary patch job was needed as all the clips snapped in the accident.

20160902_172639.jpg

After a bit of back and forth from the smash repairer, he decided he couldn't find another carbon fibre bonnet and said he was just going to put a stock bonnet on instead. No he wasn't :4_joy: not on my watch. So I called up my insurance and they decided to pay me out to source my own bonnet! What a blessing in disguise. I ended up getting Carbon Plus down in Victoria to fabricate a brand new DMAX Style bonnet for me which looks like this:

R32_GTR_DMAX_HOOD_CARBON_(2)__75464_zoom.jpg

Now whilst I don't NEED the vented hood because I don't have a top mount, I decided I just love the look of these bonnets on the GTR. There was a 6-8 week waiting time on this as it has to be made, and at this point in time I am still waiting for it (don't think it will be done before the new year).

After this I drove the car for a little while but as of about 2 weeks ago, I was going thru a tunnel and couldn't help myself so put my foot down only to have instant karma of a backfire and no boost after the tunnel. Every time I tried to hit boost, there was a faint rattling sound within the turbo and I wasn't spinning the wheels at all within the turbos. I did a bit of research and figured out it was probably the ceramic exhaust wheel that had snapped off.

A few days later I had it towed to Hornsby Automotive to Lenny who has done good work on a bunch of my friends cars. After a bit of back and forth he confirmed that it was indeed the exhaust wheel that had snapped off, he gave me a few options to which I decided to go with Garrett GT2860 -5 turbos keeping the low mount twin setup. The owner previous to me only had it tuned to ~207awkw on 10psi safe tune for whatever reason (either the intercooler piping or the turbos on their way out). 

20161109_123107.jpg

The old (unbroken) turbo which will probably end up as a paperweight

garrett-gt2860r-turbo-0.jpg

The new turbo (please excuse the generic internet photo as I didn't get any of the actual turbos before installation).

Whilst the car was there I decided to get it completely look at and serviced, he ended up replacing the spark plugs with platinum ones, rather than the $8 ones the d***head before me had chucked in for the sale. The more I found out about this car the more I started to hold a grudge against the guy who sold it to me :4_joy: Although it is my fault at the end of the day. After going over the car, the shop calls me in and decided to show me the sump plug which is completely stripped and held in with tape apparently. This really ticked me off as if that had fallen out you can say goodbye RB. I ended up having that replaced and a few other bits and pieces like hose clamps etc.

As of at this very moment, the car is done in the shop and booked in for a tune tomorrow 10/11/16 at MRC in Castle Hill which I am super excited about. My guy reckons he will have the car back Friday night, hopefully ready to be picked up sometime on Monday. Plenty more updates to come and after reading a few build threads on here (namely RBN1) I want to focus on cleaning up the interior and bits and pieces once I have her back. Below is a complete list of mods the car currently has:

  • Bosch 800cc Injectors
  • Garrett GT2860 -5 Turbos
  • Walbro 450 Fuel pump
  • HKS Cam Gear
  • Apexi Twin Filters
  • Exedy cushion button clutch
  • JJR cat back exhaust and front pipe (high on my to-do list)
  • Apexi Power FC and hand controller
  • GFB Boost Tee
  • Bc Racing Coilovers
  • Hard Race Collars
  • Hard Race tension / caster rod set
  • Rays gram lights 57 pro (18x9+20)
  • Carbon Fibre Bonnet
  • Rocket Dancer boot wing
  • Momo Style steering wheel (need to change)
  • AWD / RWD Cabin switch
  • 5% Tint (waaaay too dark, going to be changed ASAP)


Lastly, Can anyone tell me everywhere that I should be checking for rust, I want to go over the whole car completely and rectify any rust spots that I may find. Hopefully there isn't too much :mellow: Here is a few more pics of how she sat pre being reversed into :7_sweat_smile: Updates should be coming within the next week or so, interested to see what kind of power she will be putting out. 

20160818_133943.jpg

20160818_133917.jpg


Edited by Bennjamiin
Enlarged Photos
  • Like 1
Link to comment
Share on other sites

Looks great and I love 'rescue' builds. This car could well have just died somewhere and left to rot, while the old owner may have a little to explain, you still saved this GTR and it's still on the road because of you. 

For rust, on my old R33's it was always in the wheel wells and the corner of the guards (the flat angled bits near the tyres) - in Japan, they lay salt on snow to melt it. The salt then gets picked up by tyres and splashed around inside the guards. I'd assume chassis around the wheels also.

Looking forward to the updates! :thumbsup: 

Link to comment
Share on other sites

Looks great and I love 'rescue' builds. This car could well have just died somewhere and left to rot, while the old owner may have a little to explain, you still saved this GTR and it's still on the road because of you. 

For rust, on my old R33's it was always in the wheel wells and the corner of the guards (the flat angled bits near the tyres) - in Japan, they lay salt on snow to melt it. The salt then gets picked up by tyres and splashed around inside the guards. I'd assume chassis around the wheels also.

Looking forward to the updates![emoji106]

This is very true, and the most rewarding builds are those that are 'rescue builds' :) cheers for the pointers, will go over it head to toe when I get it back. I'm just as excited as you are for the updates [emoji23]

  • Like 1
Link to comment
Share on other sites

Congrats on the purchase! Car's looking good mate. I'd be keen to hear how that carbon plus bonnet fits up - was looking at those just the other night in fact.

And as already mentioned, look out for rust in the bottom corners of the rear guards.

What's the plan for the interior? MotiveDVD did an episode once where they put an R34 interior into an R32 and it looked quite good.

Link to comment
Share on other sites

Congrats on the purchase! Car's looking good mate. I'd be keen to hear how that carbon plus bonnet fits up - was looking at those just the other night in fact.
And as already mentioned, look out for rust in the bottom corners of the rear guards.
What's the plan for the interior? MotiveDVD did an episode once where they put an R34 interior into an R32 and it looked quite good.

Cheers mate!
I will be sure to let you know how the bonnet fits up when it arrives, fingers crossed it sits nicely [emoji111] And as for the interior I'm still tossing up between the nismo covers, tracking down better quality stock seats or aftermarket seats [emoji16] I'll have to find that episode and check out how it looks for sure.
Link to comment
Share on other sites

Create an account or sign in to comment

You need to be a member in order to leave a comment

Create an account

Sign up for a new account in our community. It's easy!

Register a new account

Sign in

Already have an account? Sign in here.

Sign In Now
 Share


  • Similar Content

  • Latest Posts

    • The two diagrams are equivalent. The R32 one is just one sheet out of about 3 showing everything in the whole car all at once. And without knowing the functionality that occurs in the modules, they are both equally opaque.
    • 8v - 2.48ms 9v - 2.15ms 10v - 1.74ms 11v - 1.41ms 12v - 1.15ms 13v - 0.99ms 14v - 0.89ms 15v - 0.82ms 16v - 0.81ms I'm running these values on my RB20 Neo with 570cc Denso R35 stock jets and it's great. Also bought a set for my Legnum VR4, love these injectors!
    • Thanks for your reply,  Those blue/green wires running to the actuator aren't attached to anything, so I'm not sure how the central locking is still working. I will have to take a good look tomorrow, I don't have the car with me. After googling it seems like a pretty common aftermarket actuator which even uses the same green/blue wires the immobiliser required. i'll test everything tomorrow and if it's working i'll melt the solder, strip it, resolder and neaten it all up with some heat shrink. I don't have to understand it if it works hahaha I just don't want a fire/ short circuit. That R32 diagram looks more like a continuity chart? Can you make sense of this form the R34 manual? 10V is probably due to very flat battery, i'll recheck as well tomorrow, I did have to jump start it haha. Thanks again!  
    • So, COM doesn't mean comms. It means common. What common itself means will depend on the type of device. For a two directional actuator (ie, one that can push and pull on the same output rod) then the common will typically just be the earth connection. There will be at least 2 other wires. If you put 12V on one of the other wires, then the actuator will push. On the other 12V wire, it will pull. Can't quite make out what is going on with the wiring of your actuator. It appears to have several wires at the actuator plug, but there only appears to be 2 wires where its loom approaches the door control module, with at least one of the others cut off. I don't know these actuators off by heart. I'd have to look at a wiring diagram for one before knowing what the wires were about, and that's despite me having to replace one in my car not all that long ago. Just not interesting enough to have dedicated memory set aside for trivia like that any more. That actuator is an aftermarket one, not the original one, which probably died and was replaced. That might require some sort of bodge job on wiring to make it work. Although nothing should justify the bodginess of the bodge job done. As to the soldering job on the door module's loom plug. Ahhahhahaha. Yes, very nasty. Again, I cant tell you what any of those wires do. You'd need to study the R34 wiring diagram (if you can find one that shows the door module). I don't think I have any. I'd have to study the R32 diagram to start to understand what mine is doing, and again, even though I've had a problem with mine for the last 25 years (where it locks the passenger door when the driver's window reaches top or bottom of travel) I'm just not interested enough to try to to work it out. So long as it's not burning down, it's fine with me. Here's the R32 GTR diagram, which, confusingly, has rear door lock actuators and window motors on it!! As you can see, unless you understand the functions of the door lock timer and the power window amplifier, you'll never be able to work out how it works just from the diagram. I don't imagine that the R34 one is any better. Hopefully an R34 aware bod can help. FWIW, the two wires that are cut and joined look like they are both power supply - so hopefully it is not fatal to join them. The 10V you measured on the cut off free end of one of them is concerning. You'd expect 12V, and it might be the reason for the bodge job joining them together.
×
×
  • Create New...