Jump to content
SAU Community

Recommended Posts

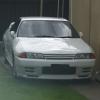
1989 Built R32 GTR

NO RUSH TO AT ALL TO SELL.

Add is https://www.gumtree.com.au/s-ad/melbourne-cbd/cars-vans-utes/built-nissan-1989-r32-gtr/1142463664

Expression of Interest. Im parting ways with my R32 GTR. Will sell for the right price only. This car has had no expense spared and is the 2nd GTR ive owned. Recently completed a full comprenhensive build, including built motor, resprayed engine bay etc Below are full specs.


Car has been tuned at 353KW @ 21psi on a Run in tuneONLY! (straight e85 Fuel) Motor Built to handle 500-550KW Safely. I have all the build photos of the progress of the car if anoyone is interested.


Motor Built by Myself @ RaceEquipped

Tuned By EMS E Tuner

Mechanical, Dyno Prep, Trouble Shooting by Motorlab

I have a file with approx $12,000 Of reciepts and more unaccounted for or invoices i lost!

Close to $15,000 -$16,000 Spent in total.


NO TEST PILOTS


BODY : 62xxxKM have JOC papers & Original Cluster. Body sprayed a few year ago by previous owner, paint is 99% immaculate. Freshly Sprayed Bay during the build also.

Very few if any scratches. Factory bonnet and panels. Sills have the standard jackstand dints. I am yet to see a GTR or any Nissan from that era that doesnt have this issue.


INTERIOR

- Very clean, no rips or tears in the seats or doortrims

- No dash Bubble

- E boost 2 Controller

- Oil Pressure Gauge

- Double Din Headunit with Aftermarket Speakers (unsure never checked)


BLOCK (less then 1000kms)

- Ross Forged 86.5MM Pistons & H Beam Rods (HPC coated piston skirts)

- Grub Screwed Crank and full balanced rotating assembly

- ACL Race bearings

- All Machining ($3900 worth of Machining, Cleaning etc for Block and Head)

- Reimax Billet oil pump Gear

- Tomei Sump baffle & drilled returns

- New water Pump

- New Timing Belt Kit

- Extended Sump

- ARP 2000 Headstuds

- Tomei Block Head Restrictor

- Tomei Headgasket

- New NPC Ceramic Button Clutch (Rated to 450KW, will hold more)


HEAD (R34 Head) (Less then 1000kms)

- Hks 272 Step 2 10.8mm lift Cam Shafts (head machined to suit higher lift)

- Tomei Buckets

- Tomei Valve Springs

- Tomei Retainers

- Tomei Metal Intake Gaskets

- Head Drain

- Supertech Intake Valves

- New Valve guides

- Adjustable Cam gears

- 3 Angle valve job

- Reshimmed Head


EXHAUST & COOLING

- Top Mount Steam pipe TOG manifold (lifetime warranty)

- 45 MM Turbosmart Hypergate

- Custom Garrett GT35 (66MM billet compreesor wheel, .50 front, 1.06 rear housing)

- Full 3.5" downpipe

- RacePace 3.5' cat back

- RacePace Aluminium Radiator

- 100MM intercooler

- Full custom stainless steel intercooler piping kit

- 3" Turbo Intake


FUEL & ECU

- 044 Intank

- 2Lt Surge tank with twin 044 external Pumps + Inline Filters

- 1400CC Delphi Injectors (1650CC at max duty cycle)

- Tomei Fuel reg + Gauge

- Power FC + Hand Controller (D Jetro MAFLESS Tune)


SUSPENSION, WHEELS & BRAKES

- HKS Coilovers

- BMC Stopper

- 17 x 9 P1 Buddy CLubs

- Federal RS-RR Semi Slicks (less then 1000KM old)

- All HEL Braided lines

- EBC Red stuff

- Slotted Discs

$_20.JPG

$_20 (1).JPG

IMAG0909.jpg

  • Like 1
Link to comment
https://www.sau.com.au/forums/topic/469680-1989-built-r32-gtr/
Share on other sites

  • 2 months later...
  • 1 month later...
  • 3 weeks later...

Create an account or sign in to comment

You need to be a member in order to leave a comment

Create an account

Sign up for a new account in our community. It's easy!

Register a new account

Sign in

Already have an account? Sign in here.

Sign In Now


  • Similar Content

  • Latest Posts

    • Yep, pretty much what you said is a good summary. The aftermarket thing just attached to the rim, then has two lines out to valve stems, one to inner wheel, one to outer wheel. Some of the systems even start to air up as you head towards highway speed. IE, you're in the logging tracks, then as speeds increase it knows you're on tarmac and airs up so the driver doesn't even have to remember. I bet the ones that need driver intervention to air up end up seeing a lot more tyre wear from "forest pressures" in use on the highway!
    • Yes, but you need to do these type certifications for tuning parts. That is the absurd part here. Meaning tuning parts are very costly (generally speaking) as well as the technical test documentation for say a turbo swap with more power. It just makes modifying everything crazy expensive and complicated. That bracket has been lost in translation many years ago I assume, it was not there.
    • Hahaha, yeah.... not what you'd call a tamper-proof design.... but yes, with the truck setup, the lines are always connected, but typically they sit just inside the plane of the rear metal mudguards, so if you clear the guards you clear the lines as well. Not rogue 4WD tracks with tree branches and bushes everywhere, ready to hook-up an air hose. You can do it externally like a mod, but dedicated setups air-pressurize the undriven hubs, and on driven axles you can do the same thing, or pressurize the axles (lots of designs out there for this idea)... https://www.trtaustralia.com.au/traction-air-cti-system/  for example.... ..the trouble I've got here... wrt the bimmer ad... is the last bit...they don't want to show it spinning, do they.... give all the illusion that things are moving...but no...and what the hell tyre profile is that?...25??? ...far kernel, rims would be dead inside 10klms on most roads around here.... 😃
    • You're just describing how type certification works. Personally I would be shocked to discover that catalytic converter is not in the stock mounting position. Is there a bracket on the transfer case holding the catalytic converter and front pipe together? If so, it should be in stock position. 
    • You talking about the ones in the photo above? I guess that could make sense. Fixed (but flexible) line from the point up above down to the hubcap thingo, with a rotating air seal thingo. Then fixed (but also still likely flexible) line from the "other side" of the transfer in the hub cap thingo up to the valve stem on the rim. A horrible cludge, but something that could be done. I'd bet on the Unimog version being fed through from the back, as part of the axle assembly, without the need for the vulnerable lines out to the sides. It's amazing what you can do when you have an idea that is not quite impossible. Nearly impossible, but not quite.
×
×
  • Create New...