Jump to content
SAU Community

Recommended Posts

13 hours ago, robbo_rb180 said:

5000rpm is good along with 70% TPS. Could wire a pressure sensor in and track pressures to find where system is efficient too and switch the condenser fan as needed. 

I am interested in this kit, the compressor and condenser efficentcy will be a massive improvement
https://frenchysperformancegarage.com/collections/cooling-and-air-conditioning/products/fpg-nissan-skyline-r32-a-c-air-conditioning-replacement-kit-r134a-fpg-039

Got any good hints/tips for an AC system to run from a battery.

To be installed into a custom back on a dual cab ute. Will be for travelling with multiple dogs in, and when out at trials and work times. So need to keep it cold to keep them comfortable. Will be ran on big lithium batteries.

11 hours ago, MBS206 said:

Got any good hints/tips for an AC system to run from a battery.

To be installed into a custom back on a dual cab ute. Will be for travelling with multiple dogs in, and when out at trials and work times. So need to keep it cold to keep them comfortable. Will be ran on big lithium batteries.

probably something designed for a sleeper cab or if super budget a window box cooler and an inverter setup.

9 hours ago, admS15 said:

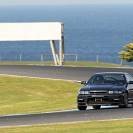
Passenger in the first pic is lovin it. Car looks the goods.

I can't keep her out of the car when we can run passengers.

8 hours ago, Duncan said:

Looks nicely sorted for grip :thumbsup:

Yeah but more is always better.

11 hours ago, robbo_rb180 said:

probably something designed for a sleeper cab or if super budget a window box cooler and an inverter setup.

This won't be a cheap setup. Will be spending a lot to build it correctly, and with fail safes in it. Not putting my children at risk.


Had just been searching online and not finding anything that looked proper useful. Looking for an electric compressor, and then the other bits and pieces that I can lay out where I need.

  • Like 2
29 minutes ago, MBS206 said:

This won't be a cheap setup. Will be spending a lot to build it correctly, and with fail safes in it. Not putting my children at risk.

Thank you for mentioning that! Feeling relieved now because I was getting a bit concerned about you leaving your dogs in the heat in the car with a potentially dodgy setup. Not sure if I could live with myself if something like that went wrong :)

1 hour ago, MBS206 said:

This won't be a cheap setup. Will be spending a lot to build it correctly, and with fail safes in it. Not putting my children at risk.


Had just been searching online and not finding anything that looked proper useful. Looking for an electric compressor, and then the other bits and pieces that I can lay out where I need.

https://www.tcboxes.com.au/collections/dog-boxes/products/800mm-dog-box-alloy


These are like what our "working" dogs at work roll in

Relying on aircon is relying on something that may fail

Some ventilation, shade and water will keep them happy, you can also get tarp covers for cold and inclement weather

Keeping it simple will keep them happy


  • Like 1
2 hours ago, MBS206 said:

This won't be a cheap setup. Will be spending a lot to build it correctly, and with fail safes in it. Not putting my children at risk.


Had just been searching online and not finding anything that looked proper useful. Looking for an electric compressor, and then the other bits and pieces that I can lay out where I need

What kind of dogs are they?

All in one unit is definitely way to go. Designed for a certain area size and warranty. But just having moving air is good.

1 hour ago, The Bogan said:

https://www.tcboxes.com.au/collections/dog-boxes/products/800mm-dog-box-alloy


These are like what our "working" dogs at work roll in

Relying on aircon is relying on something that may fail

Some ventilation, shade and water will keep them happy, you can also get tarp covers for cold and inclement weather

Keeping it simple will keep them happy


^^^This too, working with dogs overseas in summer time they acclimatised pretty well. Was a lot of very long "walks"  but any time could get them into a pmv for ac was good.

  • Like 1

Dog box like above won't be happening, it's entirely unsuitable for our situation.

It's 3x German Shepherd Dogs.

As I said, it'll be setup with failsafe redundancies for the whole thing.

But the vehicle could sit in the sun for quite a few hours, and then dog will be able to get out, and being able to run them on point is a major benefit over a dog that is already hot, and then gets out into a 35 degree day.

Will have ability for air flow (fanned, and vented for when moving), as well as fully insulated, major electronic backups on the system, and ability if need be for doors on it to auto open (without releasing pups) for air flow in event of internal temp increases.


Big issue is one of our boys is getting older and HATES the heat, and one of the others won't show signs of wearing out until he needs to be at the vets as he's about to die (never give up attitude), except he can get a bit of brain fade and turn off his listening ears. So keeping him cool when it's a stupid hot day up here is pretty paramount for what he does.


The sorting out an easy to install AC is the only difficult part for me at the moment. Though may if need be look to re-engineer an AC from an EV.

11 hours ago, MBS206 said:

Dog box like above won't be happening, it's entirely unsuitable for our situation.

It's 3x German Shepherd Dogs.

As I said, it'll be setup with failsafe redundancies for the whole thing.

But the vehicle could sit in the sun for quite a few hours, and then dog will be able to get out, and being able to run them on point is a major benefit over a dog that is already hot, and then gets out into a 35 degree day.

Will have ability for air flow (fanned, and vented for when moving), as well as fully insulated, major electronic backups on the system, and ability if need be for doors on it to auto open (without releasing pups) for air flow in event of internal temp increases.


Big issue is one of our boys is getting older and HATES the heat, and one of the others won't show signs of wearing out until he needs to be at the vets as he's about to die (never give up attitude), except he can get a bit of brain fade and turn off his listening ears. So keeping him cool when it's a stupid hot day up here is pretty paramount for what he does.


The sorting out an easy to install AC is the only difficult part for me at the moment. Though may if need be look to re-engineer an AC from an EV.

You can get a caravan aircon unit and aux batteries that run on 12v images.jpeg-62.thumb.jpg.485f5a9234dd1db9972d825f1d2487cb.jpg

  • 1 month later...

Been slow doing updates here but already done a few events this year and upgrades seem to be happening as parts needed.

So to start off the year I went over the car with a thorough bolt check, grease bolts in bushes, ziptied bit up and redid all the fluids. Found one of the caliper bolts had decided to back so put a spanner to it and .......it wasn't moving. Some patience with wd40, 1/4 drive impact socket and a rattle gun had it out, The thread in the caliper was not bad and a tap cleaned out the debirs. New bolts with a washer and no problems since. Got a new windscreen fitted as old one had a lot of chips and developed a crack last time out. Fresh screen was sourced and fitted locally.
Next up were new tyres the old A050 were well worn and 2 were almost slicks. I had a choice either spend the dollars and go another set or try the Nankang CR-S. I have been part of the testing of the CR-S so I know the Pro's and Con's of both tyres and with the aim of focusing on time attack I went with the Nankang CR-S, having a hook up for them also helps. At the same time I got another wheel alignment.

With all this done I headed out to Lakeside Park for a sprint session with a few of the Skid Control crew to pretty much go get that monkey off my back after my last visit on the whole track..........

Weather was looking not great through out the morning then the organisers thought it would be great to let people take passengers at 70% pace on a wet circuit, one written off 2023 BRZ and damaged BMW later caused a hold up so lots of waiting.

Finally got out on track and scrubbed in the tyres for 2 laps then had a go at a fast lap. I think I did a 62 with a heap of traffic, which isn't slow but isn't fast. Tyres were great and I was feeling pretty good after that. Headed back out for  next session knowing if there was no traffic I could go a second quicker.
Did a decent warm up lap then went for it, seeing green on the racechrono I kept pushing and was up a lot by Hungry corner. Coming down the hill then across the line I saw green and a 59.89. Finished up the session and cruised back in to the pits to one of my mate stopping me in the pit lane and told me the official time of a 59.0!!!!!

https://www.facebook.com/100000026398820/videos/568597401864367/
excuse the belts in front of the camera

In car of the lap
https://www.facebook.com/100000026398820/videos/3462819007280321/

So after that I decided it was time for new brake rotors and pads. I had been planning to get Endless ME20 but non in the country or Japan until at least end of May so went with Project Mu RC09 pads and the usual DBA4000 rotors. Easy fit up and done in a few hours.
 330022665_741721684233412_8125712691079930428_n.thumb.jpg.6f44778684cd08c7fac95d3bf73bc61f.jpg
333088642_915090692973331_4228050232935963984_n.thumb.jpg.582f948a910b22f166c16726406ddec6.jpg
332765911_168134322654803_5996671588456834582_n.thumb.jpg.d7b4e77dc9bc4e7f9fbdc16a782f75ec.jpg
329936790_1363245721136012_2057013924310914946_n.thumb.jpg.4fa8cf6e2912b3b3bd6b22db1faa84b3.jpg

Wheels got a good scrub too
328544223_3450656858589224_3063443846678765476_n.thumb.jpg.bfc0bac663429dfb5d81ab91dcaed43c.jpg
330081872_585638276765013_6438036760507797405_n.thumb.jpg.f8350c77bd4e6d30be17d20e4fb69276.jpg
332926166_1357018558415367_4521531789479951980_n.thumb.jpg.cb2309f7ade2dc077d8fd00c4f2405af.jpg
327900784_1825645034480812_5401387747096776299_n.thumb.jpg.cbb68c02c2fb4aa14a61d7ecac587861.jpg

All this was in preparation for Time Attack round 1 at QR. the old brakes wouldn't last 1 session.
First session I used to bed in the brakes and get a feel for them, towards the end of the 5 laps I got a vibration through the steering and pulled of cooled it down with a few laps out back of pits. Car really need me to give it throttle to move too......... Got into pits and no visible signs.
Jacked it up and took off the wheels, deceided to crack the caliper bleed nipple and pressuirsed fluid came out so went and bled the system, brakes felt good, quick spanner check, refitted wheels and re torqued the nuts. 
Session 2 got a good warm up lap in and went for it on the first lap but missed my brake marker then forgot to down shift to 4th quickly, slightly turned in late at turn 1 but was up on racechrono, turn 2 was good through dipper I was a bit late on brakes got the apex but didn't stay to the right enough for the left up hill managed to get the apex with a good exit. Down towards the next corner I nailed the braking and turnd in got the apex, then left into the final corner but turned in too early and ended up having to double apex but got on the power early enough. Crossed the line with a 57.29 on racechrono. Thought I would go for another fast lap, nailed turn 1 this time but all of a sudden got the shake in the steering again 😬
Pulled off the track layout so session wasn't held up.
Ended up with official time of 57.26 which I am happy with and qualified for Holy Grail lap time going sub 58.
Got back to pits with same issue. A few calls and messages to people and looks like return valve failed on the BMC, a GKTeck/Holfords one. Seems they don't like the heat.
As wel as the brakes the coils were getting hot causing a misfire too so pulled the pin on it.

The one proper lap I got


So already have bought genuine BM57, Taarks r35 coil kit and a Race Box Mini for better data.
Parts should turn up next week, get them fitted and then head back out for round 2 at Lakeside and better my PB there.

23rdFebTimeAttackDay2023-(4)-(ZF-9581-93600-1-001).thumb.jpg.8c4915bf686f1c9bce8fb07ba32c2794.jpg23rdFebTimeAttackDay2023-(458)-(ZF-9581-93600-1-002).thumb.jpg.57b05ae13333755178b9bed88816f7f4.jpg23rdFebTimeAttackDay2023-(658)-(ZF-9581-93600-1-003).thumb.jpg.2f4b38f54d31ac67d5f32e712718d731.jpg23rdFebTimeAttackDay2023-(661)-(ZF-9581-93600-1-004).thumb.jpg.2d8e7ff2c1d6f3b937b2c72ae5a2f6fb.jpg23rdFebTimeAttackDayPM2023-(742)-(ZF-9581-93600-1-005).thumb.jpg.383efb555b7a3e1cd1e256418677e5ed.jpg

  • Like 4
  • 1 month later...

Picking up where I left off.

As usual Taarks/efi solutions delivered quickly and got staright into fitting the coil kit. Pretty easy install and replaced the spark plugs while I was there. The kit comes with new plug and pins for the cols but after removing the splitfire kit I didn't have a loom so took the oppotunity to make new one. Bought tefzel wire from local supplier and had some raychem heat shrink from previous looms. Tried a different method with measuring and planning and it turned out pretty good.
20230309_133908.thumb.jpg.f18f0af227840274a7e25657faeea4a9.jpg
20230309_150217.thumb.jpg.302b63e659610b6e3e954b232aab10ee.jpg
20230309_161621.thumb.jpg.dcc10f0c9909a50d05248832847a7f14.jpg
20230310_143945.thumb.jpg.9189d55676f2e8818adee276cfc9b60e.jpg

With that fitted, changed dwell settings in the ecu and fired it up. Biggest thing is obvious with all the fuel being ignited is it now was running leaner so had to add fuel everywhere. Biggest place was on boost with upto 15% fuel needing to be added in places.

Fitted the BM57 and bled the brakes with the help of a local mechanic. Brake pedal felt a lot better.

With all the work done headed back to Lakeside for Time Attack round 2. First session out car felt good on the 2 warm up laps so went for a fast lap, brakes were great at turn 2 and kept pushing through bus stop to hungry corner but at the top of eastern loop got a big vibration again so went straight into the pits. Car was also a not coming down in temp as quick either (normally 90-92 but 92-94 on a cooler day)so a few pit laps and straight back to normal. 

20230323_0933521.thumb.jpg.290432edbe9016a73d8a7d549c96ede2.jpg
Quick check of wheel nuts and suspension couldn't find anything so went back out for second session and did the 1 warm up and went for a fast lap. The lap was ok but lost time at the top of eastern loop with a slight correction. Ended the lap with 59.9 but decided on a second flyer but again towards middle of the lap got the vibration in the front again so pitted and a lap of pits to cool down. Parked it up and called it a day as I was instructing in the afternoon. After around a 30mins went to move the car and felt front left brake dragging.......
 

Here's the in car from the best lap of the day. The race box mini was great paired with RaceChrono to give me more accurate data. Got a few adjustments to make tyre pressure and suspension before next time at Lakeside as car feels unsettled through the Kink and Bus Stop. 


Debated about how to fix the issue. Rebuild current calipers or fit the EVO brembo kit I have sitting on the shelf for the s15? Needed brake pads and rebuild kits for the EVO kit then would need another kit for the s15. With having no where to work on the still, went with a rebuild the current brakes. Found a local shop that was happy to help. After 2 days and a few $$$$ the shop had it all sorted. The Front calipers required seals and pistons were salvageable the rears though needed all new pistons with seals and front rotors were machined too. Now looking on all the track calendars to find a test/practice day to see how it goes before next time attack day. Looking at Morgan Park as haven't been there for over a year and a good variety of corners but also the cheapest as QR now requires Motorsport Australia licence for practice and sprints.

Hopefully thats the brake issues now sorted and can get back to driving it for a whole day. 

  • Like 4

Interesting on the need to add more fuel, as it started running lean with better spark.


In my mind, having incomplete burn, means not all of the fuel has been burned, which means you'll have excess oxygen in the exhaust, and an O2 will read lean.

This is why misfires end up reading lean, even if it's from excess fuel.


I'm genuinely curious now as to why with better spark it's showing leaner every where, as I've always understood it to be the other way around.

I could see it getting a bit leaner as it's coming onto boost, as it might be coming on a bit earlier with a nicer more complete burn, but this would only show if the last coils were unable to do the job properly ever, and hence that section of map never got reached to be tuned, but across the board needing more has me baffled :S


As I said upto 15% in some spots but on average 5-6%.

The quality of the previous coils was questionable as plug gap was down to .6mm and would breakdown over 18psi or around 2 laps of QR. So now burning all the fuel injected. I am sure someone much smarter/experienced can explain it. @Dose Pipe Sutututu @Ben C34

I am wanting to get it back on a dyno but struggling to find a tuner I can trust and willing to work with me on setting up some other ecu functions.

Edited by robbo_rb180

That is a bit of a funny once, generally with misfires you will read lean as the oxygen in part of the mixture has not combusted.

The only plausible scenario I can think of is both fuel and ignition trims at play trying to keep the motor idling with the poor spark before. Potentially it may have been tuned to compensate for slight misfire at idle and now that the combustion is sex spec the idle closed loop strategy is pegged to add in more fuel but it's maxed out.

  • Like 1
  • Thanks 1
45 minutes ago, robbo_rb180 said:

As I said upto 15% in some spots but on average 5-6%.

The quality of the previous coils was questionable as plug gap was down to .6mm and would breakdown over 18psi or around 2 laps of QR. So now burning all the fuel injected. I am sure someone much smarter/experienced can explain it. @Dose Pipe Sutututu @Ben C34

I am wanting to get it back on a dyno but struggling to find a tuner I can trust and willing to work with me on setting up some other ecu functions.

Guy across from my work races (just did 12hour and doing 6hour at Bathurst) uses PowerTorque in Brendale, and work has used another place in Seventeen Mile Rocks but I can't think of their name off the top of my head sorry.

2 minutes ago, Dose Pipe Sutututu said:

That is a bit of a funny once, generally with misfires you will read lean as the oxygen in part of the mixture has not combusted.

The only plausible scenario I can think of is both fuel and ignition trims at play trying to keep the motor idling with the poor spark before. Potentially it may have been tuned to compensate for slight misfire at idle and now that the combustion is sex spec the idle closed loop strategy is pegged to add in more fuel but it's maxed out.

Nekminit, O2 sensor has failed and new plugs end up fouled :P

  • Haha 2
21 minutes ago, Dose Pipe Sutututu said:

That is a bit of a funny once, generally with misfires you will read lean as the oxygen in part of the mixture has not combusted.

The only plausible scenario I can think of is both fuel and ignition trims at play trying to keep the motor idling with the poor spark before. Potentially it may have been tuned to compensate for slight misfire at idle and now that the combustion is sex spec the idle closed loop strategy is pegged to add in more fuel but it's maxed out.

Will look at it a bit more tomorrow. Idle has been good it needed a slight adjustment on fuel. Looking at a log it also was only making 14psi not the usual 16psi on gate pressure. So guessing they didn't tune that area too well........

14 minutes ago, MBS206 said:

Nekminit, O2 sensor has failed and new plugs end up fouled :P

Hopefully not but it would give me a chance to upgrade to a CAN lambda as still running it over a 0-5v ANVolt input. Lucky s15 has a haltech wb in it.

  • Like 1

Create an account or sign in to comment

You need to be a member in order to leave a comment

Create an account

Sign up for a new account in our community. It's easy!

Register a new account

Sign in

Already have an account? Sign in here.

Sign In Now


  • Similar Content

  • Latest Posts

    • Jdm DC2R is also nice for a FF car compared to the regular hatches of the time.
    • Gotta admit, I love the 20b Cosmo.
    • Now that the break-in period for both clutch and transmission is nearly over I'd like to give some tips before I forget about everything that happened, also for anyone searching up how to do this job in the future: You will need at least 6 ton jack stands at full extension. I would go as far as to say maybe consider 12 ton jack stands because the height of the transmission + the Harbor Freight hydraulic platform-style transmission jack was enough that it was an absolute PITA getting the transmission out from under the car and back in. The top edge of the bellhousing wants to contact the subframe and oil pan and if you're doing this on the floor forget about trying to lift this transmission off the ground and onto a transmission jack from under the car. Also do not try to use a scissor jack transmission lift. You have to rotate the damn thing in-place on the transmission jack which is hard enough with an adjustable platform and a transmission cradle that will mostly keep the transmission from rolling off the jack but on a scissor lift with a tiny non-adjustable platform? Forget it. Use penetrating oil on the driveshaft bolts. I highly recommend getting a thin 6 point combination (box end + open end) wrench for both the rear driveshaft and front driveshaft and a wrench extension. These bolts are on tight with very little space to work with and those two things together made a massive difference. Even a high torque impact wrench is just the wrong tool for the job here and didn't do what I needed it to do. If your starter bolts aren't seized in place for whatever reason you can in fact snake in a 3/8 inch ratchet + 6 point standard chrome socket up in there and "just" remove the bolts for the starter. Or at least I could. It is entirely by feel, you can barely fit it in, you can barely turn the stupid ratchet, but it is possible. Pull the front pipe/downpipe before you attempt to remove the transmission. In theory you don't have to, in practice just do it.  When pulling the transmission on the way out you don't have to undo all the bolts holding the rear driveshaft to the chassis like the center support bearing and the rear tunnel reinforcement bar but putting the transmission back in I highly recommend doing this because it will let you raise the transmission without constantly dealing with the driveshaft interfering in one way or another. I undid the bottom of the engine mount but I honestly don't know that it helped anything. If you do this make sure you put a towel on the back of the valve cover to keep the engine from smashing all the pipes on the firewall. Once the transmission has been pulled back far enough to clear the dowels you need to twist it in place clockwise if you're sitting behind the transmission. This will rotate the starter down towards the ground. The starter bump seems like it might clear if you twist the transmission the other way but it definitely won't. I have scraped the shit out of my transmission tunnel trying so learn from my mistake. You will need a center punch and an appropriate size drill bit and screw to pull the rear main seal. Then use vice grips and preferably a slide hammer attachment for those vice grips to yank the seal out. Do not let the drill or screw contact any part of the crank and clean the engine carefully after removing the seal to avoid getting metal fragments into the engine. I used a Slide Hammer and Bearing Puller Set, 5 Piece from Harbor Freight to pull the old pilot bearing. The "wet paper towel" trick sucked and just got dirty clutch water everywhere. Buy the tool or borrow it from a friend and save yourself the pain. It comes right out. Mine was very worn compared to the new one and it was starting to show cracks. Soak it in engine oil for a day in case yours has lost all of the oil to the plastic bag it comes in. You may be tempted to get the Nismo aftermarket pilot bearing but local mechanics have told me that they fail prematurely and if they do fail they do far more damage than a failed OEM pilot bushing. I mentioned this before but the Super Coppermix Twin clutch friction disks are in fact directional. The subtle coning of the fingers in both cases should be facing towards the center of the hub. So the coning on the rearmost disk closest to the pressure plate should go towards the engine, and the one closest to the flywheel should be flipped the other way. Otherwise when you torque down the pressure plate it will be warped and if you attempt to drive it like this it will make a very nasty grinding noise. Also, there is in fact an orientation to the washers for the pressure plate if you don't want to damage the anodizing. Rounded side of the washer faces the pressure plate. The flat side faces the bolt head. Pulling the transmission from the transfer case you need to be extremely careful with the shift cover plate. This part is discontinued. Try your best to avoid damaging the mating surfaces or breaking the pry points. I used a dead blow rubber hammer after removing the bolts to smack it sideways to slide it off the RTV the previous mechanic applied. I recommend using gasket dressing on the OEM paper gasket to try and keep the ATF from leaking out of that surface which seems to be a perpetual problem. Undoing the shifter rod end is an absolute PITA. Get a set of roll pin punches. Those are mandatory for this. Also I strongly, strongly recommend getting a palm nailer that will fit your roll pin punch. Also, put a clean (emphasis on clean) towel wrapped around the back end of the roll pin to keep it from shooting into the transfer case so you can spend a good hour or two with a magnet on a stick getting it out. Do not damage the shifter rod end either because those are discontinued as well. Do not use aftermarket flywheel bolts. Or if you do, make sure they are exactly the same dimensions as OEM before you go to install them. I have seen people mention that they got the wrong bolts and it meant having to do the job again. High torque impact wrench makes removal easy. I used some combination of a pry bar and flathead screwdriver to keep the flywheel from turning but consider just buying a proper flywheel lock instead. Just buy the OS Giken clutch alignment tool from RHDJapan. I hated the plastic alignment tool and you will never be confident this thing will work as intended. Don't forget to install the Nismo provided clutch fork boot. Otherwise it will make unearthly noises when you press the clutch pedal as it says on the little installation sheet in Japanese. Also, on both initial disassembly and assembly you must follow torque sequence for the pressure plate bolts. For some reason the Nismo directions tell you to put in the smaller 3 bolts last. I would not do this. Fully insert and thread those bolts to the end first, then tighten the other larger pressure plate bolts according to torque sequence. Then at the end you can also torque these 3 smaller bolts. Doing it the other way can cause these bolts to bind and the whole thing won't fit as it should. Hope this helps someone out there.
    • Every one has seemed to of have missed . . . . . . . The Mazda Cosmo . . . . . . what a MACHINE ! !
×
×
  • Create New...