

Announcements
-
Similar Content
-
-
Latest Posts
-

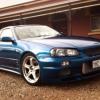
By PuReOwNaGe · Posted
Looking to sell my GTR. It is currently sitting in my garage and is ready to if someone wants it. -
-

By funkymonkey · Posted
Just re-read the history of that car. That was the P10 which wasn’t that successful. It was effectively just a Pulsar SSS with IRS. The P11 was a much better and more successful beast. I’m surprise for a campaign in the 2000’s they bought such an old car. -
By funkymonkey · Posted
I’ll offer him $50 and a cold beer and see if he wants to sell. Will save me building one -
 Yeah the aussie one was super unsuccessful. It is almost certainly at the back of some workshop under a very dusty cover
-


Recommended Posts
Create an account or sign in to comment
You need to be a member in order to leave a comment
Create an account
Sign up for a new account in our community. It's easy!
Register a new accountSign in
Already have an account? Sign in here.
Sign In Now