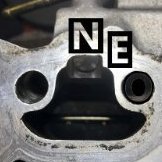
Jump to content
SAU Community

Recommended Posts

Hi all,

This will be my 1997 ECR33 GTST restoration journal, I will try to keep it updated  with progress and pictures, however I tend to write a lot so please bare with me.

The car is not in super bad shape as the previous owner had already fixed some major rust hiding in the sills and rocker panels, however it was not done fully nor properly, so I will be trying to fix everything that's left out to the best of my ability. My plan of action was to start from the boot area then onto the engine bay and finishing up with attaching the GTR overfenders I was given with the car, fitting GTR front fenders and finishing off with paint. I cannot weld and I do not have access to a professional paint booth so for welding I am using my friend's services, and for painting I am trying to get it done (properly) via spray cans. So far it turned out great however the outside of the car will of course be professionally painted once the car can move on its own wheels. From what I've been told, the car had a full body kit which was molded into the chassis with tons of filler. It was chameleon green/purple. So now I've got to dig through all the filler, paint and bad welding to fix it all up.

So without much more writing, here's some shots of the car before I started working on it:

263445773_337286927823714_800911458872964032_n.thumb.jpg.e7215325ec33b0cf0d8e6fceda02ea47.jpg262049617_425637592572653_4704912441786883839_n.thumb.jpg.b9003110472a2d0e7a7837e89bb83259.jpg263029167_376867427570162_961138573673347343_n.thumb.jpg.dcd37018d53fd9a5c9dd87fa457dfee0.jpg


This is how the trunk looked and I'm glad I chiseled all the old factory seam sealer and sound deadening as that's where most the rust was hiding!

IMG_3415.thumb.JPG.622a8ce5d2ae44d3634c652c034014f4.JPGIMG_3433.thumb.JPG.030058cfabbce756beb3729cbad66e62.JPGIMG_3414.thumb.JPG.4879aa8ac1f62d027aa8e094766a7631.JPG

IMG_3473.thumb.JPG.cfd21d5627de73e591b88b0be5b18388.JPGIMG_3468.thumb.JPG.c1ab686aa497df0fb8741c1a7bdaa495.JPGIMG_3470.thumb.JPG.946e38992ad1c3b253b73b470609ad4a.JPG

IMG_3434.thumb.JPG.2a1d913bc6162786e83407d370b5fdc6.JPGIMG_3476.thumb.JPG.9d7cd949edcb874ad2a741443fd22243.JPGIMG_3477.thumb.JPG.dd07b5ccce810b0319054616fc08f827.JPG

IMG_3480.thumb.JPG.1d665a581dc4663ec098c33f0e1c1ad5.JPGIMG_3479.thumb.JPG.9fd9c5dc5df780a8fe0db729a7a316a9.JPGIMG_3530.thumb.JPG.c2ebbbf349d5bffdc05289a29cfb96e0.JPG

IMG_3449.thumb.JPG.7f488901561b78a61d8286e0661a90f7.JPG1765789316_IMG_3462-Copy.thumb.JPG.4a0d59fb44d84922588ffa9150d335b6.JPG

IMG_3481.thumb.JPG.c8d39cd2c4923cc40f2c1bc5ed0da5fe.JPGIMG_3483.thumb.JPG.f9ff3b78bb9204ce78e14e34ae21611d.JPGIMG_3487.thumb.JPG.8756562dcb6e902582ca553161ae9d0f.JPGIMG_3543.thumb.JPG.debf55245e41bf143fc5354ba154c7ed.JPGIMG_3548.thumb.JPG.a2be1ffd0243b8660047dae735261073.JPG

IMG_3534.thumb.JPG.5841d09fc54d01c05f3c314482660b2a.JPGIMG_3542.thumb.JPG.764cb087f5f101b80ed3832a65359e48.JPGIMG_3556.thumb.JPG.1056bcd518a8ff859370ee8dd79c8eda.JPGIMG_3557.thumb.JPG.d9ab355a7450c5721d1dd8a2d057475f.JPGIMG_3558.thumb.JPG.2a83016854448da865e4a9b41a80a26c.JPG

IMG_3562.thumb.JPG.51396765ce890d4ba2ee2452c01cb886.JPGIMG_3563.thumb.JPG.7622a263402d3ba5b57d1acc3d383bd9.JPGIMG_3564.thumb.JPG.b74359cedc5de16e0eb98222447ec5b7.JPGIMG_3565.thumb.JPG.e7bae647bd3d057c6a8cee8a78a45ad1.JPG

IMG_3571.thumb.JPG.51cabf9ab50a7c3f84cb4bc695a3e964.JPGIMG_3572.thumb.JPG.30047136d110b6489aba899e75338b2b.JPGIMG_3575.thumb.JPG.b6b72733f976b2cde52f6860f8cc996e.JPGIMG_3576.thumb.JPG.a6c188ea2e42c6219ab8a62bfd43ec99.JPG


As you can see, all the rust I could get my hands on was mechanically removed, then with the help of Wurth Rust Converter, it was chemically converted to inert clean metal state, then fully primered with two good coats of Epoxy Primer (Novol's Spectral 395 line), followed by Mipa white polyurethane seam sealer in factory places as well as many areas where they do not seal from the factory (due to cost and time reasons). I took care not to block any drainages. After seam sealing, another coat of epoxy primer was applied, then sprayed with gloss white. At this point I was still unsure what tone of white to use, however most of this work will be hidden behind panels and will not be seen. The important thing is that it was done properly with good preparation and I firmly believe the rear portion of this car will not see any rust for the next decade.

The previous owner had re-welded some weird arches which will not work with the GTR overfenders, so those were cut out, welds ground, rust cleaned and the arches were fully welded. They were also primered and seam sealed inside and out. The top of the boot lid area underwent the same treatment, as well as the rear end and bumper support. I must say I am very glad with how it all came out and the same work will be done to the engine bay in the upcoming weeks. However, I ended up spending too much money on spray can primer and paint, so this time I am thinking of getting a cheap paint gun from a friend and using my 24 liter compressor. I am not so worried about the finish of the job as much as getting adequate amounts of paint and undercoat on the chassis. I will also save a lot of money this way.

That's it for now; when I have more I shall update this thread. I am open to criticism as well as helpful feedback and suggestions! Thanks for reading.


Edited by Neostead2000
  • Like 8
Link to comment
https://www.sau.com.au/forums/topic/483281-project-neostead-2000-restoration/
Share on other sites

On 2/2/2022 at 10:25 AM, sonic99 said:

What brand of primer did you use in the boot? 

I am using an epoxy-based primer from Novol. The specific one is Novol "Spectral 395" white. It is a light-coat non-sandable primer, so what I do is I prep the surface with 240 grit sandpaper then apply two-three coats of this primer with 10 minutes in between.

For the underspray I use another product by Novol called "Gravit 600 Antigravel" coating, sprayed at 4 bar from a cheap spray gun, two thick coats.

Also I use a variant of Wax/Grease remover called "Silicone remover" by OFO. Professional painters told me it's a good product to use when you need to wipe down bare metal or painted surfaces inbetween coats etc.

Lastly, I was recommended to apply seam sealer OVER at least one coat of epoxy primer, but never over bare metal. The epoxy is what gives the bare metal protection against moisture and oxidation, and the seam sealer is what repels water from inter-panel space.

  • Thanks 1
  • 8 months later...

Slight hiatus over the summer months; in the meanwhile I was procuring the rest of the missing bits and pieces including an R33 GTT 5 speed transmission and a good ol' HX35 twin scroll turbo. Super excited for when those parts come to life!

For the past 2 weeks I finally worked on the engine bay and it got the same treatment as the boot, however this time I decided to try out using a spray gun for the first time with my little 24L compressor. Now, let me preface this, I've never sprayed with a gun like this before and I've never had to mix paint. Additionally, I had bought the cheapest possible gun (Parkside LVLP from LIDL for like $15) so I guess I shouldn't have expected anything great. When I went to mix the paint, I ended up confusing the hardener and thinner ratios so the paint came out different and produced A LOT of runs (I was also spraying close to some areas, my fault...). Also, the gun had a factory defect where the spray needle was not retracting quick enough after letting go of the trigger, which made it DRIP lots of paint over my work area and over the panels. In the end it was a MESS but I got good coverage and in fact the strut tops became super smooth and glossy! I ordered factory QM1 paint so the engine bay would be color matched with the outside of the car.

As for prep work, same as before. Chiseling/wire wheeling all the old seal sealer, undercoat and rusty areas. Then treating with rust converter, then epoxy primer. Then, I tried using masking tape and applying seam sealer that way. It does look a bit neater I must say. Definitely not as sloppy as from the factory!

Enough writing, let the pics do the talking!

IMG_4935.thumb.JPG.769426700f0eee018eb66fbbf6a47a72.JPGIMG_4936.thumb.JPG.a91c8fa2e1b2adf88277304a6acb34c4.JPGIMG_4887.thumb.JPG.21e66e0cebb13f6a4eac039563da1c03.JPGIMG_4888.thumb.JPG.25a9c9d628eea6ad97a27f05fa1db2d0.JPGIMG_4937.thumb.JPG.caf1ad4d1d4451fa754ec2b52c164c84.JPGIMG_4938.thumb.JPG.81f0226acc7c05c522a76bdd8724d370.JPG

IMG_4906.thumb.JPG.8443ba3ec252faa68a6c974902d2bf3f.JPGIMG_4939.thumb.JPG.801263fc5f4b25fe8f725dd5643b743e.JPG

IMG_4941.thumb.JPG.b498ce8f7b110ceb41cfea60b074cf7f.JPGIMG_4942.thumb.JPG.f225f96946382fa89fdd73dad308cb31.JPGIMG_4943.thumb.JPG.caf2d5e4d500b0f59ed68ad7205302fb.JPG

IMG_4940.thumb.JPG.9702d44465fb66cf92dc3c0201adc95e.JPGIMG_4944.thumb.JPG.1f849e36f1c2416d03fcbade63cefc32.JPGIMG_4946.thumb.JPG.cf42a72b0b2e9ad44a123f441bfd1bb2.JPG

IMG_4948.thumb.JPG.5917a2e1c043950b672b9f312aae2adc.JPGIMG_4949.thumb.JPG.b4472df6beef5b900ddbb9410114c6b5.JPGIMG_4950.thumb.JPG.27f8cbc41c194965609df92d4b2a6d21.JPG

IMG_4951.thumb.JPG.66aa2166feeb2c9f7547cf55e2e0c1f7.JPGIMG_4953.thumb.JPG.2b742043d0c35de24a472b5c64ac18a9.JPGIMG_4955.thumb.JPG.0c634ac5cc930056d09d75733a5687a1.JPG

IMG_4956.thumb.JPG.c9932b5754c333519d4248024ce712c2.JPGIMG_4957.thumb.JPG.5aaa011ba2416a57a080ae0779cc6840.JPGIMG_4959.thumb.JPG.8e5ec0ca93d3ab8696ec480214f2d284.JPG

306504594_778298160136824_1295988607281455263_n.thumb.jpg.178e5d30c07396ce6dccb3b505d11881.jpg306931038_623686456091588_3194801080380236455_n.thumb.jpg.e5cfb2dee40c6d24f99a37ee4fb43662.jpg


Edited by Neostead2000
  • Like 2
  • 1 year later...

I haven't done this page any justice. Initially I wanted to keep it regularly updated, but I've had some moments of pause then moments of too much progress and too many pictures, so I failed to catch up. I decided to make an Instagram page to showcase the entire process with even more pictures, so if you're interested in following up, please do drop by:


https://www.instagram.com/skpro_jects/


If I can find the time, I will update it here also, but I really cannot find the time. I'm doing 10-11 hour days every day to get this Skyline finished up by the end of this year!!

  • Like 2

Create an account or sign in to comment

You need to be a member in order to leave a comment

Create an account

Sign up for a new account in our community. It's easy!

Register a new account

Sign in

Already have an account? Sign in here.

Sign In Now


  • Similar Content

  • Latest Posts

    • That's awesome, well done! Love all these older Datsun / Nissans so rare now
    • As I said, there's trade offs to jamming EVERYTHING in. Timing, resources etc, being the huge ones. Calling out the factory ECU has nothing to do with it, as it doesn't do any form of fancy boost control. It's all open loop boost control. You mention the Haltech Nexus, that's effectively two separate devices jammed into one box. What you quote about it, is proof for that. So now you've lost flexibility as a product too...   A product designed to do one thing really well, will always beat other products doing multiple things. Also, I wouldn't knock COTS stuff, you'd be surprised how many things are using it, that you're probably totally in love with As for the SpaceX comment that we're working directly with them, it's about the type of stuff we're doing. We're doing design work, and breaking world firsts. If you can't understand that I have real world hands on experience, including in very modern tech, and actually understand this stuff, then to avoid useless debates where you just won't accept fact and experience, from here on, it seems you'd be be happy I (and possibly anyone with knowledge really) not reply to your questions, or input, no matter how much help you could be given to help you, or let you learn. It seems you're happy reading your data sheets, factory service manuals, and only want people to reinforce your thoughts and points of view. 
    • I don't really understand because clearly it's possible. The factory ECU is running on like a 4 MHz 16-bit processor. Modern GDI ECUs have like 200 MHz superscalar cores with floating point units too. The Haltech Nexus has two 240 MHz CPU cores. The Elite 2500 is a single 80 MHz core. Surely 20x the compute means adding some PID boost control logic isn't that complicated. I'm not saying clock speed is everything, but the requirements to add boost control to a port injection 6 cylinder ECU are really not that difficult. More I/O, more interrupt handlers, more working memory, etc isn't that crazy to figure out. SpaceX if anything shows just how far you can get arguably doing things the "wrong" way, ie x86 COTS running C++ on Linux. That is about as far away from the "correct" architecture as it gets for a real time system, but it works anyways. 
    • Holy hell! That is absolutely stunning! Great work!!!
    • It does when you start adding everything else in. But it's not just compute. It's the logic. Getting your timing right (I'm not meaning ignition timing for the engine). Making sure of your memory mappings, seeing your interrupts. Microcontroller devices only have so much capacity. For the most part, you want all those timers and interrupts in use on your engine control, which means you're left with less than ideal methods for timing and management of other control functions.   Let's put it this way, my job is all about building custom hardware, that goes into cars, and integrates with them. We're also waiting on a media confirmation from SpaceX too fora world first we've just completed with them in NZ too. It's not just the little toys I play with. But you know, you can think and believe what you want.
×
×
  • Create New...