

Announcements
-
Similar Content
-
-
Latest Posts
-
 Hi All Finally getting back to work on the R32 this weekend and had a quick question about the GKTech anti squat kit (https://au.gktech.com/products/s13-180sx-r32-subframe-anti-squat-reduction-weld-in-kit?_pos=39&_fid=eb6b5077e&_ss=c) So, this straightens out the rear LCA and increases the roll centre by 20MM which is great BUT I also have MFR roll centre adjusters (https://www.rhdjapan.com/moonface-super-lap-rc-joint-roll-center-adjuster-bnr32-ps13-rps13.html) which gives a +15MM lift. My question is whether they can/should be used together or if its going to massively effect the geometry? In my mind, I can't see that they work together but was hoping for some feedback on someone who has done this before deciding which to use or if both? Thanks
 -

By TurboTapin · Posted
Agreed. Thing has to be running absolutely pig rich as well. I would worry a lot less about your idle and start going through all your electrical before the car burns down. -

-
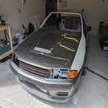
Before and after of reflectors, two coats brushed on. i used a bucket full of hot water to to heat up glue, then pry the lenses out a little with a flathead screwdriver and cutting with a Stanley. I’m not sure how the paint will go but it’s my best chance without dipping. see the reflection in the picture I’m pointing? That’s two coats paint and you can see the state of it in before shot after I cleaned it
-

-


Recommended Posts
Create an account or sign in to comment
You need to be a member in order to leave a comment
Create an account
Sign up for a new account in our community. It's easy!
Register a new accountSign in
Already have an account? Sign in here.
Sign In Now