

Announcements
-
Similar Content
-
-
Latest Posts
-
 Yes, letting batteries go flat, and then recharging them is not kind on them at all. My above was more around as the batteries age on. Going flat and recharging them very quickly shortens their life span.
 -
 I guess it depends how much you use a car, but my #1 reason for killing lead acid batteries is not driving the car (charging the battery) often enough,. I've got sick enough of dying batteries that I've switched to AGM; they are much more expensive but deal better with cold weather and almost always recover from being dead flat, unlike lead acid ones
 -
If you get 12v at one of the relay pins with IGN on, and 12v at another for about 3 sec when you turn the key from ACC to start, then yes you can just earth the relay trigger pin. Just have a look at the top of the relay, it should tell you which pin needs earth when the 12v signal is sent (or if it's not clear, just post the pic and we can work it out). If you always have 12v at 2 pins with IGN on, they it is earth triggered by the ECU which makes it harder to fix (you really need to check the ECU pin is earthing when it should, and if so it is a wiring issue from there to the relay.
-
-
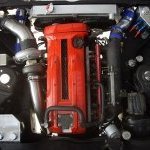 Got the gearbox in and the front drive shafts.
-


Recommended Posts
Create an account or sign in to comment
You need to be a member in order to leave a comment
Create an account
Sign up for a new account in our community. It's easy!
Register a new accountSign in
Already have an account? Sign in here.
Sign In Now