Jump to content
SAU Community

Car Specs + State Specific Modification Guidelines: Cefiro, Cimas etc


inark
 Share

Recommended Posts

UNDER CONSTRUCTION:::

Hi Guys!

Just thought i would put up an information thread in regards to our less known model cars for those that are interested or just plain curious.

As per the way i do most things on this section of these forums this thread will be locked but if you click HERE you will be able to make comments, ask questions, correct my research errors etc :rofl:

For any information on legal modifications or rules follow the below links:

-For VICTORIAN modification laws from VIC Roads click HERE

-For QUEENSLAND modification laws from QLD Roads click HERE for a PDF file. (Need Adobe Acrobat of which v6 can be downloaded HERE .)

-For NEW SOUTH WALES modification laws from NSW Roads click HERE for a PDF file. (Need Adobe Acrobat of which v6 can be downloaded HERE .)

Click on the car your after to take you to the post with the specs etc.

A31 Nissan Cefiro

Link to comment
Share on other sites

1988 - 1990 A31 Nissan Cefiro

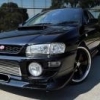
414nissan_cefiro.jpg414nissan_cefiro_inside.jpg

414nissan_cefiro_auto.jpg414nissan_cefiro_grey.jpg

As you can see these cars arent much to look at in stock form. For a few ideas on the potential of these cars check out our MEMBERS RIDES section.

General Information:

The A31 Nissan Cefiro was first released in September of 1988.

15 different models were released from Sep 1988 up until August 1990 until the E-A31 Cefiro was released. (counting same model but different year of release etc)

Townride

Touring

Sports Touring

Comfort Touring

Cruising

Sports Cruising

Contrary to much belief certain model cefiros were released in Manual transmission, from the Townride to the Sports cruising.

General Specs:

Body type: Sedan

Drive: FR

Displacement: 1998cc

Engine Specs:

Engine model: RB20E, RB20DE, RB20DET

Max.power: 205 ps (150.78 kw) / 6400 rpm RB20DET

Max.power: 155 ps (114.00 kw) / 6400 rpm RB20DE

Max.power: 125 ps (91.94 kw) / 5600 rpm RB20E

Turbo Information: Ceramic

Fuel system: NISSAN EGI (ECCS) (electronic gasoline injection) electrically controlled gasoline injection

Turbocharger: Intercooled turbo

Fuel type: Unleaded premium gasoline

Exterior Specs:

Exterior dimensions (LxWxH): 4690 x 1695 x 1375 mm

Interior dimensions (LxWxH): 1910 x 1425 x 1140 mm

Wheel base: 2670 mm

Ground clearance: 150 mm

Curb vehicle weight: 1350 kgs (auto turbo) 1330 kgs (manual turbo) 1260 kgs(manual RB20E) 1280 kgs (auto RB20E) 1300 kgs (RB20DE manual) 1320 kgs (RB20DE auto)

Seating capacity: 5

Doors number: 4

Min. turning radius: 5 m

Fuel tank capacity: 65 L

Chassis/Suspension Specs:

Power steering: Yes

Suspension system: front Independent suspension strut type

Suspension system: rear Independent suspension multiple link type

Link to comment
Share on other sites

Guest
This topic is now closed to further replies.
 Share


  • Latest Posts

    • From what I've seen and experienced first hand with those powder extinguishers, they're good to use to break a window and escape the car, and half the time then do f**k all to stop a fire. You just need much more than 1KG worth of powder. Not to mention, half the time it's an engine bay fire, and you can't easily, and do not want to completely open the bonnet, so you're left pretending to be an American Infantry... Spray and Pray baby!   And then 100% that shit is really destructive afterwards!   Realistically, those little ones at a race track might help you keep the fire from growing and give the fire marshal / truck a chance to actually get to you with their multiple large bottles.   For a road car, these days, prepare to deboard as quickly as humanly possible, and move to safety. Allow insurance to fix replace it (unless it's like a rare classic etc, then do nearly everything possible to save it!) Keep the little extinguisher with you to help protect other things around you from burning while you stand there singing "How can we sleep while our beds are burning?"   Secondly, powder extinguishers I freaking hate for indoor use, (this isn't really relevant to a car) as you will get a powder fog around you, and it can be disorientating.   When I did fire training when at BlueScope Steel, they have (had?) their own fire brigade on site. We did all the training, and at the end we were told, "If it's an indoor fire, and you need to use a powder extinguisher, we as the fire brigade would rather you just exit the building, you're more likely to get lost in the smoke and powder fog than do much help, so just GTFO" And pretty much that was what they said for most other fires too, grab extinguisher, if it's much more than paper in a bin fire, use extinguisher to get you and others out of the building to safety...   Part of me wishes when my Skyline caught alight many moons ago, I let insurance sort it out, instead of putting the fire out... part of me now says "But I've saved a classic before it was a classic!"
    • Hi all,  I have a older model of the Greddy Front facing intake on an RB25DET NEO Head. I've bought aeroflows fuel rail and injector kit (1000cc Bosche injectors) and I'm unsure if the fitment is correct. The injector o-rings fit in the intake hole but it's not snug. I can very easily rotate the injectors even when the fuel rail is mounted. The kit also came with multiple adaptors, they dont make it any more snug and using them raises the injectors up and i cant mount the fuel rail. I hope this makes sense I've asses a few photos.    Thanks so much guys. 
    • So, to run the 4g aerials to the booster, I had to get access to the rear bulkhead....bit of a mission. Hot tip, don't offer to help change the rear shocks for a mate with a v37.... Remove seat base, 2 clips that slide forward to release it the it lifts straight out Fold down rear seat (pull in from boot) The side bolster of the rear seat is not connected to the middle parts that fold. To remove unbolt at the bottom bolt then push it up off the top hook Then there is a plastic surround behind the seat back, 2 pop out clips, 2 bastard clips, some swearing at it is out Pop the rear seat latch surround off Remove door surround lower trim then side trim  Remove c pillar trim - 4 clips, pull inwards not forwards Remove metal brace - 5 bolts 1 nut Then you have got to the rear strut top...what a pain!
    • If you really want squish back, you can have it put on the piston (at least to some extent).
    • Impressive. He's very very smooth.
×
×
  • Create New...