
How Do I Tell What My Spring Rates Are?

Announcements
-
Similar Content
-
-
Latest Posts
-
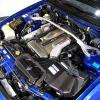
 Possibly an old turbo timer.
 -
 Yeah very fair, and still relatively untested on RBs - though initial results from the RB30 ECR33 in Brisbane look pretty impressive. G40 looks like it should be a pretty solid choice, a few people have used them too.
 -
 The specific reasons I suggested them in this case are: * OP has a complex issue that needs to be checked out thoroughly, so their engineering approach rather than just chuck whatever on should help * I've found them to be honest about what problems exist, even if the customer doesn't want to know bad news I'm sure there are places that will bolt on stuff and do a tune cheaper, and faster
 -
Its definitely not factory. You'd have to check but the yellow wire is something in the key (so see when it has 12v). The blue wire would have been a switched version of whatever the yellow wire was (eg if yellow is IGN, then blue was something that can be switched on when IGN is on). Whatever it is, it is now inop if nothing is plugged into it.
-
 Where do the wires go?
-


Recommended Posts
Create an account or sign in to comment
You need to be a member in order to leave a comment
Create an account
Sign up for a new account in our community. It's easy!
Register a new accountSign in
Already have an account? Sign in here.
Sign In Now