Jump to content
SAU Community

Recommended Posts

hey guys ive decided to start a thread on my build up of the engine, and stuff on the stagea and saves people asking q's and ill post up heaps of pics as i go along :)

heres the info so far on what ive got:

Engine: RB26DETT

INTERNALS:

JUN 2.7L stroker kit

JUN forged crank

JUN forged connecting rods

JUN cosworth forged pistons

JUN oil pump

JUN head stud kit

JUN big end stud kit

JUN 272 degree/11.35mm lift cams

JUN adjustable cam gears

JUN titanium retainers

JUN heavy duty valve springs

Nismo bearings

HKS metal gasket kit

valve guides

Gates timing belt

n1 waterpump

INTAKE:

HKS T04Z (0.81) turbo

K&N Pod Filter (huge!!)

Trust stainless steel exhuast manifold

custom 3" aluminium intercooler piping

HKS 50mm external wastegate (vented to atmo :D )

EXHAUST:

4" dump pipe into 4" exhaust, to 3.5" after cat

4" magic cat converter

3.5" stainless steel mufflers x 2

FUEL SYSTEM:

sard 1000cc injectors

sard dual entry fuel rail

sard adjustable fuel pressure regulator

bosch 044 fuel pumps x 2

goss intank pumps x 2

Alloy surge tank

twin fuel lines from pumps to engine

DRIVELINE:

custom twin plate clutch

gtr 5 speed gearbox

GTR rear diff and axles

4.3 diff ratios

SUSPENSION:

bilstein shocks

whiteline springs

whiteline/arc swaybars

BRAKES:

R34 gtr v spec front 4 spot brembo calipers

DBA 328mm alloy hat slotted rotors

R32 GTR rear 2 spot calipers

DBA 300mm slotted rotors

brembo front brake pads

bendix ultimate rear pads

stainless steel braided brake lines

OTHER ENGINE BITS:

Autronics SMC ecu

Autronics CDI ignition amplifier

MSD coilpacks

nismo engine mounts

nismo gearbox mount

oil cooler

custom 9L baffled sump

need to get a 100mm thick cooler blitz or apexi or something similiar, and thats pretty much all i need to get now :)

engine is at the machine shop at the moment and hoping to get block back within 3 weeks or so and the head is machined for the cams and porting is being done as we speak, the HKS t04Z turbo is ordered from japan and waiting on exact price from HKS :)

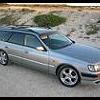
heres a few pics of the car at the moment and a test fit of the brembo r34 calipers and dba alloy rotors which luckily just fit behind my rims :D

and i been hiding all the headlight wiring harnesses and all the wires that run along between headlights and battery and headlights and air box on the other side, i took a few pics with the wiring gone and if u checkout your own stagea's they are full of wires usually :P

and heres the dba 328 mm rotor compared to the stock stagea front rotor :O

and ill show i few pics of before it had the motor taken out :)

ill update as i go in here rather than posting heaps of different threads :)]

cheers

Brad

post-20455-1127213305.jpg

post-20455-1127213392.jpg

post-20455-1127213532.jpg

post-20455-1127213657.jpg

post-20455-1127213873.jpg

post-20455-1127213955.jpg

post-20455-1127214056.jpg

post-20455-1127214202.jpg

post-20455-1127214411.jpg

post-20455-1127214488.jpg

post-20455-1127214566.jpg

post-20455-1127214665.jpg

Edited by StageZilla
Link to comment
https://www.sau.com.au/forums/topic/88412-updates-on-the-jun-27l-staj-build/
Share on other sites

What did you have to do to convert the rear end to GTR?

Is it just a rear GTR diff and axle stubs? They all bolt in perfect etc? New driveshaft?

I mean, the power i will chase in the end, id like to at least be prepared as youve said stagea axles are tiny.. :D

What did you have to do to convert the rear end to GTR?

Is it just a rear GTR diff and axle stubs? They all bolt in perfect etc? New driveshaft?

I mean, the power i will chase in the end, id like to at least be prepared as youve said stagea axles are tiny.. :D

hey alex its not as simple as first thought :)

the easy bit...

gtr diff housing and stagea housing r identical size, except stagea one has mounting points for attessa pumps and gtr one doesnt so i put the gtr diff internals in the stagea diff housing and therefore the same abs sensors were in also as the gtr ones r different, the rear diff plate on the gtr diff is alot bigger and shiny ally fins where as the stagea one is flat and black, gtr one bolts on ok but the fins hit on the rear cradle not allowing to pull hard up when bolting up, so we bent the end piece of the crossmember lip like 2-3mm and its clear by a few mm, which is fine and totally unnoticable :O

hubs and brakes fit str8 on with the change of two of the bushes, easy as :)

stagea tailshaft bolts str8 on as normal :)

axles r two different lengths (drivers side is longer than passenger side), which is something i didn't realise for a while, and i tried the gtr long axle on the short side and it was too short, and then i got a gts4 axle and tried the long side on the short side of my car and it fit perfect, so i got another gts4 one and thought it would fit (thinking they were the same length :D ) and it was wayyyyy short, like 70mm i think, so we cut up one of the gtr ends and welded on an extension piece on the the main bit that bolts onto the diff flange, and its lasted for abit of absolute thrashing and hard launches etc with 360rwhp but i dont know how its gonna take 600hp+ :lol:

time will tell :P

Edited by StageZilla

Ok,

So for realistic purposes, i may be better off to get some custom axles machined up by someone in just thicker diameter metal and stronger alloy?

Add a NISMO GT PRO LSD to the mix and that should mean overall improved strength i suppose...

Do you have any info on how the ATESSA would hold up with increased power? What problems can arise and what are the consiquences of the ATESSA going?

thanks gts evolution, i got em for a bargain price, thanks to a champ :)

and alex im not sure on the attessa, but its the same as the gtr one so i cant see any problems but thats what ive said about this whole conversion from rb25-26 etc etc and look its been on the road 3 weeks in 10 months :D

patience is the key B)

What did you use to paint the rear caliper?  Did you do it yourself, or is it a pro job?  I was always under the impression it wasn't a good idea to spray the inside near the piston.

Its going to be a damn fast volvo ;)

painted them at home with that anodizing paint, but u gotta buy an undercoat first so it sticks, its about $40 for the colour and the primer which is ok, it looks awesome for a spray can job :)

theres a thread in the tutorial section which explains details about the paint and how to do it etc :)

heres the link... http://www.skylinesaustralia.com/forums/in...+brake+calipers

i cant wait to drive it dont you worry :D

i love volvos ;)

cheers

Brad

How is the build going?

engine is still at the machine shop and the shop is waiting on jun specs for clearances etc which is taking for bloody ever.

turbo i am waiting for, and bov waiting, and suspension waiting, need oil cooler, and head needs to be ported and assembly of the engine then :)

i just cant bloody wait hehe :cheers:

  • 3 weeks later...

well finally some development in the build, and i picked up the freshly machined block yesterday and the head is machined for the 270/11.35mm lift cams but it still needs a freshen up and port and polish.

the day prior to that i picked up my HKS T04Z Turbo and its got through customs without and taxes haha, and it weighs a bloody tonne, lucky lucky i reckon :)

so with the block ready i just need to sort the head and then i need to get the JUN stroker kit instructions translated for torque specs and clearances etc.

assembly is not for away and im still searching for a 100mm thick jap intercooler, might get an ARE one, or a brand new blitz one if i have too.

ive got the n1 water pump and im wondering how that is with abit of street driving? because im going to be revving to over 10k so a stock water pump wont cut it?

heres a pic of the turbo and one with it next to a stock gtr turbo.

cheers

Brad

post-20455-1129372238.jpg

post-20455-1129373326.jpg

Considering you wont be needing your std turbine, want to give it to me at a bargain price so that i can get it rebuilt for my stagea?

I know its probably in good condition anyway, but im looking for a an any condition one to rebuild

Considering you wont be needing your std turbine, want to give it to me at a bargain price so that i can get it rebuilt for my stagea?

I know its probably in good condition anyway, but im looking for a an any condition one to rebuild

its a standard rb26 turbo :) not much use on a 25, and i sold em off anyways :)

  • 3 months later...

The full build up thread is over here: http://www.skylinesaustralia.com/forums/in...showtopic=98086

That is so stupid, why the hell didnt they just unban StageZilla?

Politics, really gets in the way sometimes.

I wondered why the name change happened. What's the background to this for those of us obviously not in the know?

Create an account or sign in to comment

You need to be a member in order to leave a comment

Create an account

Sign up for a new account in our community. It's easy!

Register a new account

Sign in

Already have an account? Sign in here.

Sign In Now


  • Similar Content

  • Latest Posts

    • It can't be some stupidly proprietary video signal coming out of it that only Nissan's can understand. Surely you can just find some generic camera to stuff in there and use hot melt glue/blu-tac/gaffer tape to hold it in place if need be?
    • Update: Tunehouse looked into the problem and identified a wiring issue between the camera unit and the connector. They managed to get it working , but did warn me at some point it will stop working again. From their perspective it is unserviceable and will need replacement. They did some research and found that the new replacement camera would be Approx $1400 supply only (their fitting cost would be $190) . They did provide the part number (28442-JL05B) and a quick google of the part number shows that these are rather expensive brand new (seemingly no longer in manufacture) for the places that still have them in stock, with the used option potentially presenting  the same issue down the track at some unknown point. They are happy for me to supply the part so that they can fit it. Decisions, decisions... I can definitely recommend Tunehouse (thankyou Vee37!). Cost for the diagnosis was as quoted  ($190) , car was ready on time and communication was top notch. Their workshop is super clean and modern, and there was plenty of car candy parked out the front on the day I went.   Would definitely go back.   
    • to fix the voltage drop issue I swapped out the old 150amp alternator which turns out is a brand known for having issues and replaced it with the black 180amp alternator beside it 
    • For anyone interested, the Way Back Machine has that Japanese website archived with pictures, etc: https://web.archive.org/web/20051023225805fw_/http://www.a31cefiro.com/air_con.htm "Simply swapping the wiring of the harness will not allow it to function properly. For the outdoor air sensor and sunlight sensor, disconnect the wiring connected to CN1-11 of the air conditioning harness from the harness and connect the sensor side wiring to earth. For the indoor air sensor, disconnect the wiring connected to CN2-3 of the air conditioning harness from the harness and connect the sensor side wiring to earth. The connector PIN numbers listed here are the genuine A31 PIN numbers. To avoid incorrect wiring, check with a tester before wiring. Also, disconnect the wiring in a location close to the sensor. The disconnected harness side wiring will not be used, so be sure to insulate it." Wish someone sold a conversion harness to just plug-and-play a Kouki 180sx digital climate control into C33/A31. I'm decent with wiring but feeling kinda lazy about taking this on. Edit: Did some more digging and found a helpful Minkara blog post about the conversion as well: https://minkara.carview.co.jp/userid/1831116/car/1360568/2284209/note.aspx "After installation is complete or the battery is replaced, you need to go into self-diagnosis mode and set the internal air recirculation. The way to do it is to "hold OFF with the key on for more than 5 seconds, set the number to 5, then press 卍→C." ↑↑↑It probably won't make sense unless you actually try it (・∀・)." Lol wtf
    • Maybe SAUNSW could see howany members would do a motorkhana day if Schofield's is still available for a reasonable price...
×
×
  • Create New...