Jump to content
SAU Community

Recommended Posts

Front calipers?

1/ Jack up car, put on chasis stands, take wheel off

2/ Undo the large bolts on the back of the caliper that bolt them to the hub. Either 17 or 19mm bolts, 17 I think. Don't undo the ones that hold the two halves of the caliper.

If you need to physically take the calipers off the car you will also need to undo the brake fluid line. If you are only changing the discs just pull the caliper out of the way, cable tie or support it on something other than the brake line.

To undo the brake line you really should use a "flare nut spanner" if you can get your hands on one. It is an open ended spanner with almost a complete circle, only a really small gap for the hose to fit thru.

If you can't get one use an open ended spanner and be * really* careful, the line can be really tight to open and it is easy to crush or strip the nut. You will loose all the brake fluid and need to rebleed everything if you undo the brake line

read my thread.. "changing brake calipers from non mspec to mspec" the process is essentially the same.. and it will show you what you need to remove.

sigh, no the photos aren't in there anymore.. i'll put the whole thing up on project32 when i have a spare minute..

hang on,

thread asks how to remove rotors...

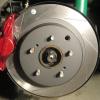
-remove caliper (2 bolts on back that bolt it to hub)

(place caliper somewhere with it still connected to brake line

-pull brake rotor towards you.

That's it... rears can be hard due to drum handbrake, there are 2 bolt holes where you can screw in bolts to push the rotor off.

it will be impossible to fit *longer* rear studs without taking the hub apart, due to the drum brake assembly being in the way.

Edited by MerlinTheHapyPig

haha wish I had read it properly before typing all the extra crap then :D

Re the wheel studs, assuming it is to fit spacers, a better way is to use bolt on spacers which are more secure (bolted to the hub) but still give normal stud length for the wheel

lol thats the funniest start to a tread i'm read.. :angry: ok with just pulling the rotor off you don't have to put two bolts into those little holes between the studs to push it off?? just didn't know what they were for.

lol thats the funniest start to a tread i'm read.. :angry: ok with just pulling the rotor off you don't have to put two bolts into those little holes between the studs to push it off?? just didn't know what they were for.

usually fronts will come off easily without too much force

I had to use those bolt holes for the rear, because the handbrake makes it hard (even with handbrake off...)

  • 11 years later...

Hey I know this is opening an old thread. But I'm trying to take off rotors on a R32 gtr and I'm trying to find the exact dimensions of the bolt holes. Anyone know what they are. I've tried a m10 bolt but it seems a little too big. Maybe the pitch is different? I've tried a m10 1.5 and a m10 1.25.
Ps I've taken off the caliper or put to the side and tried to hammer in certain spots to losen/pull off rotor.

Cheers for any help.

1483438967077.thumb.jpeg.f6f7c8fb81315d0 1483438872210.thumb.jpeg.e693d88aafeea58

hey good searching at least :) sorry I don't have stock rears to check, did you try an m8 bolt if you think m10 is too large? It's a common thread size from memory rather than something unusual

When I took my original rear rotors off they were a bit rusted making it harder to get the bolt in. As per Duncan's comment it's a standard size at least with the OEM rotors.

Maybe give the hole/thread a good clean with some degreaser and a wire brush? 

  • 3 weeks later...

Thanks Duncan m8 is what standard gtrs rotors usually take however I Found the bolt. Had to go to a bolt specialist. Apparently these were a m10 in pitch 1.25. This is not standard though. Got them rusty rotors off finally!

Create an account or sign in to comment

You need to be a member in order to leave a comment

Create an account

Sign up for a new account in our community. It's easy!

Register a new account

Sign in

Already have an account? Sign in here.

Sign In Now


  • Similar Content

  • Latest Posts

    • I would again like too thank Matt for his help in me sourcing the detachable hard top for the little red car, without Matt's assistance in inspecting it and locking it down, I can guarantee it would have sold before I could get up to see it,  and as that was the only available NC hardtop in Australia, I consider myself extremely lucky on multiple levels To say I'm more that happy would be an understatement And, it is 100% water tight, I drove through torrential rain coming back south, and by torrential, they type of rain that doing 40kph in a 110kph zone was a real thing, and even then, the standing water on the Hwy was deep enough to throw waves I'm also more than happy that the huge "BEASTS" that Matt calls dogs didn't eat me for lunch, I'm sure the sniffs and licks were more to "taste test" me, over being to friendly Now to work out what colour to get it painted, panel match, or gloss black........first world problems are real
    • Actually I might have figured out. Looks like there is a tab according to google images but it's hidden. Silly me.
    • No clips on this one like the other connector. Only that red tab that I can push slightly up.
    • For any loom connector that has an obvious release that resists pushing far enough to unclip, just spray some silicone lube into it. You might also benefit from using a bent screwdriver or small pick to push in the right place at the right angle.
    • Hey all, I went to try and fix my indicator not canceling, but I couldn't remove the clockspring cable under the column so I could twist that green thin. Anyone know how to remove this cable? I see this red tab but didn't have any luck. I was thinking of unscrewing it but wasn't sure if it would cause issues. I did notice for my indicator stalk, 2 out of 3 cables were plugged in but the last cable wouldn't fit in the stalk. I'm getting it's for fog lights. It was like this when I originally pulled it off.  
×
×
  • Create New...