Jump to content
SAU Community

Recommended Posts

Well I've got the day off, and I'm making up my wing stands and have measured out my custom 'jack's backyard aerodynamics' wing ends.

360mm stands to get the sucker at basic roof line. The wing blade is a carbon jobbie with a sorta built in gurney flap, so, hope it works as well as looks.

and my dual wing blade/ends should be pretty unique, should have it close by the end of the weekend.

my ass dyno/aero effects-o-metre is light years ahead of that shit.

i'll test it by running with it at the track, then unbolt it and run with no wing and see how it compares.

I'm tipping around a 10-15k loss of speed on the back straight but a hell of a lot better car to drive.

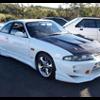
Recently purchased a second hand set of 17x8 +35 and 17x9 +32 Volk Racing GT-P to go on the R33. Tyres going on to be Kumho KU-36.. Should be grippy enough. Picking up the front tyres next week, the rears will have to wait a week or two more until I save enough money.

Did some smallish things today, put new windscreen wiper blade/carrier things on it today, still got to take the arms off at some point and actually paint them so they are just flat black instead of half black/half unpainted metal. Will wait until it's warmer.

Purchased replacement leather gearstick/handbrake boots, and bought some random leather wrapped Nismo gearknob off eBay. *shrug*.

Got more stuff in the pipeline to do to the 33, then I'll have to get it out to a track day or two... Needs some suspension parts replaced before any of that happens though.

Fun times ahead, may involve corners!

my ass dyno/aero effects-o-metre is light years ahead of that shit.

i'll test it by running with it at the track, then unbolt it and run with no wing and see how it compares.

I'm tipping around a 10-15k loss of speed on the back straight but a hell of a lot better car to drive.

even just putting that new suspension in will make it 20 times better to drive :P cant wait to see the custom work, send me a pic of it noob!

this a little update. wing uprights are cut out, just need to sand some file marks out, buzz them off with some 240g and I'll etch them up and paint them satin black.

they were such a bastard to cut out, 10mm thick alloy plate is nasty to work with by hand.

I'm still in the process of making the wing blades/ends. making dual blades, should have them done in a day or so

post-47373-0-30706300-1311996223_thumb.jpg

post-47373-0-40547100-1311996280_thumb.jpg

heres a pic with the bar on, its still in primer obviously, prob not going to rub down til i've got the front guards finished, they are going to get a bit more flare work, then prime.

the old man was onto me to fit the bar as we have a garage crawl with the classic ford club 2moro. They are prob not going to think too much of my jap crap anyway lol.

post-47373-0-24525100-1312002585_thumb.jpg

post-47373-0-70894200-1312002599_thumb.jpg

Edited by Mr. Untouchable

well, its mounted on factory bracing at the front points, and its on the edge of the boot at the rear, so already very solid.

however, I'm pretty sure I'm going to cross brace it with stainless wire trace and some nice neat SS turnbuckles and mount some anchor points at the front of the boot.

doing a simular thing with the splitter :thumbsup:

my ass dyno/aero effects-o-metre is light years ahead of that shit.

i'll test it by running with it at the track, then unbolt it and run with no wing and see how it compares.

I'm tipping around a 10-15k loss of speed on the back straight but a hell of a lot better car to drive.

We did a day of testing on a big origen wing at baskerville. even on full downforce we didn't lose any top speed. It helped that the car came onto the straight 5-10km/h faster with the extra grip

if anyone in launceston is free and knows how to get a gearbox out of a fwd corolla let me know!

just about to have another crack at it now but its being a real PITA

picked up our new custom made catch can today to fill the hole in the engine bay were the battery used to be, will put some pics up tonight, just need to measure up the top mount bracket for it and fit the mini filters, polish in then all sorted, looks pretty with the speedflow fitting fitted up...

Create an account or sign in to comment

You need to be a member in order to leave a comment

Create an account

Sign up for a new account in our community. It's easy!

Register a new account

Sign in

Already have an account? Sign in here.

Sign In Now


×
×
  • Create New...