Jump to content
SAU Community

R32 GTR (USA-Alabama) KG1 1990


Recommended Posts

Im very far behind on starting this build thread, but better late than never.

While stationed in western Tokyo (2013-2015) I was able to fulfill a childhood dream of owning a Nissan Skyline GTR. 

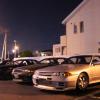
Made the purchase of the car as a reward to myself after making promotion. This is how it sat when purchased in October 2013. 

21690509_133762683916475_6074055149297336320_n.jpg.fa7aa97439ce6a278e773f62b21fe679.jpg10543058_1512044832377370_278547534_n.jpg.45f99f6090286104664c4b980b7eb2af.jpgomori.png.163078269f304a2ea3ffd9eb51026cce.pngMINES.png.5dfde652a6cb856031bdddfba734fe53.pngbay.png.98acb25d7f97da054782cde76d74beba.pngdash.png.47731c5fac57c0b4b9e10984533e4c42.png


What It Came With:

Engine:

Greddy FMIC

Greddy Radiator

 HKS hard pipe intercooler set

MINES ECU

Straight pipe from turbo back

Suspension:

Tein Adjustable Type-TS CruiseMaster Coilovers
Nismo Arms and Rods
Omori Factory Re-inforced Chasis
Nismo Front/Rear Stabilizers

17x9 and 255 40 17 all around


Interior:

Nismo 230/km dash
Greddy Turbo Timer
Greddy Oil Pressure and Boost Guage

Exterior:

Nismo Body Kit (front bumper with vents, N1 bonnet lip and trunk lip)

JUN front lip

LED Tail Lights


The car was in running condition when i got it but it needed some work to get it drive properly. 

- The clutch was bad. The seller knew it was twin discs, but not sure of the brand in it.

- One of the stock turbos in it were bad. The seller had two R33 GTR stock turbos that came with the car.

- The LED taillights were of Pinkish color now and only two were working.


After saving up and having the car sit for a month or so, I was ready to start buying parts to get this car on the road. I went to UpGarage near the base to find a replacement clutch. Something simple and used, just to see what kinda clutch is in it and to get it operational. I grabbed a HKS Twin isc clutch and was on the lift the following weekend. After dropping the transmission, we noticed it was an OS Giken Twin Disc (TS2CD). After finding this gem, I decided it would be better to buy a rebuild kit for the clutch and put the Giken back in. RHDjapan was able to get me the rebuild kit in less than a week. 

Once the rebuild kit came in, work was getting more and more hectic, I was not going to be able to do the work myself. Since the turbos needed to be swap too, i found this to be the perfect time to get both the clutch and turbos done.

14736378_1169483999754501_4355255507120816128_n.jpg.038974edc357783a003deaf9377b404f.jpg

You also get a nice glimpse of the replacement wheels I put on it. Advan RGII - 17x9 +30. The offset wasn't ideal but it gave the car a better look IMO and I could NOT pass up the deal that was offered.

13562115_1191899370841531_1791697436_n.jpg.23207f25f7c6cf88b1aaa304a1692a49.jpg

I finally got the car back and it was able to boost and shift as it was supposed to. Still wouldn't pass the inspection due to the LED taillights not being fully functional, CV Boot on the front passenger, and the brakes pads and rotors were shot. I got on YAJ and ordered a set of stock taillights and shopped for the R33 GTR Brembos. Was able to source a front set for an amazing price with rotors and pads included. Back to the shop it went. 

I got it to pass inspections and was completely satisfied with driving it every now and then. I didn't drive the car for weeks at a time due to work and not wanting to break it before getting it back to the States. 

Nothing to write home about happened upgrade wise with the car until it was time to get it ready for the trip across the Pacific. 

11247775_442889989206312_1139240480_n.jpg.abe28a67aa50699a6a6f90ff154ac601.jpg

Here's me at Yokohoma Bay dropping the car off. April 2015.


I was stationed in New Mexico next and the car was being delivered to Dallas, TX. The car made it and was ready for pick up in June 2015


After getting it registered stateside I was ready to start adding small things here and there. First thing I got was a Boss hub kit and NRG quick release for the steering wheel. I had a used Nardi wheel that I got while in Japan begging to be installed. 

15338396_267992603604003_3523518777964625920_n.jpg.77f5c50957c2c68f779beb147b92ccaa.jpg

Also i bought the Viper 2-Way Security System {5706V} (Remote Start System) and installed it so the motor would be warmed up by the time I came out to drive it. 


Started doing more research on the MINE'S ECU in the car and knew it would be smart to buy an aftermarket ECU and get it tuned for USA pump gas. So i got on YAJ and found a used PowerFC L-Jetro w/ hand controller at a decent rate. Looked around for boost controllers and the GReddy Profec OLED was what caught my eye, so i grabbed one from RHDJapan. Searched and searched for someone who was able to tune this ECU and have a dyno. Finally found someone in El Paso, texas about an hour away from where I was stationed in New Mexico. Once the parts came in from Japan I scheduled a date and I hit the road to Texas. 

14705135_236201390126948_163432121317195776_n.jpg.10eadaa1d6beefc2792ec68976862976.jpg29401865_192223154900230_4538712234850779136_n.jpg.ad41c45078368a1f76b9979821c454d0.jpg16123430_1406078632765326_4767577942404366336_n(1).thumb.jpg.4ad8bca6545eada6b00b985ddb34d5e1.jpg

We were able to get it tuned, but was not able to get an actual HP number due to the Boost Controller not operating correctly. Noticed very quickly the difference in response as well as actual fuel economy improved. 

The New Mexico dessert heat is quite different from the heat in Tokyo so i thought an oil cooler and Oil filter relocation kit was needed. I sourced one via a FB group and had it installed by some random shop in Alamogordo, NM. It was a dumb move on my part. This is where the trouble for the car began.

They installed the oil cooler and relocator, but they didnt use the steel braided lines I brought it to them with. They used thick Motorcycle hoses that had no flex. The car developed an oil leak at the cooler (they used -8An instead of the -10AN) and it never was the same since.

Around this time, I had decided to leave the military so i was not in a position to shell out funds for parts. So i would drive the car whenever the urge came, but I was also having to add a quart of oil here and there since I couldn't pay to get it fixed at that moment.

  • Like 4
Link to comment
Share on other sites

After getting out of the military April 2016, i moved back home and had the car shipped from New Mexico to Alabama. The car was still running and operational, but with that oil leak still. At this point I'm currently trying to decide if I keep it or sale it. I dont have the funds to fix it how I want to RIGHT NOW. I chose to keep it and just drive it sparingly to keep from damaging it any further. Did some cruises and a couple events, but nothing beyond that.

15803470_377419369284639_5842011960513658880_n.jpg.92ec85057fc58b2bcff5d07ff632d63d.jpg14723014_844279712380642_3964764957538516992_n.jpg.b132e85dddba830bfb47a5632af865da.jpg15875888_1823046304610351_8803609988070113280_n.jpg.831235945aa3bebc2cb615c360a9d5be.jpg


Fast forward to now. June 2018.

I Bought a house last year so i could have a garage to keep it in. Now I'm finally comfortable and ready to get this build going. So i thought at least. Originally, I just wanted to chase a HP number and have the dyno sheet to brag about. So i bought HKS 2530s, 660cc injectors and a NISMO 276l/h fuel pump. Started searching and calling around to find someone capable of installing the turbos and doing the tune on PowerFC. Either I had to buy another ECU or install the turbos myself. I finally found someone local to me who was capable of doing all the maintenance I needed due to him owning and working on RB's himself. 

We started discussing goals and plans for the car. I had changed my mind again on what i wanted out of the car. The HP number wouldn't matter if I didn't enjoy driving the car. So after talking to him, I decided to ditch the injectors and pump. I grabbed Bosch 1000cc EV14 E85 injectors and Frenchy's Performance garage single pump with the baffle setup with the Walbro455 Pump. 

31975776_441447919635609_8057690489354190848_n.jpg.36ded2309d99e19c46868593c4b39cc7.jpg

Now the parts are in and its time to drop off the car and parts. I gave a list of things i wanted to be taken care of, including things like the oil leak.

After dropping the car off, i head outta town for the weekend I have an email that Monday while waiting at the airport from the mechanic to give him a call. Aw man, I was soooo excited! My car is ready this quick! So I gave em a call and it was not ready, complete opposite. During the look over of the car he noticed the oil was leaking from more than one place all on the plenum side. Since all the hot side was coming off for the turbos, it would just make more since to pull the motor right??? Make it more accessible to fix the oil leaks and swap the turbos. 

Soooooooooo Here we are


Eng out.jpg

Edited by Dewayne2121
  • Like 10
  • Haha 1
Link to comment
Share on other sites

So now that the motor is out and in good condition minus the leaking oils. i have purchased more parts to handle the things that need to be taken care of. its an almost 30 year old car and Ive owned it for 5 years and have neglected it myself at times. So here is the current parts list.

Genuine Nissan OEM Gasket Kitgasket.thumb.jpg.a3f7c511f9a70141c0dc71006c78f218.jpg

HKS 2530 w HKS actuators (steel braided lines)

FPG Fuel Pump Assembly w/ Baffles (Walbro 455lph E85)

Bosch 1000cc Injector w/ Resistor Box Delete

Radium Fuel Rail

Aeromotive FPR

Tomei Adjustable Cam Gears 


The discoveries are continuously rolling in. The more parts that are taken off the more problems are being found. I was very naive to believe i could slap these turbos, injectors and fuel pump in and be golden. The timing belt had dry rotted. 

Timing Kit (Belt, Tensioner, Idler, Spring) 

New OEM Water Pump

The hoses were very hard or would crumble if bent in any fashioon

Silicone Heater Hose Kit

The crank pulley was completely seized and was damaged when removed. searched for an OEM one but they weren't easy to find so i did a little digging on the googles and chose to go with the Fluidampr Crank Pulley (phase I).


I wanted to have some newer gauges also considering the GReddy ones in the car now doesn't illuminate  so i got the AEM AFR Gauge 30-0300 / AEM Oil Pressure Gauge 30-0307 to spruce up the cockpit a little. 


I have also decided to go with the ECUMaster EMU Black as my ECU choice. I'll be deleting the MAFs and going with a MAP tuning. running a WHP Flex fuel sensor (-6AN) with the RB26 Plun N' play adapter harness. You can read on them if you like here: https://www.ecumaster.com/products/emu-black/


Discovered the throw out bearing in the car was larger than it should be. Ordered the appropriate one to help with the shifts.

Now I am at the point of turning in the parts to him as they come in from various websites i purchase from. Once the engine is back in the car, he is gonna make the custom fuel lines to suit the new set up.


All the parts for the mechanical side of the build has been made. I haven't got the ECU and Flex fuel sensor yet, but that portion can wait til the engine is back in anyway. it's officially a waiting game. I would like to have the best response option possible for the turbos. Let me know if I am reaching here, but I want the turbos to start coming on before 4,000RPM. hopefully dialing in the cam gears, the E85 and the support of the breather mods can assist in this. 500+ WHP and a nice torquey mid-range.  

timing.jpg

  • Like 1
Link to comment
Share on other sites

As you can imagine, the engine bay was a mess. There was pretty much oil residue everywhere.

d1.thumb.jpg.1f46c4543397e8403294168fb6e15861.jpg

d2.thumb.jpg.5c70788cac8a6aab6ede35eec317737e.jpg

d3.thumb.jpg.d3a3c342e49edd0cc4333095fd4199ce.jpg

After pressure washing the bay, he was able to bring out a little shine in there. 

c3.thumb.jpg.f1317f944e7d308cd40aafff37cfc7e5.jpg

c2.thumb.jpg.59873ca56472afd917c1f7f16c90e0cb.jpg

c1.thumb.jpg.c6b6e085836774890c4a25f39beccdf3.jpg

To help keep the new cleanliness of the bay, i opted to do the engine covers and strut bar in a wrinkle black finish. The process as a whole is moving along faster than I expected. 

Link to comment
Share on other sites

Got the turbos installed on the motor now and about to start fabricating the braided lines next for the project. turbs.thumb.jpg.cb87347d23986955f3606201e3e68a8e.jpg

turbo.thumb.jpg.4cbf8500d58bb9bcbd06229873a02f55.jpg


I am also in the market for coilovers. The ones that are installed now are Tein Adjustable Type-TS CruiseMaster, which can't be found on the web. They were on when I bought the car, so their age is really unknown. Right now I have my eyes set on a set MeisterR Zeta CRD (https://www.meisterr.com/products/zetacrd/?attribute_pa_vehicle=nissan-skyline-r32-gtr-bnr32-89-94). They have great reviews in the UK and have recently started a USA department. Can get them Rebuilt and different parts here in the states. Second choice would be the more known BC Type RS coilovers. Leaning towards the MeisterR at the moment and will make a decision before the weak is out. 

Link to comment
Share on other sites

On 6/15/2018 at 12:15 AM, Dewayne2121 said:

I am also in the market for coilovers. The ones that are installed now are Tein Adjustable Type-TS CruiseMaster, which can't be found on the web. They were on when I bought the car, so their age is really unknown. Right now I have my eyes set on a set MeisterR Zeta CRD (https://www.meisterr.com/products/zetacrd/?attribute_pa_vehicle=nissan-skyline-r32-gtr-bnr32-89-94). They have great reviews in the UK and have recently started a USA department. Can get them Rebuilt and different parts here in the states. Second choice would be the more known BC Type RS coilovers. Leaning towards the MeisterR at the moment and will make a decision before the weak is out.

There is fairly obviously going to be some decent suspension available in the USA for GTRs.....but don't expect too many of us to know what is good and what is shit.  If you are price sensitive, then buying local will make the most sense.  Buying BC makes no sense to me, because here in Oz we just go to MCA and get something that suits the usage from them.  Their stuff is far far far better than BC, at not much extra cost.  But for you, shipping to the US will bump that up a bit.  Still.....worth a look.

Link to comment
Share on other sites

Suspension came in today.

IMG_0828.thumb.JPG.50c75cec6c3bee3ce1a29af5765723dc.JPG


IMG_0829.thumb.JPG.2b7936569a8cf1127f02a8058f5209b8.JPG

IMG_0831.thumb.JPG.74340063927ff14fbadb0dc6fb14f3d5.JPG

IMG_0830.thumb.JPG.6ff45d8198579883cab2632edd1fd9cc.JPG

Also grabbed some Energy Suspension 3-Piece Tension Rod Bushings since mine were all worn out. Now Im awaiting the Wheels and tires to get in so the suspension portion will be completely done. 

Edited by Dewayne2121
First photo upside down
Link to comment
Share on other sites

Create an account or sign in to comment

You need to be a member in order to leave a comment

Create an account

Sign up for a new account in our community. It's easy!

Register a new account

Sign in

Already have an account? Sign in here.

Sign In Now


  • Similar Content

  • Latest Posts

    • The two diagrams are equivalent. The R32 one is just one sheet out of about 3 showing everything in the whole car all at once. And without knowing the functionality that occurs in the modules, they are both equally opaque.
    • 8v - 2.48ms 9v - 2.15ms 10v - 1.74ms 11v - 1.41ms 12v - 1.15ms 13v - 0.99ms 14v - 0.89ms 15v - 0.82ms 16v - 0.81ms I'm running these values on my RB20 Neo with 570cc Denso R35 stock jets and it's great. Also bought a set for my Legnum VR4, love these injectors!
    • Thanks for your reply,  Those blue/green wires running to the actuator aren't attached to anything, so I'm not sure how the central locking is still working. I will have to take a good look tomorrow, I don't have the car with me. After googling it seems like a pretty common aftermarket actuator which even uses the same green/blue wires the immobiliser required. i'll test everything tomorrow and if it's working i'll melt the solder, strip it, resolder and neaten it all up with some heat shrink. I don't have to understand it if it works hahaha I just don't want a fire/ short circuit. That R32 diagram looks more like a continuity chart? Can you make sense of this form the R34 manual? 10V is probably due to very flat battery, i'll recheck as well tomorrow, I did have to jump start it haha. Thanks again!  
    • So, COM doesn't mean comms. It means common. What common itself means will depend on the type of device. For a two directional actuator (ie, one that can push and pull on the same output rod) then the common will typically just be the earth connection. There will be at least 2 other wires. If you put 12V on one of the other wires, then the actuator will push. On the other 12V wire, it will pull. Can't quite make out what is going on with the wiring of your actuator. It appears to have several wires at the actuator plug, but there only appears to be 2 wires where its loom approaches the door control module, with at least one of the others cut off. I don't know these actuators off by heart. I'd have to look at a wiring diagram for one before knowing what the wires were about, and that's despite me having to replace one in my car not all that long ago. Just not interesting enough to have dedicated memory set aside for trivia like that any more. That actuator is an aftermarket one, not the original one, which probably died and was replaced. That might require some sort of bodge job on wiring to make it work. Although nothing should justify the bodginess of the bodge job done. As to the soldering job on the door module's loom plug. Ahhahhahaha. Yes, very nasty. Again, I cant tell you what any of those wires do. You'd need to study the R34 wiring diagram (if you can find one that shows the door module). I don't think I have any. I'd have to study the R32 diagram to start to understand what mine is doing, and again, even though I've had a problem with mine for the last 25 years (where it locks the passenger door when the driver's window reaches top or bottom of travel) I'm just not interested enough to try to to work it out. So long as it's not burning down, it's fine with me. Here's the R32 GTR diagram, which, confusingly, has rear door lock actuators and window motors on it!! As you can see, unless you understand the functions of the door lock timer and the power window amplifier, you'll never be able to work out how it works just from the diagram. I don't imagine that the R34 one is any better. Hopefully an R34 aware bod can help. FWIW, the two wires that are cut and joined look like they are both power supply - so hopefully it is not fatal to join them. The 10V you measured on the cut off free end of one of them is concerning. You'd expect 12V, and it might be the reason for the bodge job joining them together.
×
×
  • Create New...